Your gaming motherboard usually pulls about 30‑50 W at idle, plus roughly 5‑10 W for VRM overhead and another 2‑10 W for integrated components, so you’re looking at roughly 40‑60 W before adding GPUs, RAM, storage, or peripherals. Add the power draw of your cards, sticks, SSDs, and USB devices, then apply a 20‑25 % buffer for headroom and future upgrades. If you keep going, you’ll discover how form factor, chipset features, and BIOS tweaks can further fine‑tune your power budget.
How Much Power Does a Typical Gaming Motherboard Use?

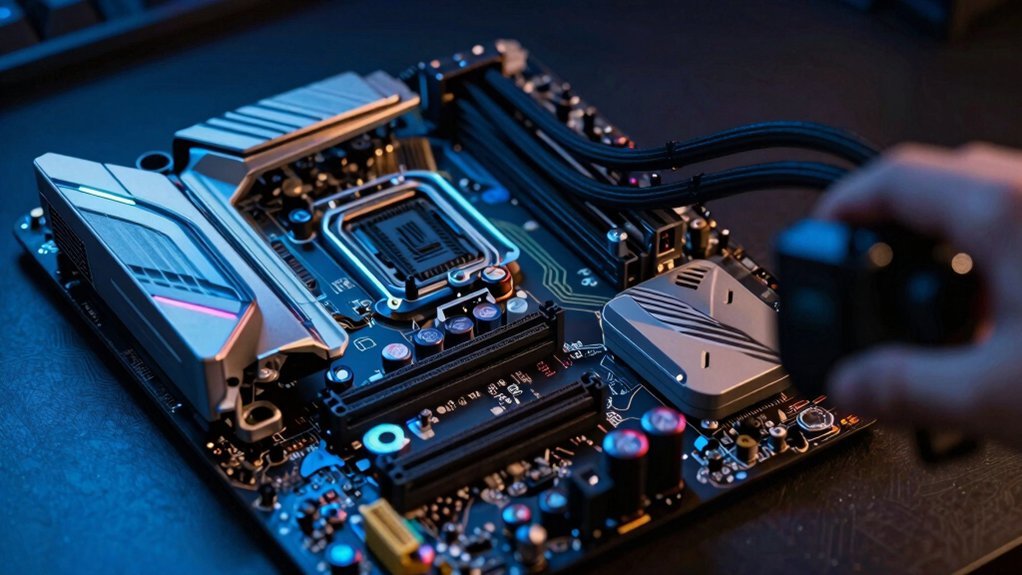
How much power does a typical gaming motherboard actually draw? You’ll see motherboard power consumption hovering between 30 W and 50 W, with high‑end ATX boards edging toward the upper range. Baseline motherboard power—chipset, ICs, and core functions—accounts for roughly 40 W in most estimates. Add VRM overhead, which tacks on another 5 W to 10 W, especially on boards that deliver robust power to CPUs and GPUs. Integrated components like onboard graphics, network adapters, and sound chips each contribute only a few watts. When you plug in PCIe cards, RAM, and USB devices, the draw rises modestly, but it remains a small slice of total system power compared with the CPU and GPU. Keep these numbers in mind when sizing your PSU. Power distribution considerations also matter for maintaining stable operation across diverse peripheral setups.
How Different Gaming Motherboard Form Factors Affect Power Consumption
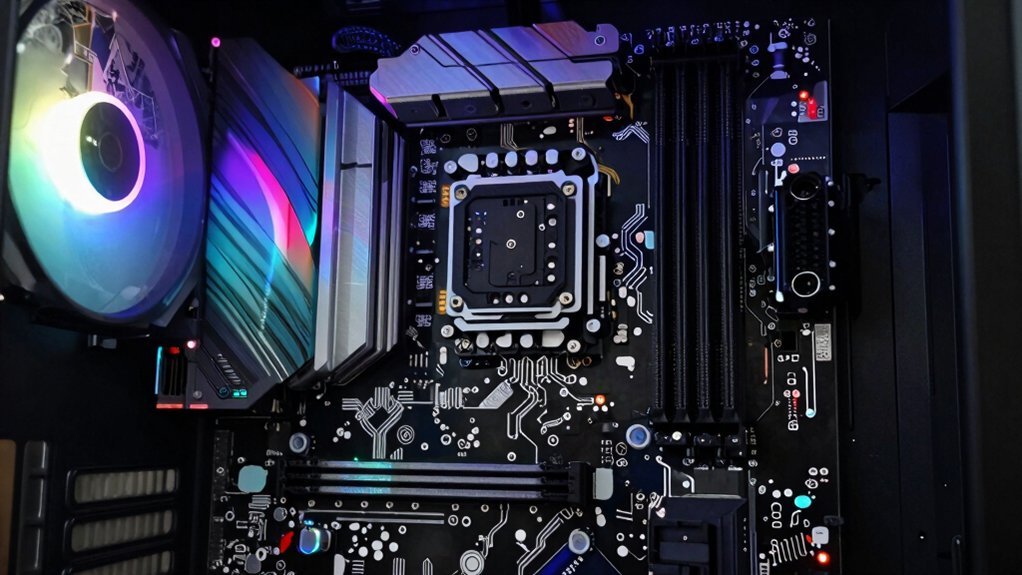
Ever wondered why a full‑size ATX board feels more power‑hungry than a compact Mini‑ITX? You’ll see motherboard power consumption rise with the board’s size because ATX components like extra PCIe slots and larger VRM banks add load. A typical ATX gaming motherboard draws 30‑50 W, while VRM overhead tacks on another 5‑10 W. Mini‑ITX trims those phases, so you often stay near the lower end of that range. The inclusion of expanded onboard peripherals and additional power delivery options in larger form factors can also contribute to marginally higher idle and active draw, especially under peak gaming loads. Power delivery considerations further influence overall PSU headroom without drastically changing total system consumption.
How Chipset Features Influence Gaming Motherboard Energy Use
When you pick a motherboard, the chipset’s feature set directly shapes its power draw: richer networking, advanced storage controllers, and integrated graphics each add a few watts, while extra PCIe lanes and high‑speed USB hubs increase the baseline 30‑50 W by another 5‑10 W. A gaming motherboard with a high‑end chipset may push that baseline toward 60 W, especially when you enable multiple NICs or RAID‑capable SSD controllers. VRM overhead adds roughly 5‑10 W, covering voltage regulation for CPU and GPU spikes. Onboard components—audio codecs, Wi‑Fi modules, and basic graphics—contribute 2‑10 W, depending on how many are active. RAM and PCIe devices further raise consumption, about 2‑3 W per DIMM and extra per‑card load, so each added stick or expansion card nudges total motherboard power consumption upward. Modular storage planning and labeling, as outlined in budget storage guidance, help maintain clarity when managing multiple drives and expansion options Budget Storage Principles and Planning.
Gaming Motherboard RAM Configurations and Power Requirements
Why does RAM matter for a gaming motherboard’s power budget? Each DIMM you install adds roughly 2 watts, so a four‑stick kit can pull 8–16 watts. Your motherboard already uses 30–50 watts, and the VRM adds another 5–10 watts depending on phase count. Higher‑frequency or larger RAM modules raise draw marginally, but the biggest jump comes from adding more DIMMs. For example, enabling high‑end RAM with robust heat dissipation can further stress the VRM during intense gaming sessions, especially when paired with multiple PCIe devices Power Budget. When you size your PSU, start with the motherboard’s baseline, add the worst‑case RAM load, then tack on about 25% power headroom to cover CPU, GPU, and storage spikes. This approach ensures the VRM can handle peak currents without throttling, keeping your gaming rig stable and efficient.
Adding Storage: SATA vs. NVMe Power Implications for Gaming Motherboards
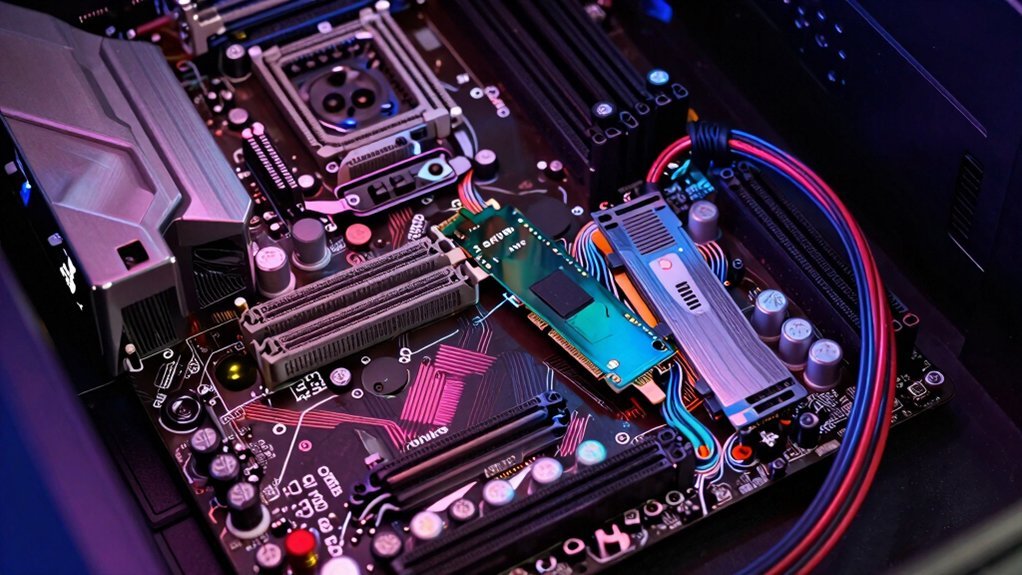
How much extra power will your storage add? A single SATA SSD typically sips 2–5 W, while a basic HDD draws 6–8 W. NVMe drives, however, can spike higher during intense I/O, especially when multiple PCIe lanes fire, adding tens of watts in short bursts. On a gaming motherboard, each additional storage device nudges the motherboard’s overall power consumption a bit, but the impact stays modest compared to CPU and GPU loads. When you stack several NVMe units, the PCIe shows impact on peak draw, so you’ll want a PSU with ample PCIe and SATA connectors to avoid adapters. Account for these numbers in your power budget, and you’ll keep your system stable without over‑specifying the supply. USB-C PD 20W
USB, Wi‑Fi & Bluetooth: Small Loads, Big Impact on Gaming Motherboard Power
Storage power draws are modest, but the next set of components—USB controllers, onboard Wi‑Fi, and Bluetooth—can collectively add a noticeable chunk to a gaming motherboard’s consumption. You’ll find each USB controller uses about 2–5 W, and a Wi‑Fi/BT combo draws 2–10 W depending on radio activity. When you plug in multiple peripherals, hubs, or high‑speed drives, the USB subsystem can spike a few watts during intense data bursts. High‑end boards often bundle extra USB ports, RGB controllers, and additional controllers, pushing the load to 5–20 W beyond the base motherboard figure. Even though Bluetooth’s draw is negligible, the cumulative effect of these small loads isn’t. Include them in your PSU calculations, especially if you run many peripherals or rely heavily on wireless networking. USB controllers can contribute additional overhead even when not in active use, depending on the controller architecture and power management features.
PCIe Slots & Expansion Cards: Managing Extra Power Needs on a Gaming Motherboard
You’ll notice the PCIe slots use different power connectors—6‑pin, 8‑pin, or the newer 12‑pin—so you must match your GPU’s cable requirements to the board’s headers. A careful look at your case and motherboard manual helps you anticipate power needs before adding upgrades. Power distribution considerations on the motherboard can indicate how much headroom remains for future expansions without tripping protections. If your graphics card pulls more than the slot can supply, you’ll need dedicated power cables from the PSU to avoid throttling. Planning for future expansion means budgeting extra headroom now, ensuring the motherboard’s VRM and power distribution can handle additional cards without overloading the system.
PCIe Power Connector Types
Ever wondered why a high‑end GPU still needs extra cables even though it plugs into a PCIe slot? Those cables are PCIe power connectors—typically 6‑pin, 8‑pin, or a mix like 6+6 and 8+8—that push extra current beyond the slot’s 75 W limit. Your motherboard must route sufficient PCIe power rails to the slot and expose proper headers for PSU cables, ensuring stable GPU power delivery under boost. High‑draw cards, such as 450 W‑plus RTX 4090s, rely on these connectors to avoid throttling. A robust VRM and well‑designed slot re‑driver keep voltage steady, while a modest overhead in your PSU’s cable rating protects against spikes during intense gaming sessions.
GPU Power Cable Requirements
The extra PCIe power connectors you saw on the GPU are just the tip of the iceberg—what really matters is matching those connectors to the right PSU cables and ensuring the motherboard can feed the slot with stable 12 V rails. You’ll need to check the GPU’s PCIe power requirements, count the 6‑pin and 8‑pin plugs, and verify that each GPU power cable aligns with a dedicated 12 V rail on your PSU. If the PSU lacks sufficient headroom, you’ll see voltage sag during overclocking, which harms stability. Also, confirm that the motherboard’s VRM can handle the extra draw without overheating.
- A 450 W RTX 4090 pulling two 8‑pin connectors from separate 12 V rails
- A 300 W GPU using a single 8‑pin plus a 6‑pin, both on the same rail for compact builds
- An overclocked 350 W card demanding three 6‑pin cables to keep PSU headroom ample for spikes
Future Expansion Power Planning
Where do you start when planning future PCIe expansions? First, calculate your motherboard baseline—roughly 30–50 W for most boards, plus 5–10 W for VRMs and 2–10 W for integrated components. Add the draw of each expansion card you intend to install; a typical graphics or capture card can add 30–150 W. Sum those figures, then apply a 20–25 % buffer for PSU headroom to cover peak loads and signal overhead. This margin protects stability when you add future upgrades like additional SSDs, capture devices, or high‑end NICs. During power planning, choose a PSU that exceeds the total by at least that buffer, ensuring the system stays cool and reliable even under the toughest workloads.
Choosing the Right PSU Wattage for Your Gaming Motherboard
How much power does your gaming motherboard actually need? You start by estimating motherboard power at 40 W, then add VRM overhead (5‑10 W) and any extra PCIe, SATA, or USB connectors. Next, plug CPU, GPU, RAM, and storage draws into a power calculator like Newegg’s. The tool spits out a total, and you should select a PSU wattage that gives you at least 20‑25 % headroom for peak load and future upgrades.
- Picture a 650 W PSU feeding a high‑end board, CPU, and GPU, with a comfortable margin for overclocking.
- Imagine a 500 W unit barely covering a mid‑range setup, leaving little room for extra drives.
- Visualize a 750 W PSU comfortably handling a premium rig and future expansions.
Budget‑Friendly Ways to Reduce Gaming Motherboard Power Use
You can start by tweaking BIOS power settings to shut down unused circuits and lower voltage limits.
Picking a motherboard with a low‑power chipset and fewer PCIe slots trims the baseline draw.
Turning off or removing unnecessary onboard features like extra audio or LAN controllers further cuts power consumption.
Optimize BIOS Power Settings
If you enable the BIOS’s built‑in power‑saving features—C‑States, ERP/ACPI 2.0, and peripheral shutdowns—you’ll instantly cut the motherboard’s idle draw without sacrificing performance.
Next, delve into BIOS power settings and tweak voltage tuning to a conservative range; that reduces VRM activity and improves VRM efficiency.
Update the firmware regularly so the latest power‑management code runs smoothly, and consider a modest undervolt or a lower performance governor for the CPU cores. These adjustments keep idle power low while preserving the gaming experience.
- C‑States throttling cores when they’re idle, shaving watts.
- ERP/ACPI turning off unused SATA, USB, and PCIe devices.
- Voltage tuning dialing back Vcore and load‑line calibration for cooler VRMs.
Select Low‑Power Chipset
Looking to keep your gaming rig’s power draw low without breaking the bank? Choose a low‑power chipset that trims VRM overhead and pares down integrated components. Budget‑friendly B‑series or H‑series chips often sport simpler power phases, shaving 5–10 W off motherboard power. Pair them with a compact ATX or micro‑ATX board, and you’ll avoid the extra draw of high‑end features. Even RAM DIMMs add modestly—four sticks contribute roughly 8–16 W total—so stick to dual‑channel kits if you can.
| Feature | Typical Power Impact |
|---|---|
| Low‑power chipset | –5–10 W (VRM) |
| Integrated components (NIC, audio, USB) | <5 W each |
| RAM DIMMs (4 sticks) | 8–16 W |
Minimize Unused Onboard Features
What’s the easiest way to shave a few watts off your gaming motherboard? Start by hunting down idle onboard features that quietly drain power. Each unnecessary controller adds to motherboard power and VRM overhead, inflating overall power consumption. By disabling what you don’t need, you free up headroom for future upgrades without sacrificing performance.
- Turn off integrated audio and LAN in the BIOS if you use a dedicated sound card or Ethernet adapter.
- Unplug or disable unused PCIe slots and their power‑delivery rails.
- Hide debug LEDs and other status lights that stay lit even when idle.
These simple steps cut a few watts, lower VRM stress, and keep your system efficient for the next generation of components.
Frequently Asked Questions
How Many Watts Does a Gaming Motherboard Use?
You’ll typically see a gaming motherboard pulling 30‑50 watts, with lower‑end models around 20‑30 W and high‑end boards topping 50 W plus 5‑10 W VRM overhead for extra features.
Is 850W Enough for a High-End PC?
Yes, 850 W will comfortably power a high‑end PC, even with a power GPU, overclocked CPU, multiple drives, and a 40‑W motherboard, leaving headroom for future upgrades.
Is 750 Watts a Lot for a PC?
Yes, 750 watts is plenty for most gaming rigs; it comfortably powers high‑end GPUs, CPUs, and peripherals, leaving headroom for overclocking and future upgrades without stressing the PSU.
Is 400 Watts a Lot for a PC?
You’ll find 400 W isn’t huge for a gaming rig; it comfortably powers a mid‑range CPU, GPU, and peripherals, leaving headroom for overclocking and future upgrades without stressing the PSU.
In Summary
In the end, your gaming motherboard’s power draw hinges on its size, chipset, RAM, storage, and add‑ons. By picking efficient components, trimming unnecessary features, and matching a PSU that’s just right for the load, you’ll keep energy use low without sacrificing performance. Smart choices let you game hard while staying power‑ and.


Leave a Reply