You’ll keep your Xbox One feeling brand‑new, avoid e‑waste, and save money by fixing the LT/RT triggers instead of buying a new controller. Repair restores the original magnetic coupling and rubber pads, preserving tactile feedback and firmware compatibility while eliminating the need for a full‑controller replacement. It’s a low‑cost, environmentally friendly solution that maintains the controller’s design and performance. Keep reading to discover the exact causes, repair steps, and when a replacement becomes the smarter choice.
Why Fix Xbox One LT/RT Triggers Instead of Buying New

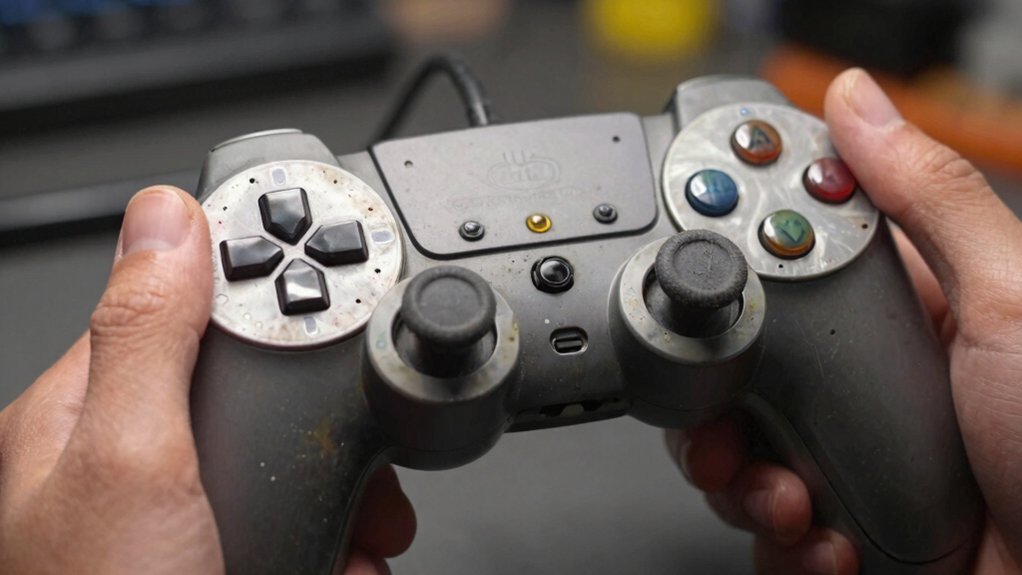
Why bother replacing the whole Xbox One controller when you can simply fix the LT/RT triggers? You’ll notice a like‑new feel once you address the magnet‑based Hall sensor interaction and sticky rubber. This approach also preserves existing firmware compatibility and avoids the extra e‑waste from replacing parts that can be rehabilitated, including maintaining the original trigger design and tactile feedback ESD-safe cleaning to ensure safe maintenance.
What Causes Sticky Xbox One LT/RT Triggers?
You’ll notice the triggers stick when the magnet’s wear or mis‑alignment weakens its pull, the rubber pad degrades and leaves residue, and the Hall‑effect sensor drifts from its original sensitivity. These three factors combine to create friction and uneven travel. Understanding them gives you a clear target for repair instead of replacement. surround sound
Magnet Wear and Alignment
Ever notice how the LT/RT triggers feel sticky after months of play? The culprit is often magnet wear and misalignment. The Hall‑effect sensor relies on a stable magnetic field, so any shift or loss of strength makes the trigger lag or stick. Here’s what you should watch for:
- Magnet drift – Repeated presses can nudge the magnet, causing the field to drift relative to the sensor and producing delayed registration.
- Strength loss – Temperature swings, shell flex, or impacts can weaken the magnet or let it settle out of its ideal spot, increasing resistance.
- Housing wear – Cracks or loosened adhesive in the trigger housing allow micro‑movements, altering the field and giving a sluggish, sticky feel.
Addressing these issues restores smooth actuation without replacing the whole controller. For reliable performance, consider how the USB-C ports and charging speed concepts in related power-strip layouts illustrate the importance of stable, consistent connections and mechanical integrity in gaming hardware design considerations.
Rubber Degradation and Residue
What’s making your Xbox One LT/RT triggers feel sticky? The rubber membranes behind the triggers degrade over time, peeling or leaving adhesive residue that clings to the trigger housing. Heat, humidity, finger oil, and repeated presses accelerate this breakdown, reducing elasticity and creating friction. The leftover glue migrates onto surrounding surfaces, making the trigger grind instead of glide. In addition, some players report that the degradation can also affect the tactile feel and actuation consistency of the triggers DPI ranges and customization within the broader context of hardware variability and input precision. To fix it, peel off the old rubber and clean the area, then reattach a fresh piece of rubber or, if you lack the original adhesive, apply a small strip of single‑sided foam tape. This restores the cushioning effect, eliminates stickiness, and gives you a smoother, more consistent trigger feel without replacing the whole controller.
Sensor Sensitivity Drift
Why do your Xbox One LT/RT triggers feel sticky over time? You’ll notice the lag because the Hall‑effect sensor’s threshold drifts as the magnet and sensor age or collect debris. Mechanical wear nudges the magnet, while adhesive residue from the rubber backer adds friction, both altering magnetic coupling. Temperature swings and humidity further shift magnet strength, making the trigger’s input thresholds inconsistent. Dust, oil, or rubber particles trapped between magnet and sensor also contribute to drift, giving the impression of stickiness.
- Aging or debris changes Hall‑sensor thresholds.
- Wear and adhesive residue shift magnet position and add friction.
- Temperature, humidity, and trapped particles alter magnetic coupling.
Faster memory and higher bandwidth in gaming systems underscore the importance of stable sensor inputs and consistent actuation thresholds, which can be compromised if environmental or mechanical factors cause drift in the trigger mechanism. magnetic coupling
How Xbox One LT/RT Triggers Work: Magnet & Hall‑Sensor Basics
The Xbox One’s LT and RT triggers rely on a simple magnetic‑Hall sensor pair: a small magnet is attached to the moving trigger, while a Hall‑effect sensor sits on the PCB beneath it. When you press the trigger, the magnet slides closer to the sensor, altering the magnetic field. The Hall sensor converts that change into an electrical signal, which the controller reads as a press. Release the trigger, the magnet retreats, the field weakens, and the sensor outputs a release signal. No wires connect the trigger to the main board—magnetic interaction alone carries the input. The trigger’s feel comes from the spacing between magnet and sensor and the mechanical coupling through adhesive, rubber cushions, and housing. Mis‑alignment or degraded cushioning can cause stickiness or inconsistent input, which is why cleaning or repositioning those parts often restores proper function. Additionally, the presence of a stable magnet and proper sensor alignment reduces false inputs and improves repeatable performance over time magnetic coupling.
Step‑by‑Step Disassembly of the Xbox One LT/RT Mechanism
You’ll start by opening the battery cover, then use a T9 screwdriver to pull out the hidden screw hidden beneath the label.
Next, pry the two plastic shell pieces apart with a plastic tool to expose the interior.
This gives you clear access to the LT/RT area so you can begin inspecting and cleaning the trigger mechanism.
In addition, ensure you have proper anti-static precautions to protect the internal components during disassembly cable management.
Access Battery Cover
Where to start? You’ll need to pop off the battery cover to reach the hidden screw that locks the shell together. First, slip a T9 screwdriver under the label and twist out the concealed screw. Then grab a plastic prying tool and pry the two shell halves apart, starting at the seam around the edge. Finally, lift the back cover after removing all visible screws, including the two at the rear, to expose the LT/RT mechanism.
- Remove the battery cover and locate the hidden screw.
- Use a T9 screwdriver to extract that screw.
- Pry the shell halves apart with a plastic tool, then lift the back cover.
Locate Hidden Screws
Where do those hidden screws lurk? You’ll find them beneath the label on the controller’s backside. First, pry off the battery cover, then insert a plastic prying tool between the two shell halves and separate them gently. As the shells part, a small T9‑screw head becomes visible under the label. Use a T9 screwdriver to unscrew it, then locate the two additional screws near the rear edge of the back panel. Remove those as well, keeping each screw in a safe spot.
With all hidden fasteners out, lift the back cover away. This exposes the internal trigger assembly, letting you inspect or replace the LT/RT mechanism without further obstruction.
Separate Plastic Shell Pieces
Ever wondered how to pry the Xbox One controller’s two plastic halves apart without cracking them? First, you lift the battery cover and locate the hidden T9 screw under the label. Then, slip a plastic prying tool between the front and back shells, working gently around the edges to avoid snapping. Once the clips give, remove the five visible screws—two near the back and three scattered across the interior.
- Separate the shells – pry slowly, listening for the click of disengaged clips.
- Unscrew the back cover – keep the screws organized; they differ in length.
- Expose the LT/RT mechanism – lift the back piece to reveal the magnet‑mounted triggers and Hall sensor.
Reassemble by aligning the shells, reinserting the screws, and tightening them evenly.
Locate and Remove the Hidden T9 Screw Under the Label

Before you can split the Xbox One controller’s shell, you need to peel back the small label that hides the T9 screw. Gently lift a corner of the label with a fingernail or a thin spudger, then slowly pull it away, keeping it flat to avoid tearing. Once the label is removed, you’ll see a tiny recessed Torx 9 socket. Grab a T9 precision screwdriver and press it firmly into the recess; the screw may be snug or lightly glued, so maintain steady pressure. Turn the screwdriver counter‑clockwise until the screw pops out, then set it aside.
With the hidden screw gone, you can use a plastic prying tool to separate the front and back shell halves along the seams, exposing the trigger mechanism for further work.
Clean Xbox One LT/RT Rubber Pads and Remove Adhesive Residue
You’ll start by pulling the rubber pads off the controller, then scrape away any sticky adhesive that’s built up from previous fixes.
A quick wipe with is isopropyl‑based cleaner will eliminate the residue without harming the rubber.
Once the pads are clean, you can reattach them—or replace the adhesive with a thin piece of foam tape—to restore the smooth, soft‑touch trigger feel.
Remove Rubber Pads
Why let sticky residue ruin your gaming experience? You’ll first need to pry the rubber pads off gently. Use a flat plastic spudger to lift the edge, then wiggle until the pad separates from the back cover. Keep the motion steady to avoid tearing the foam. Once the pad is free, you can clean the surface or and for any remaining adhesive.
- Inspect the pad for cracks or deformation; if it’s damaged, set it aside for replacement.
- Apply fresh double‑sided foam tape or a small piece of single‑sided tape to the back cover.
- Press the pad back into place, ensuring it sits flush and tests the trigger for a smooth, non‑sticky feel. This restores the original tactile response without a full controller swap.
Eliminate Adhesive Residue
Sticky residue under the LT/RT rubber pads can ruin smooth trigger travel even when the magnets and Hall sensor work fine.
First, gently lift the pads with a plastic pry tool.
Dampen a microfiber cloth or cotton swab with isopropyl alcohol or a mild adhesive remover, then press it onto the adhesive.
Let it soak for a few seconds to soften the residue.
Wipe away the loosened glue in a single, controlled motion, avoiding excess pressure that could tear the rubber.
If any stubborn bits remain, repeat the dampening and wiping until the surface is clean.
Once the pads are residue, reattach them using fresh adhesive or thin double‑sided foam tape.
Finally, test the trigger travel to confirm the stickiness is gone.
Which Adhesive or Foam Tape Works Best for Re‑attaching Pads?
A thin, low‑compressibility foam tape—typically 0.5–1.0 mm thick—offers the best balance of cushioning and precision when re‑attaching trigger pads.
First, clean any leftover adhesive with is isopropyl wipe so the new surface bonds securely.
Then, cut a strip that matches the original pad footprint and press it evenly onto the shell.
Finally, re‑install the pad, confirming the travel distance feels unchanged.
- Double‑sided foam tape from electronics repair kits (0.5 mm)
- Thin adhesive foam sheet (0.8 mm) for a softer feel
- Low‑profile silicone‑backed tape (1.0 mm) for extra durability
These options keep the Hall‑sensor alignment intact while restoring the tactile, non‑slip grip you expect from a well‑tuned controller.
Adjust Xbox One Magnet Position for Reliable Hall‑Sensor Signals
If you notice intermittent trigger response, fine‑tuning the magnet under the LT/RT button can restore reliable Hall‑sensor signals without swapping the whole controller. The sensor reads the magnetic field, so moving the magnet a millimeter closer or farther shifts the activation threshold.
Start by loosening the adhesive that holds the magnet, then nudge it while watching the trigger’s response in a game or test app. Aim for a position where the sensor registers a clean, immediate click each time you press the button, without wobble or delay.
Once you hit a stable point, secure the magnet firmly with a thin strip of double‑sided tape, ensuring it doesn’t touch nearby PCB traces or other sensors. This precise repositioning eliminates false positives and missed activations, giving you consistent trigger behavior.
Re‑assemble the Controller While Protecting the Battery Plate
While you’re putting the controller back together, make sure the battery plates sit exactly where they belonged and stay flat, because any shift can interfere with the shell fit and the trigger mechanism. First, align the plates with the original layout; the orientation matters for internal pressure and sensor clearance. Next, reattach the two plastic shell halves, confirming that the LT/RT triggers have enough room and that the cover closes flush. Finally, tighten the five screws evenly, preventing warping that could misalign magnets or sensors.
Align battery plates precisely, reattach shell halves, and tighten screws evenly to avoid misalignment and interference.
- Verify plate orientation before securing.
- Check trigger clearance after shell alignment.
- Tighten all screws uniformly, then confirm no contact interference.
Test Trigger Feel: Click‑y vs. Sticky After Repair
How do you know the triggers are truly fixed? After you finish the repair, press each trigger firmly from rest to full travel. You should feel a distinct, tactile “click” that returns instantly, without any lingering stickiness. The click must be consistent on both left and right sides, and the resistance should feel uniform throughout the motion. If the trigger still feels gummy, double‑check the rubber adhesive and verify that the Hall‑effect sensor aligns perfectly with the magnet. A proper fix transforms a previously sticky actuation into a smooth, predictable snap, with the sensor detecting magnetic changes across the entire travel. Uniform resistance and no intermittent sticking confirm the repair succeeded.
How Much Does a Trigger Fix Actually Cost?
Wondering what you’ll actually spend on a trigger fix? You’ll usually only pay for the parts you replace, not a whole controller. If you already own a screwdriver and some foam tape, the cost can be virtually zero. Most DIYers spend $10‑$30 on magnets, springs, or adhesive kits, while a professional shop adds a modest labor fee but still stays far below a new controller price.
- Adhesive or foam tape only – $0‑$5 if you have it at home.
- Small part kit (magnet, spring, Hall sensor) – $10‑$20.
- Professional labor – $15‑$30 extra, still cheaper than a full replacement.
When a Trigger Repair Isn’t Worth It: Signs of Irreversible Damage
Even if you’ve saved money by fixing a trigger with just adhesive or a cheap part kit, some problems can’t be salvaged. When the magnet or Hall‑effect sensor shows severe wear, the inputs become erratic and no amount of cleaning will normalize them.
Cracked housing or displaced magnets that can’t be re‑tacked mean the original feel is gone. If, after thorough adhesive removal and foam taping, the trigger still sticks, the tactile mechanism has degraded beyond repair.
Complete loss of click feedback, permanent sticking in both LT and RT, or repeated calibration errors are clear signs the damage is irreversible. In these cases, replacing the trigger is more cost‑effective than persisting with futile repairs.
Frequently Asked Questions
What Is the Average Lifespan of a PS5 Controller?
You’ll typically get about four to seven years of solid play from a PS5 controller before wear shows up, especially after a few thousand gaming hours and regular charging cycles.
How to Calibrate Controller Triggers?
You calibrate triggers by opening the controller, locating the Hall sensor, then using the console’s calibration tool or a test game to press LT/RT from zero to full, noting min/max values, adjusting magnet alignment or foam if needed, and re‑testing until the response is smooth and repeatable.
Can You Replace the Triggers on a PS5 Controller?
You can replace the triggers, but you’ll need to desolder, realign the Hall‑effect sensor, and recalibrate the travel. It’s a delicate process, so most users prefer repairing the original mechanism instead.
Why Are My Controller Triggers Sticking?
Your triggers stick because adhesive or worn rubber behind the magnet‑Hall sensor creates friction, preventing the magnet from moving freely and causing the trigger to feel sticky instead of crisp.
In Summary
You’ve learned why fixing the Xbox One LT/RT triggers beats buying a new controller, what makes them sticky, and how the magnet‑Hall‑sensor combo works. The disassembly guide shows you exactly where the hidden T9 screw hides, how to protect the battery plate, and how to re‑assemble without hassle. After testing, you’ll feel the click‑y difference. The repair’s cheap, and unless the damage is irreparable, you’ll save money and keep gaming smoothly.


Leave a Reply