Keep your controller spotless by wiping it gently with a damp microfiber cloth, using cotton swabs for crevices, and blasting short bursts of compressed air—avoid harsh chemicals that can damage the finish. Schedule light clean‑ups weekly and deeper sessions every couple of months; this prevents stick drift and button stickiness. Watch for odd noises, freezes, or error messages, and run quick diagnostics to catch wear early. Update firmware during low‑usage periods, following the official guide and keeping the device powered. Choosing the right DIY fixes or professional service will extend its life, and the next section shows how to decide which route works best for you.
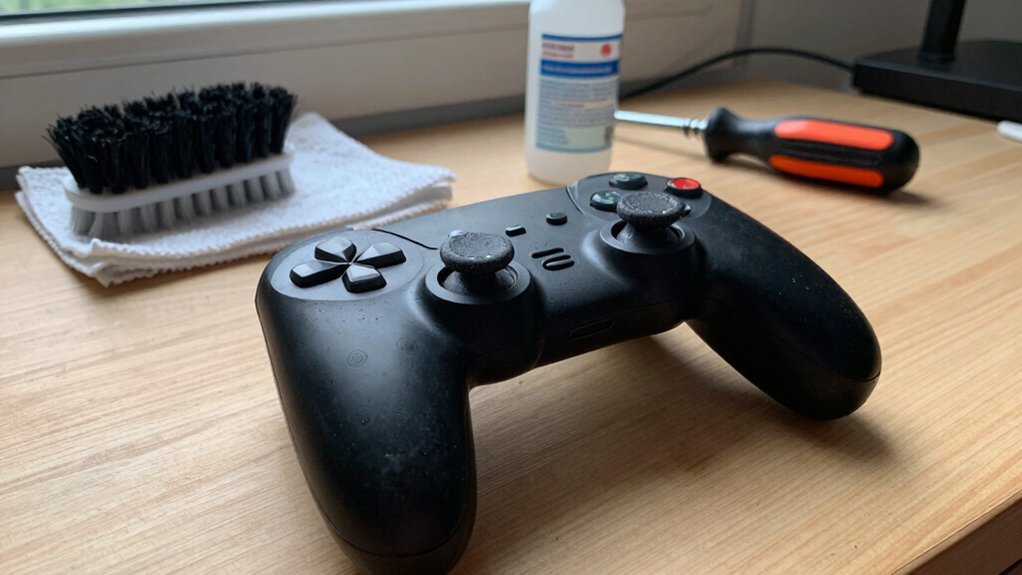
Clean Your Controller Safely
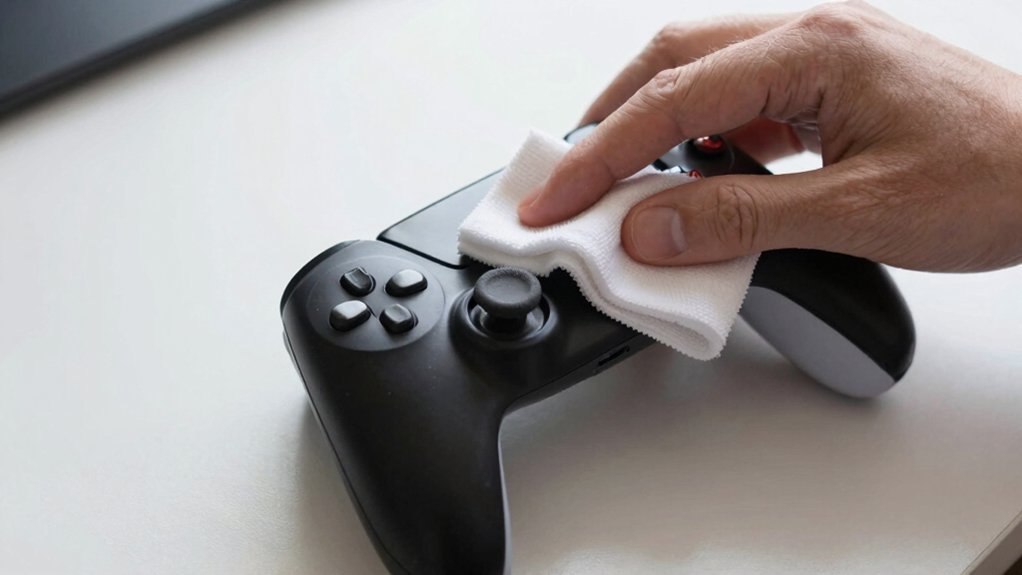
Ever wondered how to keep your controller spotless without risking damage? Start with a microfiber cloth lightly dampened with a mild cleaning solution; wipe the exterior in smooth strokes, avoiding harsh chemicals that could ruin the finish. For debris removal, use cotton swabs to coax out dust from crevices and gaps between buttons and analog sticks. Then, apply compressed air in short bursts to blast away particles from hard‑to‑reach spots, making sure no moisture drifts in. Regular maintenance, including weekly light cleans and deeper sessions every couple of months, helps prevent sticking and unresponsive inputs, extending your controller’s life and saving you replacement costs. Moisture-wicking features in grip products and careful material choices can also influence how easily dust and oils accumulate on surfaces and crevices over time.
Detect Early Warning Signs and Diagnose Issues
A clean controller is only half the battle; keeping an eye on its behavior can save you from costly repairs. Notice any odd noises, frequent freezes, or error messages—those are your warning signs. Run quick diagnostics to check stick drift, button response, and connection stability.
Spot odd noises, freezes, or errors early; run quick diagnostics to catch drift, lag, and connection issues.
If the analog sticks wander or buttons lag, it often signals wear that simple cleaning or reseating can fix. Use maintenance tips like clearing vents and tightening cables before deep‑dive fixes.
When diagnostics reveal persistent drift or lag, schedule a professional assessment; early intervention usually costs a fraction of a full replacement.
Stay proactive, and you’ll catch issues before they demand expensive repairs long-term durability.
Update Your Controller Firmware at the Right Time
When a new firmware version drops, you should check your controller’s current version and compare it to the official release notes before installing anything. First, locate the official source—usually the manufacturer’s website or companion app—to download the update. Verify the version number matches the notes, then schedule the update timing during a low‑usage period to avoid interruptions. Follow the step‑by‑step guide, keep the controller powered, and don’t disconnect the cable mid‑process. Also, ensure you use a surge-protected power strip with adequate outlet spacing to prevent power interruptions during the update USB-C Power Delivery 20W and to protect your hardware from spikes.
DIY Controller Repair or Pro Service: Which to Choose?
You’ll often wonder whether a quick DIY fix or a professional service will save you time and money when your controller starts misbehaving. If stick drift appears, you can try cleaning or replacing the thumb‑stick module, but a professional repair often restores precision faster. Unresponsive buttons may need deeper testing beyond a simple wipe, and connection problems usually point to a faulty Bluetooth antenna that a pro can replace. Battery health declines with age; a certified technician can run accurate diagnostics and swap the cell safely. Consider the controller’s modular repair design: swapping sticks, triggers, USB‑C, or buttons yourself can extend life, yet professional repair may be more cost‑effective than a full replacement. A dedicated service can also determine whether your issue stems from firmware, which an expert can update or revert to maintain compatibility with newer games and accessories firmware updates.
- Clean or replace drift modules.
- Test and replace unresponsive buttons.
- Diagnose and fix connection problems.
- Assess battery health and replace if needed.
Frequently Asked Questions
What Are the Best Metrics to Track Controller Health Over Time?
You should monitor temperature, voltage ripple, current draw, error logs, response latency, firmware version, uptime, fan speed, power consumption, and diagnostic checksum trends to catch degradation early.
How Often Should I Audit Controller Inventory for Underutilized Units?
You should audit your controller inventory quarterly, reviewing utilization reports and performance logs each time; this cadence catches underutilized units early, lets you reallocate resources, and prevents costly replacements.
Which Automation Tools Integrate With Existing IT Asset Management Systems?
You’ll find that ServiceNow, SolarWinds, and ManageEngine all offer APIs and pre‑built connectors, letting you automate discovery, tagging, and reporting directly within your existing IT asset management platform.
What Criteria Determine When to Refurbish Versus Replace a Controller?
You decide based on age, failure frequency, performance loss, cost of parts, and downtime impact; if repairs cost under 50% of a new unit and reliability meets specs, refurbish, otherwise replace.
How Can I Securely Wipe Data During Controller Decommissioning?
You should encrypt the drive first, then run a DoD‑approved wipe utility that overwrites every sector multiple times, verify the logs, and destroy any residual media to assure data can’t be recovered.
In Summary
By keeping your controller clean, watching for early warning signs, and updating firmware on schedule, you’ll slash downtime and dodge costly replacements. If a problem pops up, weigh a DIY fix against professional service—choose the route that saves time, money, and hassle. With these habits, your controllers stay reliable, your budget stays intact, and you keep the whole system running smoothly.


Leave a Reply