You’ll spot a fake by checking the label for glossy, mis‑aligned printing, missing four‑rectangle patterns, or blurry micro‑text, and by confirming the Nintendo logo, date stamp, and tiny imprint characters are correct. Open the cart with the proper security or tri‑wing bit and look for black‑blob chips, stacked dies, mismatched cutouts, or missing stickers on the PCB. Inspect the pins and seams for straight, flush connections and original recessed tri‑wing screws. If you keep going, you’ll discover more detailed checks.
How to Verify Cartridge Authenticity Before You Buy
Ever wonder how to tell a genuine cartridge from a fake before you hand over cash? You can test Nintendo authenticity with an Operator device: insert the cart, watch the status read Official, Unofficial, or Unrecognized, which reflects internal hardware and game data for Game Boy and SNES units. If you have the tools, open the case using a 3.8 mm security bit (GB/GBC, SNES) or tri‑wing (GBA) and inspect the PCB. Look for proper logos, serial numbers, copyrights, and chip types. Spotting black‑blob chips, stacked boards, missing stickers, oddly sized PCBs, or pin holes signals counterfeits. Compare label fidelity, imprint characters, and the Nintendo Seal of Quality; any deviation points to a fake. This quick check saves you from costly mistakes. verification standards help you gauge whether the cartridge meets official specifications and reduces the risk of counterfeit purchases.
Visual Clues That Reveal Cartridge Authenticity
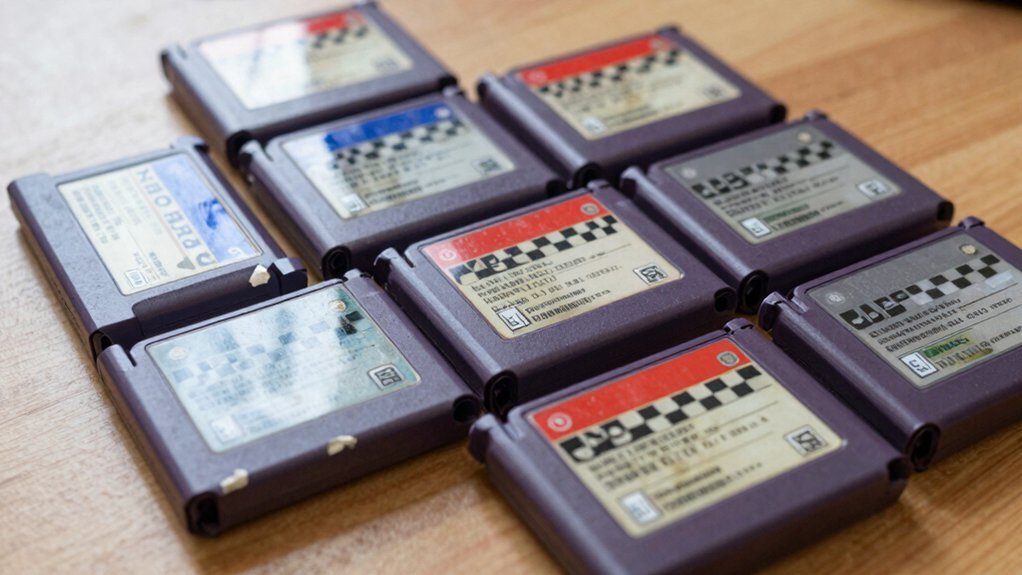
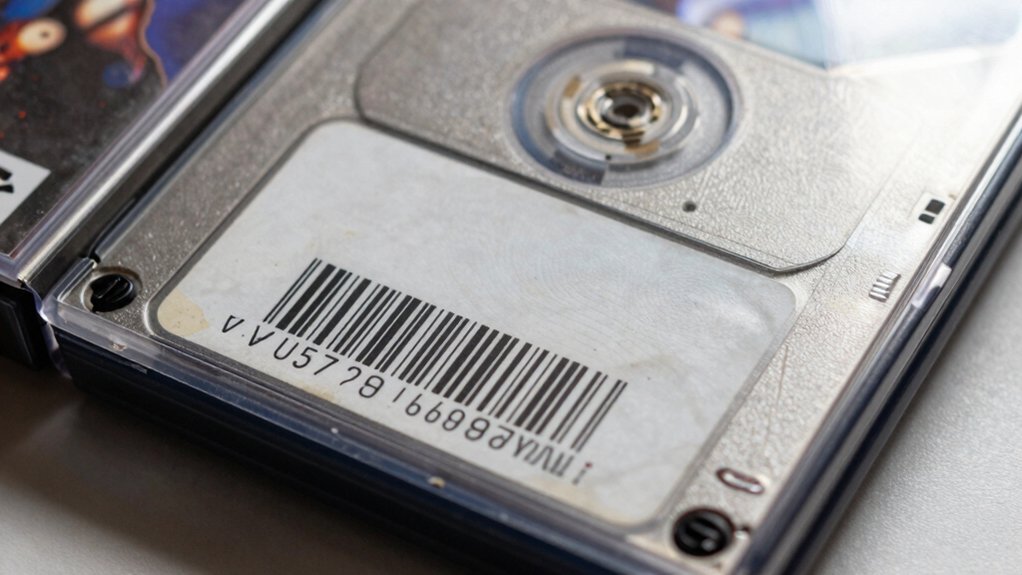
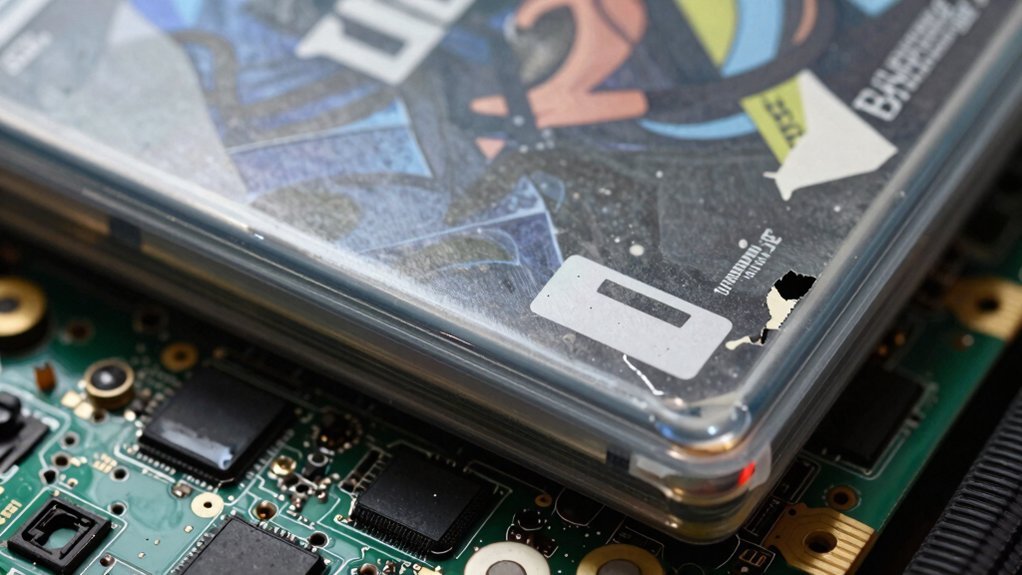
After inspecting the circuitry, the next step is to let your eyes do the work. Your gaze should hunt for glossy, misaligned labels, typos, or odd logos—any of these visual defects scream counterfeit. Check the front and back Nintendo logos; even slight font shifts or color mismatches betray a fake. On GBA Pokémon titles, glance at the back label’s top‑left corner for four rectangles; their absence is a red flag. Look for the tiny two‑character imprint (09, 11, 08) on the label—if it’s missing, the cartridge is likely bogus. Finally, assess the box art and ESRB rating; low‑resolution prints or a missing Nintendo seal signal inauthenticity. Misaligned or glossy labels with typos and hidden serial markers can further indicate fakery.
What You’ll See When You Open the Cart
When you crack open the cart, you’ll immediately spot the PCB and any labels, checking for proper Nintendo logos, serials, and copyright markings.
You’ll then identify the chip type, looking for mismatched or oddly‑shaped COB components that rarely appear in genuine releases.
Finally, inspect the pins and connectors for holes, lifted leads, or misaligned seams that signal counterfeit internals.
PCB and Label Inspection
What should you look for once you pry open the cart? You’ll see the PCB and its labeling, and you need to scan for Nintendo logos, serial numbers, and copyrights. Spot any black‑blob COB chips, stacked boards, or oddly‑shaped cuts that don’t fit the original layout. Check the pins for holes, lifted solder, and irregular wiring. Compare the board’s fonts and logo placement to authentic reference images, and note any missing internal stickers.
- Verify PCB labeling matches official Nintendo branding.
- Examine solder joints and pin holes for uneven or lifted work.
- Look for non‑standard chip shapes, stacked PCBs, or cut‑out edges that clash with the proper fit.
Chip Type Identification
Ever notice the tiny chips that sit under the Nintendo logo on a cartridge’s PCB? When you open the cart, you’ll see the chip type is a tell‑tale sign of authenticity. Genuine boards use a single, clean‑soldered ROM chip with Nintendo’s logo and part number etched clearly. Counterfeit chips often appear as black blobs, multiple stacked dies, or mismatched packages that don’t align with the PCB’s layout. Look for official serials and copyright markings printed on the chip; fakes usually lack them or use altered fonts. Check solder joints—authentic chips have smooth, even fillets, while counterfeits show rough, uneven solder or lifted pins. Finally, verify the chip’s orientation; correct boards have precise edge cuts, whereas fakes may have rough edges or misaligned components. PS5-PS4 storage considerations
Pin and Connector Condition
Ever notice how a single bent pin can betray a counterfeit cartridge? When you pry open the case, you’ll see the pin and connector condition instantly. A genuine cart has clean, straight pins that sit flush against the connector. Any lift, corrosion, or missing metal suggests tampering. The PCB should match the official edge profile and thickness; a warped or thin board hints at a fake. Also, look for sloppy solder—jagged beads or excess blobs around the connector—because cheap assemblies often cut corners.
- Bent or lifted pin, poor contact, possible fraud.
- Misaligned or loose pins, internal tampering signal.
- Irregular solder on connector, red flag for counterfeit.
A reliable evaluation can also benefit from noting the broader hardware context, such as ensuring compatibility with standard interfaces and connector layouts used in authentic cartridges, which aligns with the importance of verified edge profiles and PCB consistency discussed in related hardware guidance. Edge profile verification
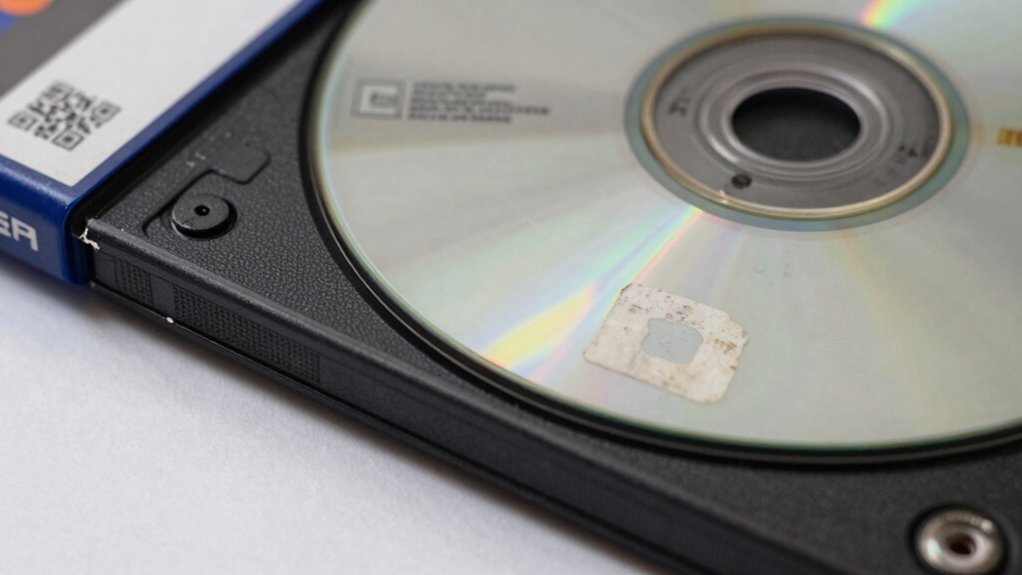
Spotting Fake Parts: Black‑Blob Chips, Stacked Boards, and Missing Stickers
Spotting fake parts is easier than you think: a black‑blob chip (COB) inside a cartridge screams counterfeit, because genuine games rarely use that component. You’ll notice a black blob on the PCB, a tell‑tale sign that a cheap, mass‑produced part replaced the proper IC.
Next, open the case and look for stacked boards; official cartridges contain a single, neatly routed PCB, so any layered, stacked boards reveal a hack job.
Also check for missing stickers or labels inside the housing—authentic units carry manufacturer tags that counterfeit makers often omit.
These visual cues let you decide quickly whether the game is legit or a fraud, saving you time and money.
Essential Tools for Safely Opening and Inspecting Cartridges
You’ll need a 3.8 mm security bit for Game Boy, Game Boy Color, and SNES carts, plus a tri‑wing screwdriver for Game Boy Advance cartridges. With those tools in hand, you can open the case safely and inspect the PCB under bright, focused lighting. This setup lets you spot fake indicators like black‑blob chips, stacked boards, or missing stickers quickly and accurately.
Bit Security Bit
How can you safely pry open a Game Boy, Game Boy Color, or SNES cartridge without marring its screws? You’ll need the 3.8 mm security bit, a tiny tool that fits the proprietary screw heads perfectly. Using the right security bit prevents stripping the screw and eliminates the chance of creating false indicators that could hide counterfeit internals. It also lets you remove the cover cleanly, so you can inspect Nintendo logos, serial numbers, and solder joints for authenticity. A durable, magnetized bit helps securely grip screws and avoids losing small parts during the procedure security bit importance.
- Grab a 3.8 mm security bit with a magnetic tip.
- Align it with the cartridge screw and turn clockwise until it releases.
- Carefully lift the cover, exposing the PCB for visual verification.
Tri‑Wing Screwdriver Required
Ever wondered why a tri‑wing screwdriver is indispensable for opening GBA, SNES, or other Nintendo cartridges? You need it to loosen the tiny back screw without stripping the head, then gently pry the shell apart. Once the case opens, you can inspect PCB branding, serial numbers, and copyright markings that signal authenticity. The tri‑wing bit protects the cartridge’s plastic and internal connectors, preserving resale value.
After checking for genuine Nintendo logos, correct date stamps, and intact edge seams, reseal the shell with the original screw—never substitute a non‑spec fastener. Using the right tool keeps the cartridge structurally sound and helps you verify that the game you’re buying isn’t a counterfeit. Grips and protective accessories memory-foam-like cushioning can also help ensure a comfortable, secure grip during inspection sessions, reducing hand fatigue during detailed examinations.
Proper Inspection Lighting Setup
After loosening the tri‑wing screw and opening the shell, you need a lighting setup that makes every detail pop. Use a daylight‑balanced lamp that floods the workspace with bright, diffuse light; this eliminates glare and shadows that could hide flaws. Position the cartridge at a 45‑degree angle so reflections reveal seam misalignment or worn labels. Keep the area free of direct sunlight and ensure even illumination to expose faint misprints and sticker irregularities. A 10×–20× magnifying lamp or loupe lets you scrutinize tiny imprint characters, label microtext, and back‑stamp depth, giving you clear cues about authenticity.
- Daylight‑balanced, diffuse lamp
- Adjustable 45‑degree cartridge holder
- 10×–20× magnifying lamp or loupe
What to Do When You Find a Counterfeit?
Spotting a counterfeit cartridge is only the first step; once you’ve identified the red flags, you need to act quickly to protect yourself and your collection. First, document the labeling quality—photograph the glossy or misaligned label, any blurred logos, and the missing imprint characters. Then, open the case and examine the Internal PCB; note any black‑blob chips, stacked boards, or mismatched cutouts. If the back‑label’s four‑rectangle pattern is absent, treat it as suspect. Next, contact the seller with clear evidence and request a refund or exchange. If they refuse, open a dispute with the marketplace or payment provider, citing the specific counterfeit indicators you recorded. Finally, report the item to the platform’s fraud team to help other buyers.
Trusted Sources for Authentic Cartridges and Price Verification
How can you be sure a cartridge is genuine before you hand over cash? You start by demanding proof of PCB authenticity and doing thorough price verification. Trustworthy sellers will answer why they’re selling, how long they’ve owned the game, and send clear PCB photos that show the original name and date. Cross‑check their history: a pattern of rapid turnover or dozens of rare copies often signals a scam. Compare current listings to sold data and expert opinions, and avoid marketplaces that ship from uncertain regions like China when doubts linger. Use documented benchmarks—region‑accurate labeling and PCB images—to filter out counterfeits.
Demand PCB proof, verify seller history, compare prices, and avoid uncertain shipping sources.
- Request ownership details and PCB photos.
- Research seller history and listing patterns.
- Compare prices to sold records and expert valuations.
Frequently Asked Questions
How to Tell if Games Are Fake?
You can spot fakes by checking glossy misaligned labels, wrong logos, missing stickers, mismatched pins, rough seams, and by opening the cartridge to verify PCB logos, serials, and authentic markings.
What Does a Fake Switch Look Like?
You’ll spot a fake Switch by blurry logos, misaligned text, cheap plastic, rough cartridge edges, missing Nintendo copyright, odd serial numbers, and non‑standard PCBs that don’t match authentic hardware.
How to Spot a Fake Game and Watch?
You’ll spot a fake game and watch by checking for mismatched logos, blurry serials, cheap plastic, missing or wrong battery contacts, and inconsistent firmware versions that don’t match the official release.
How to Detect a Fake Pokémon?
You’ll spot a fake Pokémon by checking the back‑label corners for four rectangles, confirming two‑character imprint sets, verifying exact logos and ESRB marks, feeling smooth seams, and demanding PCB photos with Nintendo stamps.
In Summary
By checking the cartridge’s visual details, opening it carefully, and using the right tools, you can spot fake parts before you spend a dime. If you uncover a counterfeit, stop the purchase, report the seller, and stick to trusted sources. Staying vigilant protects your wallet and preserves the integrity of your game collection.


Leave a Reply