
You’ll need a plug‑and‑play USB mic like the Blue Yeti Nano (or Rode PodMic USB for future‑proofing), a 1080p webcam such as the Logitech C920, and an affordable capture card like the NZXT Signal HD60 for smooth game capture. Pair them with free OBS Studio, a compact controller like the Elgato Stream Deck Plus, wired Ethernet, and a cheap LED panel or ring light at a 45° angle. An ergonomic chair and basic cable management keep your setup comfortable, and the next steps will show you how to upgrade and troubleshoot.
Build a Budget‑Friendly Starter Streaming Kit
Looking for a starter kit that won’t break the bank? You can pair a reliable USB microphone like the Blue Yeti Nano with an affordable capture card such as the NZXT Signal HD60, then run everything through free streaming software like OBS Studio or Streamlabs. The mic plugs directly into your laptop or desktop, delivering clear voice without extra drivers. Budget storage principles emphasize arranging gear with clear labeling and modular, stackable organizers to maximize space and accessibility growth planning. The capture card grabs 1080p gameplay at 60 fps, sending video to your PC via HDMI. With at least 8 GB RAM and a modest CPU, OBS handles scenes, overlays, and alerts smoothly. This combo balances cost and performance, giving you a solid foundation before you upgrade to higher‑end gear.
Choose a Beginner‑Friendly USB Microphone
Start with a USB mic that’s plug‑and‑play and won’t drain your wallet—like the Blue Yeti Nano. It’s a beginner‑friendly USB microphone that delivers clear voice capture without an audio interface, so you can jump straight into game chat or streaming. The compact design fits a dorm desk, and the price stays modest while still beating most built‑in laptop mics. If you later crave a sturdier build or USB‑C future‑proofing, consider the Rode PodMic USB, but the Blue Yeti Nano remains the sweet spot for first‑time streamers. For longer sessions or more demanding setups, you might explore models with low latency wireless options for game chat on the go, as described in budget gaming earbuds with low latency options like IAMJOY or RYR, which emphasize reliable connectivity and pass‑through charging capabilities to keep you connected across devices. Low‑latency connectivity can be essential when you’re coordinating with teammates during intense gaming sessions.
Select a Budget Webcam or Action Camera
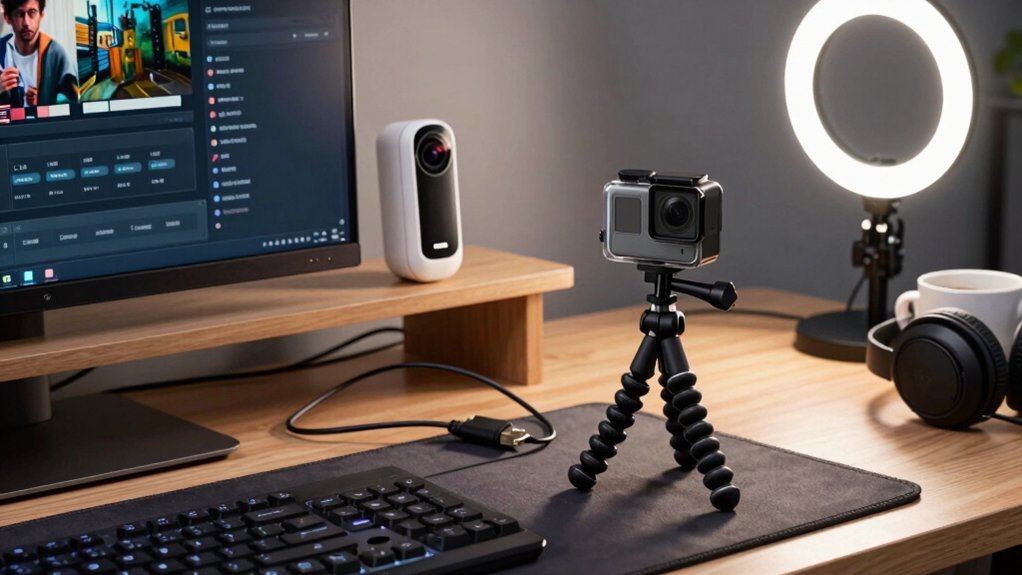
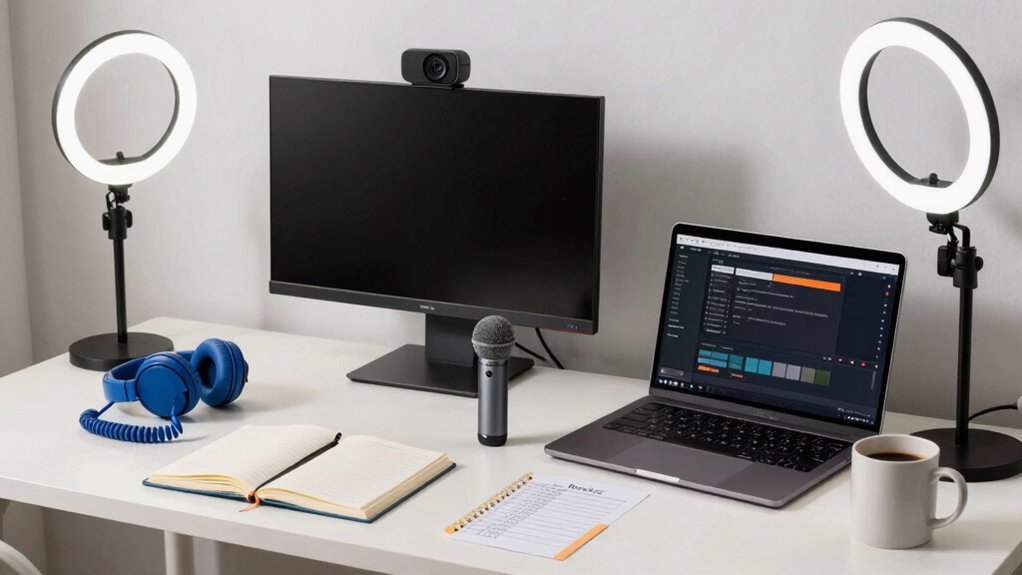
If you’re on a shoestring budget but still want crisp, 1080p video, a webcam like the Logitech C920 is the easiest choice—plug‑and‑play, built‑in stereo mics, and reliable low‑light performance. You can also mount a cheap action camera for dynamic POV shots, especially when you want to stream fast‑moving gameplay from a unique angle. Pair your chosen device with a decent mic and solid lighting, and you’ll look professional without breaking the bank. USB-C PD 20W
Add a Low‑Cost Capture Card for Your PC
You can boost your stream’s quality without breaking the bank by adding a budget‑friendly capture card.
The NZXT Signal HD60 plugs in, runs at 60 fps 1080p, and needs almost no software, so you’ll spend less time troubleshooting and more time gaming.
Just make sure your PC and platform support it, and you’ll have a reliable, plug‑and‑play solution.
Durability and compatibility considerations from reliable data suggest checking for PCIe Express compatibility and driver support to maximize long‑term usefulness durability features.
Budget‑Friendly Capture Options
Looking for a simple, affordable way to bring your PC gameplay onto a stream? A budget‑friendly capture card can be the cornerstone of your streaming gear without breaking the bank. The NZXT Signal HD60 delivers 1080p capture, 4K passthrough, and up to 60 fps—all with minimal software. It sits under $100, making it perfect for college gamers who need a reliable starter. If you want a step up while staying cheap, consider the AverMedia Live Gamer Ultra 2.1, which adds VRR and 4K passtrough. Both options keep your setup plug‑and‑play, so you can focus on content, not configuration. The right cable clips can help keep your streaming setup tidy by managing power and HDMI cables around your dorm desk and peripherals cable organization.
Simple Plug‑and‑Play Setup
One of the quickest ways to get your PC gameplay on stream is to plug in a low‑cost capture card like the NZXT Signal HD60. This plug‑and‑play device captures at 1080p60, offers 4K passthrough, and stays under $100, so you won’t break the bank or waste time on drivers. Just connect the HDMI output from your PC or console to the card, then USB‑C into your streaming rig; the software is minimal, letting you focus on content. The budget picks in Top Budget-Friendly Capture Cards can further help you compare options that also offer 3.5mm mic inputs for commentary and plug‑and‑play setup without drivers. When you outgrow it, consider an upgrade like the AverMedia Live Gamer Ultra 2.1 for higher‑resolution passthrough and VRR, but the Signal HD60 handles everyday college gaming streams with ease.
Set Up a Simple Streaming Controller/Mixer
Pick a simple controller like the Elgato Stream Deck Plus or Rode Streamer X and you’ll get plug‑and‑play integration with your streaming software. These devices let you route audio and switch scenes with a single press, keeping your setup tidy and responsive. Additionally, budget-friendly Macro Keypads with LCD keys can expand your workflow by offering 18 programmable keys for quick actions and OBS/Streamlabs integration USB-C connectivity.
Simple Controller Choices
Need a compact, budget‑friendly way to toggle scenes, adjust audio, and trigger effects without a cluttered desk? You can get away with a single device that handles both switching and mixing. The Elgato Stream Deck Plus packs eight programmable keys, a touch bar, four dials, and built‑in audio mixer controls, plus USB/XLR compatibility for mic setups. If you want everything in one box, the Rode Streamer X merges a capture card, audio interface, and controller, delivering XLR/48V phantom power and dual USB‑C. For a portable mixer, the RodeCaster Duo offers four physical faders, two virtual faders, SMART pads, and two XLR inputs.
- Stream Deck Plus – versatile, integrated, affordable
- Rode Streamer X – all‑in‑one, XLR ready
- Original Stream Deck – cheaper, scene‑only
- RodeCaster Duo – dedicated mixer, portable
Plug‑And‑Play Integration
After sorting through controller options, the next step is getting everything to work together without a maze of cables and software. You’ll want a USB‑plug‑and‑play hub that merges scene switches, audio tweaks, and camera cues into a single device. The Elgato Stream Deck Plus gives you eight programmable keys, a touch bar, and four volume dials, all configurable through Camera Hub for instant scene changes. If you prefer a single‑box solution, the Rode Streamer X bundles a capture card, XLR audio, HDMI I/O, and dual USB‑C ports, letting you control gain, headphone levels, and streaming sources without extra adapters. Both options keep your desk tidy and your workflow fast.
| Device | Key Plug‑and‑Play Feature |
|---|---|
| Stream Deck Plus | USB‑C connection, customizable keys |
| Streamer X | Dual USB‑C, HDMI in/out, XLR with phantom |
| Original Stream Deck | USB only, no audio controls |
| Larger Stream Deck models | USB, extra keys, no integrated audio |
| Camera Hub software | USB‑based integration, scene management |
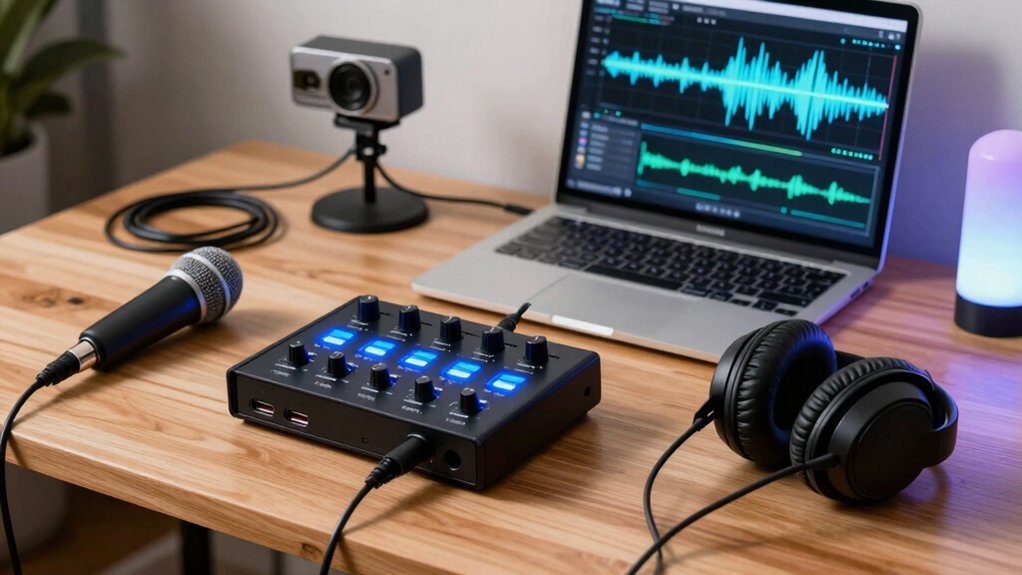
Affordable Audio Routing Options
Looking for a budget‑friendly way to juggle game audio, mic input, and music without a rack of gear? You can keep things simple with a streaming controller that doubles as an audio interface, then add a compact mixer when you need more control.
- Elgato Stream Deck Plus – eight programmable keys, four volume dials, built‑in audio routing; perfect budget gear for beginners.
- Rode Streamer X – combines capture card, audio interface, and streaming controller; supports XLR + 48 V phantom and HDMI in/out.
- RodeCaster Duo – four faders, two USB‑C inputs, Rode Central software; a dedicated mixer that stays compact.
- USB mic + Stream Deck Plus – start with this combo, then upgrade to RodeCaster Duo for advanced routing.
These options let you mix game sound, voice chat, and background music without juggling multiple devices, keeping your desk tidy and your budget intact.
Configure Software, Internet, and Lighting Basics
Ever wondered how to keep your stream smooth, your software organized, and your lighting crisp without breaking the bank? Start with OBS Studio because it’s free, works on Windows and macOS, and lets you layer game capture, webcam, and alerts in one scene. Hook your capture card or game PC into OBS, assign hotkeys, and save scene collections for quick swaps. For internet, aim for at least 5 Mbps upload for 720p; if you can, secure 30 Mbps to avoid buffering during high‑action moments. Test your speed with an online tool, then prioritize a wired Ethernet connection over Wi‑Fi for stability. Lighting doesn’t need a studio rig—grab a cheap LED panel or ring light, position it 45° from your face, and adjust white balance in OBS to eliminate shadows and keep your image bright and professional.
Upgrade to Mid‑Range Audio and Video Gear
Now that your software, internet, and lighting are solid, it’s time to level up the audio and video hardware. Mid‑range gear gives you noticeable quality without breaking the bank, and you’ll feel the difference in every stream.
Mid‑range gear upgrades audio and video quality without breaking the bank.
- Rode PodMic USB – USB‑C, dynamic capsule, windsock, future‑proof XLR path.
- Rode Streamer X – Capture card, audio interface, HDMI in/out, 48 V phantom, dual USB‑C.
- Elgato Stream Deck Plus – Eight programmable keys, touch bar, four volume dials, tight Elgato integration.
- NZXT Signal HD60 – 1080p capture, 4K passthrough, minimal software for beginner‑to‑intermediate transitions.
Pair the PodMic or Streamer X with the Deck Plus and you’ve built a solid mid‑range audio and video foundation. Your streaming setup will sound clearer, look smoother, and stay within a reasonable budget.
Upgrade to Professional‑Grade Streaming Equipment
You’ll notice a huge jump when you swap your USB mic for an XLR setup with an audio interface, giving you crystal‑clear sound and full gain control.
Pairing that with a high‑performance capture card lets your DSLR or 4K cam stream at native resolution without choking your GPU.
Adding an integrated stream controller ties everything together, so you can switch scenes, trigger alerts, and adjust audio on the fly.
Professional‑Grade Mics
A solid upgrade from a USB starter mic to a professional‑grade XLR microphone can instantly elevate your stream’s audio quality, and options like the Shure SM7dB or Rode PodMic USB give you that boost without breaking the bank.
The Shure SM7dB delivers studio‑level depth with an integrated preamp, while the Rode PodMic USB offers durability and a future‑proof XLR path.
Pair any XLR mic with a reliable audio interface, and you’ll control gain, EQ, and monitoring without latency.
- Choose Shure SM7dB for rich, broadcast‑grade tone.
- Grab Rode PodMic USB for easy USB‑C plug‑and‑play now.
3.3 an audio interface to unlock full XLR potential.
4. Use a pop filter and boom arm to keep sound clean and consistent.
These steps give you pro‑quality audio while staying budget‑friendly.
High‑Performance Capture Cards
A high‑performance capture card is the bridge that lets your PC handle 4K gameplay while you stream at smooth 60 fps, and choosing the right one can dramatically boost both visual fidelity and reliability. For a budget‑friendly start, the NZXT Signal HD60 offers 1080p capture with 4K passthrough, minimal software, and a sub‑$100 price tag.
When you need pro‑grade performance, the AverMedia Live Gamer Ultra 2.1 delivers 4K capture up to 60 fps, VRR 144Hz passthrough, and USB‑C/USB 3.0 interfaces for flexible connections.
If you prefer an internal solution, the Elgato Game Capture 4K Pro provides 8K passthrough, 60 fps capture, and a PCIe 2.0 x4 lane for rock‑solid reliability.
Upgrading to these capture cards lets you push higher resolutions and frame rates while keeping your stream smooth and your setup tidy.
Integrated Stream Controllers
After you’ve secured a reliable capture card, the next step is to centralize all your streaming commands. Integrated stream controllers let you switch scenes, adjust audio, and trigger effects without juggling multiple apps. Here are four budget‑friendly options that deliver integrated control:
- Elgato Stream Deck Plus – eight programmable keys, touch bar, four volume dials, and deep Elgato app integration for audio/video and Camera Hub.
- Rode Streamer X – combines capture card, audio interface, and control; XLR with phantom power, HDMI in/out, dual USB‑C, and on‑device gain/headphone knobs.
- RodeCaster Duo – compact mixer with four physical faders, two virtual faders, SMART pads, two XLR and two USB‑C inputs for pro‑level routing.
- Original Stream Deck – pure macro/scene switching if you don’t need built‑in audio control.
Pick the device that matches your workflow and budget, and you’ll streamline production while keeping costs low.
Troubleshoot Common Streaming Issues
Ever notice your stream stuttering or the audio cutting out? Start with audio troubleshooting: confirm your USB mic is the default input, update its driver, and tweak gain to avoid clipping. If video lags, verify your capture card is set to 1080p60 and that your GPU/CPU aren’t maxed out. Reduce scene complexity or bitrate to ease CPU strain on a single‑PC streaming setup. For connectivity hiccups, switch to wired Ethernet and ensure at least a 5 Mbps upload.
| Issue | Quick Fix |
|---|---|
| Audio dropouts | Re‑select mic, test another USB port |
| Low mic gain | Increase gain in mic settings |
| Video desync | Set capture resolution to 1080p60 |
| CPU bottleneck | Lower bitrate, simplify scenes |
| Wi‑Fi drops | Use Ethernet, check upload speed |
These steps keep your budget gear humming without costly upgrades.
Answer Frequent Questions About Budget Streaming
Wondering which upgrades actually matter when you’re streaming on a shoestring budget? You’ll find that a solid USB microphone, a reliable budget capture card, and a clear upgrade path cover most questions. Here’s what you should focus on:
- USB microphone – Start with the Blue Yeti Nano for crisp audio without extra gear.
- Budget capture – The NZXT Signal HD60 gives 1080p @ 60 fps and 4K passthrough, keeping software simple.
- Entry‑level streaming – Pair the mic and capture card, then use free software like OBS to go live.
- Future upgrades – When funds allow, swap to an XLR mic (e.g., Shure SM7B) and add a mixer for richer sound.
Stick to this plan, and you’ll answer the most common budget‑streaming concerns while staying within a student’s wallet.
Add Ergonomic Chair and Lighting on a Budget
Your mic and capture card are set, so now focus on staying comfortable and looking good on camera. An ergonomic chair with lumbar support and adjustable height keeps your posture solid during marathon gaming, while budget lighting—like a compact LED ring or a small standing lamp—brightens your face without draining your wallet. Position the light at a 45‑degree angle to cut shadows, and add a footrest to ease leg strain. Choose a chair with adjustable armrests and tilt so it works with any desk height as your streaming setup evolves.
| Item | Why It Matters |
|---|---|
| Ergonomic chair | Supports spine, reduces fatigue |
| Budget lighting | Improves image quality, cheap |
| Footrest | Relieves leg pressure |
| Adjustable armrests | Fits desk, enhances comfort |
Finalize Your Streaming Checklist Before Going Live
Ready to go live? You’ve got a solid audio setup and a simple capture device, but you still need a tight streaming checklist to avoid hiccups. Follow these four steps before you hit “Start Streaming”:
- Verify your internet speed – at least 5 Mbps upload for 1080p60, bump to 30 Mbps+ if you plan AI overlays or a dual‑PC rig.
- Test your microphone (Blue Yeti Nano or similar) and capture card (NZXT Signal HD60) together in OBS or Streamlabs; confirm levels and sync.
- Configure a single scene layout with all sources—game, webcam, alerts—so you can launch instantly.
- Add beginner gear like a Rode Streamer X or Elgato Stream Deck Plus to streamline control and keep your desk tidy.
Run through this streaming checklist once more, then press go and enjoy a smooth broadcast.
Frequently Asked Questions
What Do Gamers Use for Streaming?
You use a USB mic like the Blue Yeti Nano, a budget capture card such as the NZXT Signal HD60, and a simple streaming software—often OBS—to broadcast your gameplay.
How Many Viewers Do You Need to Make $1000 a Month on Twitch?
You need roughly 5,000‑10,000 average concurrent viewers each month, or about 1,000‑3,000 active subs, plus bits, tips, and ads, to net $1,000 after Twitch’s revenue split.
What Equipment Do I Need to Be a Gaming Streamer?
You need a decent mic, a capture card, and basic lighting; start with a Blue Yeti Nano, NZXT Signal HD60, and a simple ring light, then upgrade to XLR gear and a stream deck.
What Equipment Do I Need to Livestream?
You need a USB mic (like the Blue Yeti Nano), a 1080p webcam (Logitech C920), a basic capture card (NZXT Signal HD60), and a simple controller/mixer (Elgato Stream Deck Plus).
In Summary
You’ve got everything you need to start streaming without breaking the bank. With a solid mic, decent webcam, cheap capture card, simple controller, and budget lighting, you’ll look and sound professional while staying comfortable. Follow the checklist, tweak settings as you go, and you’ll be ready to go live and grow your audience—no expensive gear required.


Leave a Reply