
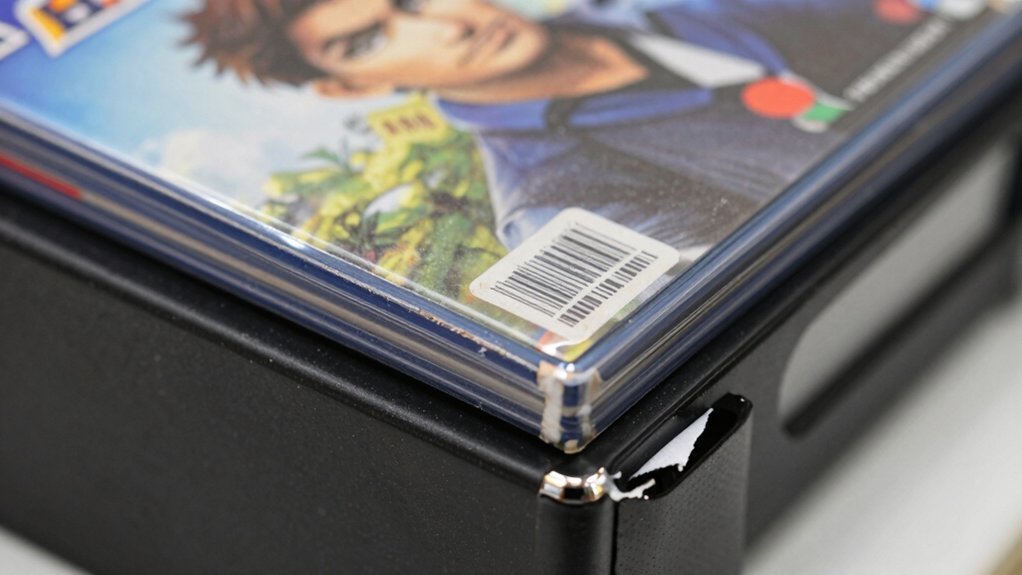
Grab a high‑intensity flashlight, hold it low and angled to the disc edge, and rotate the disc slowly. Watch for bright swirls, concentric rings, or tiny scratches that pop up under the oblique light—these often signal past cleaning, resurfacing, or hidden rot. Direct, bright light will reveal surface flaws, while grazing light highlights micro‑scratches. If you see any of these marks, test the disc on multiple consoles before buying; the next section shows you how to decide whether to keep or skip it.
Why a Flashlight Is Essential for Used‑Game Disc Buying

Ever wondered why a simple flashlight can make or difference when you’re hunting for a used‑game disc? You point a high‑density light at an angle, and micro‑scratches, swirls, and resurfacing marks pop into view—details that ordinary lighting hides. The bright, direct beam reveals surface flaws, letting you spot cleaning history or hidden rot. Clean discs stay mostly swirl‑free, while those with swirls betray past resurfacing attempts. Even a disc that looks pristine can show micro‑damage under the flashlight, warning you of potential read errors. If you see no swirls, the disc is likely in decent shape, but inconsistent player readability still calls for further testing. This quick visual check saves you money and frustration before you buy. LED Lighting can enhance visibility of surface imperfections during inspections.
Step‑by‑Step Flashlight Test for Used Game Discs
After you’ve seen how a flashlight reveals hidden swirls and scratches, it’s time to put that insight into practice with a systematic test. First, grab a high‑density flashlight and hold it at a low angle to the disc surface. Rotate the disc slowly while the beam skims the edge, watching for swirls or scratches that appear only under this angled glow. Note any clean‑looking areas—those usually indicate fewer swirls, but still test readability across players. If you spot both scratches and swirls, suspect prior cleaning or possible rot. Finally, compare what you see with a baseline of a known‑good disc. Surface Compatibility and Removal
How to Spot Swirls, Scratches, and Rot Under Direct Light
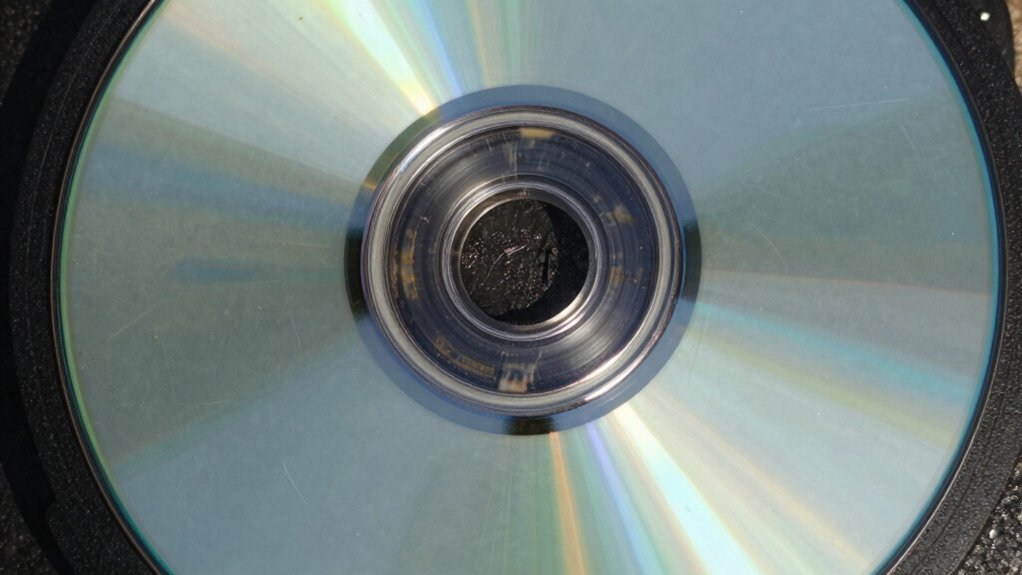
Grab a flashlight and tilt it sharply; the angled beam will make any swirls pop out on the disc surface. When you shine the light straight on, scratches become obvious as bright lines or pits. If nothing shows up at any angle, you’re likely looking at a clean disc, but still test multiple angles to be sure. Additionally, ensure the power strip you’re using to test peripherals has proper surge protection, such as 1700 joules or higher, to protect your testing setup surge protection.
Flashlight Angle Reveals Swirls
A shallow‑angle flashlight makes the disc’s surface pop, turning tiny swirls and scratches into bright, jagged lines that you can spot instantly. Hold a high‑density torch just above the disc, letting the beam skim the plastic. The grazing light catches even the faintest swirl, revealing the jagged pattern that ordinary lighting hides. Rotate the disc and compare the glow from several shallow angles; if the lines disappear at a steeper tilt, they’re likely superficial scratches. The test also helps verify edge wear, which can influence long‑term durability edge wear.
Direct Light Shows Scratches
Shallow‑angle lighting already showed you the subtle swirls, but pointing a bright lamp straight at the disc makes those scratches scream. Hold a flashlight or desk lamp just a few inches away, aimed perpendicular to the surface. The glare will highlight any micro‑scratches, edge nicks, or swirl patterns left by resurfacing. If you see a network of fine lines that weren’t visible before, that’s a red flag—someone likely sanded or repaired the disc. A uniformly clean look under this harsh light suggests the surface hasn’t been tampered with, though it doesn’t guarantee internal health. Remember, even a spotless disc can still suffer from read‑error issues, so pair this test with playback checks before you buy. Also, consider the type of surface coating used on the disc, as some finishes are more prone to visible wear under direct light.
Absence Indicates Clean Disc
Ever notice how a bright flashlight can make a disc look flawless, yet that very absence of swirls often signals it hasn’t been resurfaced? When you shine a directed beam at an angle, any lingering swirl or scratch should catch the light. If nothing appears, the surface likely hasn’t been aggressively cleaned or resurfaced, meaning fewer alterations.
However, a clean‑look doesn’t guarantee the disc is damage‑free; deep scratches may hide beneath the surface, and micro‑scratches can stay invisible at certain angles. Consistently seeing no marks across multiple viewpoints suggests the disc is in its original state, reducing rot‑related risk but not eliminating it. Still, run compatibility and read tests on several players before you buy M.2 Slots: 2x M.2.
Interpreting Swirl Patterns: Cleaning vs. Resurfacing History

You’ll notice swirls when a disc’s surface has been cleaned or resurfaced, and they often form clear, concentric rings.
If the disc lacks any swirl pattern, it’s likely never been touched, which can mean deeper scratches are present.
Spotting these differences helps you decide whether the game is merely cosmetically worn or actually compromised.
Swirl Presence Indicates Cleaning
A quick way to spot a disc that’s been cleaned or resurfaced is to shine a high‑density flashlight at an angle and look for fine swirls that follow the surface. Those swirls usually mean a cleaning or resurfacing process, not a pristine finish. If the light is bright and you see many delicate spirals, the disc was likely rubbed with alcohol or another solvent, even if it looks normal in ordinary lighting. Swirls can hide deeper gouges or micro‑scratches, so a disc that glitters under the flashlight may still read poorly. surface ventilation can influence how well a disc reads, especially if the storage context varies between clean and dusty environments.
Conversely, a disc lacking visible swirls under the same light might’ve fewer surface alterations, though hidden micro‑scratches can still exist, so you should test readability before buying.
Resurfacing Leaves Distinct Rings
When the flashlight reveals clean, concentric rings that radiate evenly from the disc’s center, you’re looking at the hallmark of a resurfacing process rather than a simple cleaning. Those rings are uniform, fine, and spaced consistently, showing a controlled pass that a machine applied. In contrast, cleaning-only swirls appear lighter, irregular, and often coexist with micro‑scratches from manual scrubbing. Look for a repeatable pattern under an oblique light; a perfectly even set of rings signals proper resurfacing, while patchy or sporadic marks betray shallow cleaning. If you spot both bright circular swirls and deeper scratch lines, the disc may have been resurfaced or heavily cleaned, yet hidden damage could still impair readability. Assessing these details helps you avoid purchasing a compromised game.
Absence Suggests Untouched Surface
Ever wonder why a disc that shows no swirls under a bright flashlight often feels untouched? You’re looking at a surface that likely hasn’t been aggressively resurfaced. When the light reveals a clean, uniform reflection from every angle, the disc probably saw only light handling or a proper cleaning. That absence of swirls doesn’t guarantee flawless readability—micro‑scratches can hide beneath the shine, and drive issues may still cause inconsistent reads. Test the disc on several consoles; if it plays smoothly across them, the untouched appearance is genuine. If performance varies, suspect deeper scratches or hardware problems rather than resurfacing. Use this visual cue as a first‑step filter, then back it up with thorough, multi‑system testing before you buy.
Identifying Deep Scratches That Remain Invisible to the Eye
Ever wondered why a disc looks flawless under a lamp yet stutters on every console? You’ll spot deep scratches that hide beneath the glossy surface when you tilt a bright, narrow beam across the edge. The light catches micro‑abrasions on the data layer, revealing sharp, linear marks that are invisible in normal lighting. Even a pristine‑looking front can conceal gouges that only appear as irregularities along the track grooves under a steep angle. If the disc reads inconsistently across consoles, that’s a red flag for inner‑layer damage. Resurfaced discs may still carry embedded scratches that cause read errors despite a spotless exterior. Use a high‑intensity, angled flashlight to expose these hidden flaws before you buy.
Real‑World Flashlight Inspection Results From Popular Titles
You’ll see hidden swirls pop up when you shine a flashlight straight on the disc, but an angled beam can mask them.
The angle you choose changes how scratches appear, so a quick tilt can expose damage that looks fine at first glance.
Even discs that have been resurfaced, like Mega Man Legends or Resident Evil, may still fail under this test.
Flashlight Reveals Hidden Swirls
Can a simple flashlight expose damage that looks invisible otherwise? You point a high‑density beam across the disc and watch micro‑swirls and tiny scratches appear. Normal room light often hides these marks, but the bright, angled light makes them pop. Swirls usually mean someone cleaned or resurfaced the disc—an indication that the surface has been tampered with and may not read reliably. Even a brand‑new‑looking disc can reveal flaws under the flashlight, warning you of hidden rot risk. If you see no swirls, the disc is likely in decent shape, though deep scratches could still be a problem. Use this quick test before buying to avoid costly playback issues.
Angle Impacts Scratch Visibility
A flashlight’s angle can make or break your ability to spot scratches, and real‑world tests on popular games prove it. When you tilt the beam, shadows can hide tiny marks, while a direct, bright shine reveals surface flaws. Mega Man Legends shows top‑surface imperfections only under angled light, not in normal room illumination. Resident Evil discs illustrate that both angle and your viewing side matter—some scratches appear just from one side. Spider‑Man’s disc needs the right angle and brightness to expose swirls, even if scratches are already visible. A resurfaced disc may look flawless in standard lighting, yet a high‑density flashlight at an oblique angle uncovers micro‑scratches and hidden swirls.
- Steep angles cast shadows that conceal minor scratches.
- Direct illumination makes surface flaws pop.
- Mega Man Legends reveals imperfections only with angled light.
- Resident Evil’s visibility depends on angle and viewer position.
- Resurfaced discs expose swirls under oblique, high‑intensity light.
Resurfaced Discs Still Fail
Some resurfaced discs look flawless at a glance, yet a bright‑angle flashlight often exposes hidden swirls or texture inconsistencies that the original press never had. You’ll notice faint spirals on titles like *Mega Man Legends* or *Resident Evil* that weren’t there before, and those micro‑swirls can interrupt the laser’s path even if the surface feels smooth. A clean sweep under the light doesn’t guarantee playability; deep scratches or edge damage still block the drive’s mechanism. Professional resurfacing may revive a disc temporarily, but if the underlying rot wasn’t fully removed, the problem returns. Real‑world tests reveal that the same resurfaced game can read on one console and fail on another, pointing to residual flaws or drive‑specific compatibility issues.
When a Resurfaced Disc Still Won’t Play on Your Console
Why does a resurfaced disc still refuse to spin up on your console? Even after you sand away visible scratches, micro‑swirls or manufacturing flaws can remain hidden beneath the lacquer. Those imperfections keep the data tracks from aligning correctly in the drive, so the console can’t read the disc. Inconsistent reads across different consoles usually mean the resurfacing only fixed some spots while leaving others, or that each player’s tolerance differs. Bright‑light, angle‑based inspection might show a smooth surface, but deep rot, warping, or inner‑layer damage can still sabotage playback, especially on legacy systems like the PS2. Professional resurfacing can help, but it isn’t a guarantee; repeated sanding thins the lacquer and may expose the data layer to more harm.
- Residual micro‑swirls block track alignment
- Uneven resurfacing leaves untouched damage
- Deep scratches or rot remain invisible to the eye
- Inner‑layer warping affects legacy consoles
- Over‑resurfacing thins lacquer, worsening exposure
How Alcohol Scrubbing Changes Surface Appearance and Readability
Visibility shifts when you scrub a disc with rubbing alcohol, turning a dull surface into a glossy one that reveals micro‑swirls under angled light. You’ll notice the sheen brighten, and dust disappears, making the track numbers easier to read at first. But the alcohol also lifts tiny residues and protective coatings, leaving faint scratches or haze that re‑appear after a few uses. When you inspect the disc under a bright lamp, new streaks and swirls pop up—signs of previous cleaning attempts. If the disc looks flawless only after the alcohol treatment, it may be masking deeper scratches or rot‑prone damage that resurfacing can’t repair. Remember, these surface changes don’t guarantee long‑term readability across different drives.
Professional Resurfacing: What Works and What Doesn’t
How can you tell whether professional resurfacing will actually revive a disc? You’ll notice that high‑grade equipment and calibrated pressure can smooth surface swirls, but deep scratches or internal rot often stay unreadable. A disc that passes on one console but stalls on another signals hidden integrity issues, not a guaranteed fix. Test across multiple players before you trust the result.
- Expect surface‑level improvements, not deep‑scratch repairs.
- Professional tools use controlled pressure; DIY abrasives create micro‑scratches.
- Swirls may reappear under new drives, indicating inconsistent outcomes.
- A disc reading on one console but not another points to drive‑specific tolerances.
- Even after resurfacing, disc rot can still cause failures.
Troubleshooting Inconsistent Readability Across Different Consoles
Ever notice a game disc that spins flawlessly on your old Xbox but stutters on the newer PlayStation? That mismatch usually signals surface damage, not a broken laser. Grab a bright flashlight and tilt it; swirls or fine scratches will glint at odd angles, revealing flaws that only some drives can’t.
If the disc reads on a handful of consoles but fails on others, you’re likely dealing with uneven wear or a deep groove that confuses specific lens types. Aggressive resurfacing can leave hidden swirls, so check under light even after cleaning.
Keep notes: does it work on older models but not newer ones? Does a particular drive type always choke? Patterns help you separate genuine disc rot from drive quirks.
Quick Checklist: Decide Whether to Keep or Skip a Used Disc
- Wondering if a used disc is worth keeping? Grab a high‑density flashlight and tilt it at a grazing angle. Look for bright swirls, concentric marks, or hidden pits. If you see them, the disc’s likely been resurfaced or cleaned and may fail reads. No swirls suggest a cleaner surface, but deep scratches could still be invisible. Test the disc on multiple consoles; inconsistent performance hints at deeper damage. When a disc looks flawless until you shine the light, treat it as a risk—play it on several devices or walk away.
- Shine a flashlight at a low angle to expose surface flaws.
- Spot bright swirls or concentric rings? Flag it for possible read errors.
- No swirls but deep scratches? Keep an eye on hidden damage.
- Try the disc on different consoles; inconsistent results = skip.
- If hidden defects appear only under light, test widely or discard.
Frequently Asked Questions About Used Game Disc Inspection
After checking a disc with a flashlight and spotting any swirls or hidden pits, you probably have a few questions about what those signs really mean. What do swirls indicate? Bright‑light swirls usually mean someone cleaned or resurfaced the disc, which can weaken the data layer and cause future read errors.
Can I trust a disc with no visible swirls? A clean look suggests fewer surface alterations, but deep scratches or rot may still lurk beneath.
Why does a disc read fine on one console but not another? Inconsistent readability points to drive or disc integrity issues, not a flawless product.
Should I rely solely on flashlight inspection? Use it as a diagnostic guide, not a final verdict—pristine‑looking discs can still fail after resurfacing or due to hidden rot.
Frequently Asked Questions
What Is the 20 Rule for Video Games?
You follow the 20 Rule by inspecting twenty common red flags—scratches, warping, missing inserts, label damage, lid cracks—across the disc’s edge, rings, and label, then quickly test playback.
Are 87% of Games Lost?
You’re not seeing a universal 87% loss—those figures mix damaged, missing, and unplayable copies. Most used games work fine; only a small fraction fail due to disc defects or wear.
What Game Took 12 Years to Make?
You’ll find Duke Nukem Forever took twelve years to make, starting in 1997 and finally launching in 2011 after a marathon of engine swaps, publisher changes, and endless redesigns.
How to Tell if a Game Is Counterfeit?
You spot counterfeit games by checking packaging for off‑brand logos, misspellings, or wrong legal text; comparing barcodes and product codes; inspecting discs for uneven wear, misaligned labels, or fuzzy artwork.
In Summary
Now you’ve got the flashlight trick down, you can spot hidden damage before you hand over cash. A quick scan reveals swirls, scratches, and resurfacing history, so you know whether a disc’s worth keeping or returning. Use the checklist, trust your eyes, and avoid costly surprises—your gaming library stays pristine, and your wallet stays happy.


