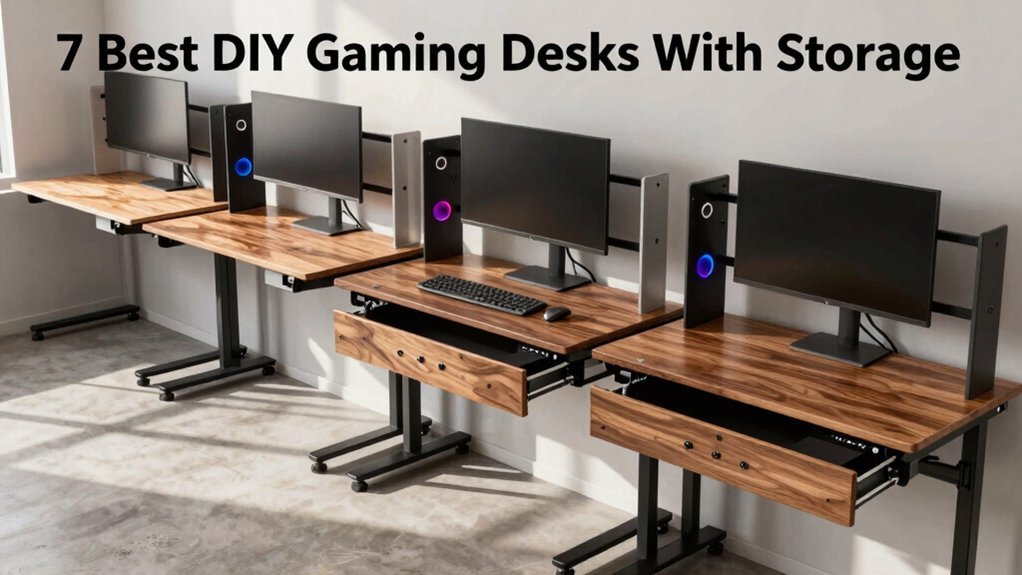
You can build a gaming desk that rolls like a cart, slides smoothly across the room, and keeps your gear dust‑free. Add an L‑shaped extension for dual monitors, reinforced with thick legs and corner brackets for stability. Mount heavy‑duty arms and tuck cables into under‑desk trays or T‑tracks. Install a pegboard and shelves to showcase collectibles, and a magnetic rail dock for headsets and wrist rests. Snap on a clamp‑on mug holder for spill safety, then upgrade to a sit‑stand frame with power rails for future‑proof flexibility. Keep reading to discover the seven top DIY designs.
Add Castor‑Enabled Rolling Storage to Your DIY Gaming Desk

Ever wondered how a simple castor can transform your gaming desk into a dynamic workstation? You attach Castors to a low‑profile drawer or shelf, then roll it wherever you need it during a session. The wheels act as cheats, letting you reposition storage without lifting heavy gear, so you stay in the flow. Dust‑free drawer setups keep a calm clean look, while trays inside organize smaller items for quick access. Open shelves display controllers, headphones, or snacks within arm’s reach, reducing pause time. Because the storage rolls, you can test new layouts or clear space for a new monitor without a full remodel. The result is a tidy desktop that adapts instantly to your gaming rhythm. Non-slip bottom
Add a DIY L‑Shaped Extension for Dual‑Monitor Gaming Desks
You’ll want to pick leg sizes that match the L‑shape’s span so the extension stays sturdy under dual monitors.
Choose mounting options that let you bolt the arms directly to the top or use sturdy brackets for extra support.
Finally, run cable trays or T‑tracks along both arms to keep wires tidy and within easy reach.
Shaped Desk Leg Size
If you want a sturdy L‑shaped extension for a dual‑monitor gaming desk, start by choosing legs that are thick enough to bear the weight of heavy mounts without sagging. Your desk legs should be made from solid hardwood or reinforced metal, at least 2 inches wide, to prevent flex when you load 21‑inch monitors and a keyboard. Aim for a 24‑inch main span and a 30‑inch extension, balancing space and stability. Add corner brackets or a Finnvard‑style trestle to lock the joint, and route cables through under‑desk trays or a T‑track to keep both work surfaces tidy. Ensure the design includes a built‑in power hub or accessible outlets to support peripherals and maintain a clean setup Power and Connectivity Features. 1. Use 2‑inch‑plus thick material for each leg. 2. Include corner support brackets at the L joint. 3. Install under‑desk cable trays for clean wiring.
Mounting Options for Dual Monitors
When you add a DIY L‑shaped extension to a dual‑monitor gaming desk, choosing the right mounting system is essential for stability and ergonomics. A telescoping dual‑monitor desk mount (STAND‑V002E) gives you height and reach adjustments, keeping eye level consistent across 21‑ to 32‑inch screens. For heavier widescreen pairs, upgrade to a high‑capacity arm like the Ergotron HX or a gas‑lift model to prevent sag. Mount two arms on the outer leg of the L‑extension, leaving the main surface clear for keyboards and controllers. Reinforce the IKEA top—Linnmon or Karlby—at each mounting point to avoid flex. Integrate cable management trays (Signum) and zip‑ties under the desk to keep power and video cords tidy and out of the way. Cable Management and practical setup tips help ensure long‑term stability and a cleaner workspace.
Cable Management Along Extension
Ever wondered how to keep cords tidy while extending your gaming desk? Adding a DIY L‑shaped extension lets you position a primary workstation at the corner and stretch along the adjacent wall, giving you dual‑monitor space without widening the footprint. You can embed cable management directly into the extension using under‑desk trays and a T‑track system, so power strips, monitor cables, and USB hubs stay hidden yet reachable. Thicker veneer worktops or reinforced panels support heavy monitor arms, while pegboards, hook rails, and tower brackets on the inner face streamline peripheral clutter. Ensure leg clearance and brace supports beneath the extension to prevent sagging. 24V phantom power
Integrate a Heavy‑Duty Monitor Arm and Cable Management Tray for a Clean DIY Gaming Desk
Even a massive 49‑inch monitor can stay securely in place when you mount a heavy‑duty arm like the Ergotron HX, and pairing it with a low‑profile cable‑management tray such as the Signum keeps the workspace tidy. Reinforced mounting hardware helps the arm handle weight and gas‑lift pressure over time, especially for long gaming sessions. Align the arm’s base with a T‑track or built‑in cable port, then route power and video cords through the cable management tray to hide them from view. The tray’s slotted design lets you slide connectors out for upgrades without removing the arm. Adjust the arm’s height, tilt, and swivel, and watch the cables stay neatly tucked, preserving a clean gaming surface. cable management is essential for maintaining an uncluttered setup as you upgrade components or add peripherals.
Create a Custom Pegboard and Shelf System for DIY Gaming Desk Collectibles
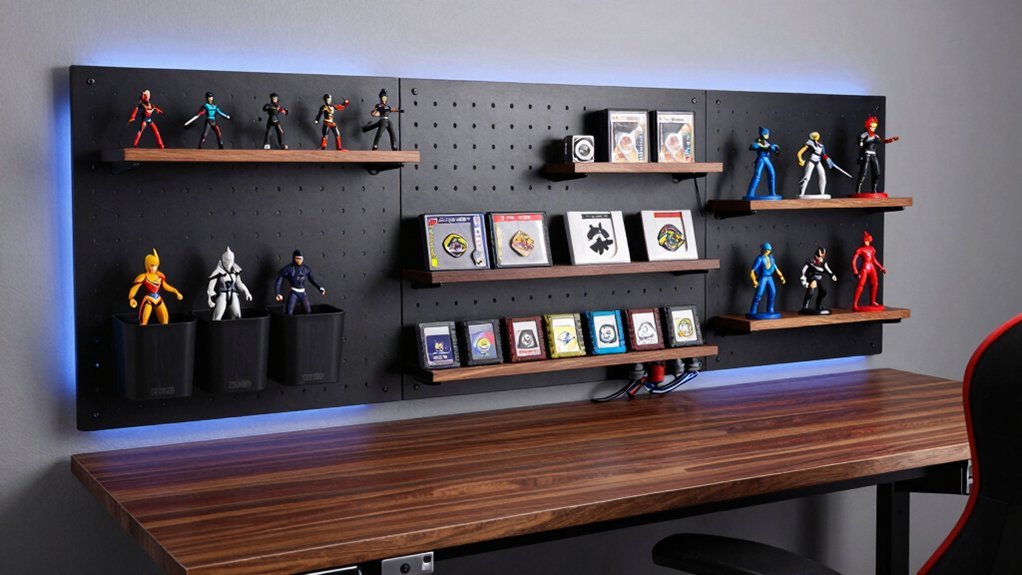
You can start by arranging a modular pegboard layout that lets you snap hooks and bins exactly where you need them. Adjust the shelf heights so your favorite figures and consoles sit at eye level without crowding the work surface. This combo keeps collectibles on display while keeping everything else neatly organized and within arm’s reach.
Modular Pegboard Layout
- Use interchangeable hooks for controllers and headphones.
- Add magnetic trays for keycaps and batteries.
- Install open‑back panels to showcase minifigures and deluxe editions.
- Incorporate modular, stackable storage with clear labeling to align with budget planning principles and maximize space efficiency Budget Storage Principles.
Adjustable Shelf Heights
Ever wondered how to keep your gaming collectibles within arm’s reach yet out of the way? Use a pegboard as the backbone of an adjustable‑height shelf system. Mount heavy‑duty, powder‑coated steel brackets to the board, then slide removable hooks and shelf brackets into the staggered holes. You can set vertical spacing anywhere from 12 in to 24 in, tailoring each level to figurines, limited‑edition boxes, or DIY builds. Staggered hole patterns let you add shelf lips that maximize density without blocking your monitor. Mix open shelves for display with closed bins for dust‑sensitive pieces, keeping essential accessories right where you need them. The result is a sturdy, customizable storage wall that grows with your collection. Cable Size Compatibility Across Clips support threads and exact measurements can help ensure brackets and shelves won’t interfere with cable runs as you expand the system.
Showcase Collectibles Efficiently
When you mount a pegboard around your gaming desk, you instantly turn a plain surface into a flexible showcase for collectibles. Use a system like Skadis with hooks and containers to keep mini‑figures, keycaps, batteries, and air dusters within arm’s reach. Pair the pegboard with open shelves or a glass‑front cabinet to display deluxe editions while keeping essentials handy. Position the board near the desk edge or behind monitors so you can glance at prized items without breaking focus. Route power and USB cords through the pegboard’s holes, then secure them with clips or ties for tidy cable management.
- Hook‑mounted trays for small accessories
- Adjustable shelves for larger figurines
- Integrated cable clips for clean wiring
Build a Magnetic Rail Dock for Your Headset and Wrist Rest

If you want instant access to your headset and wrist rest while keeping the desktop tidy, a magnetic rail dock mounted along the desk edge does the trick. A desk rail lets you slide magnetic cradles and a wrist‑rest holder into place without drilling, so you can reposition them as your setup evolves.
Use magnetic attachments or hinged clips to secure the headset, keeping cushions off the surface and protected from dust and scratches. Mount the wrist‑rest on the same rail, aligning it with your typing posture for ergonomic comfort.
Integrate the dock with a cable‑management channel; route charging cables and USB hubs nearby for tidy, tangle‑free access. This modular system maximizes desk space while keeping essential gear within arm’s reach.
Add a Clamp‑On Mug Holder for Drinks on Your DIY Gaming Desk
A magnetic rail dock already frees up space for your headset and wrist rest, so adding a clamp‑on mug holder is a natural next step. The holder snaps onto the front edge or rail of your DIY gaming desk, keeping drinks off the main surface and within arm’s reach. Adjustable jaws grip any desk thickness, so you won’t need to drill or modify the frame. Pair it with cable management and the magnetic rail, and you’ll enjoy a tidy desk setup that protects keyboards and mice from spills.
- Stability – The clamp’s secure grip prevents wobble during intense gameplay.
- Versatility – Fits thin or thick edges, letting you reposition as needed.
- Safety – Dedicated spot reduces accidental spills, keeping your equipment dry.
Upgrade to a Sit‑Stand Frame With T‑Track Power Rails for Future‑Proof DIY Gaming Desks
Looking to future‑proof your gaming setup? Upgrade to a sit‑stand frame with memory presets and you’ll store four heights for instant recall, letting you switch from seated marathons to standing sprints without missing a beat.
The T‑Track power rails sit hidden beneath the desktop, giving you a clean cable‑management hub and a modular rail for PC towers, drawers, or cubbies.
Slip magnetic accessories—mug holders, hobby shelves, or extra ports—along the outer edge for quick access without clutter.
Because the system is adjustable, you can add or rearrange components as your gear evolves, keeping the desk functional and sleek.
This combination delivers a flexible, ergonomic workspace that adapts to future upgrades with minimal rework.
Frequently Asked Questions
How Much Weight Can the T‑Track Support for Mounted Gear?
You can typically load 30‑45 lb per foot on a t‑track, so a 4‑ft span holds about 120‑180 lb. Check the specific rail’s rating and secure gear with proper brackets to stay safe.
Can the Sit‑Stand Frame Be Retrofitted to an Existing Desk Without Replacement?
Yes, you can retrofit the sit‑stand frame to your existing desk; just ensure the tabletop’s thickness fits the frame’s clamps, reinforce any weak joints, and verify the frame’s weight capacity before mounting.
What Tools Are Required to Install the Magnetic Rail Dock Correctly?
You’ll need a drill, screwdriver, level, measuring tape, pencil, and a set of hex keys. Make sure the drill bits match the rail’s mounting holes, then tighten the screws securely.
Is the Clamp‑On Mug Holder Compatible With All Desk Thicknesses?
Yes, the clamp‑on mug holder works with any desk thickness between ½ inch and 2 inches, so you’ll fit it on most standard surfaces without drilling or extra hardware.
Do the Rolling Castors Lock Securely for Stationary Gaming Sessions?
Yes, the rolling casters lock securely; you just engage the brake lever, and they stay put, letting you game without wobble or drift, even during intense, stationary sessions.
In Summary
Now you’ve got a gaming desk that’s as flexible as your playstyle—rolling storage for easy moves, a L‑shaped extension for dual monitors, a sturdy arm with cable trays for a clean look, pegboard shelves for collectibles, a magnetic rail for headset and wrist‑rest, a clamp‑on mug holder for drinks, and a sit‑stand frame with T‑track power rails for future upgrades. This custom setup maximizes comfort, organization, and performance, letting you dominate every session.


Leave a Reply