

Pick an open‑front case to let cool air rush straight over your components, then mount a 140 mm fan at the front for high airflow with low noise. Pair it with a 120 mm rear exhaust and a front‑mounted 120 mm AIO radiator to keep the CPU cool while the GPU vents out the top. Add dust filters, tidy cables, and set PWM fan curves so you stay quiet and under 85 °C. The next steps will show you how to fine‑tune each part.
Pick an Open‑Front Case for Unrestricted Gaming‑PC Cooling
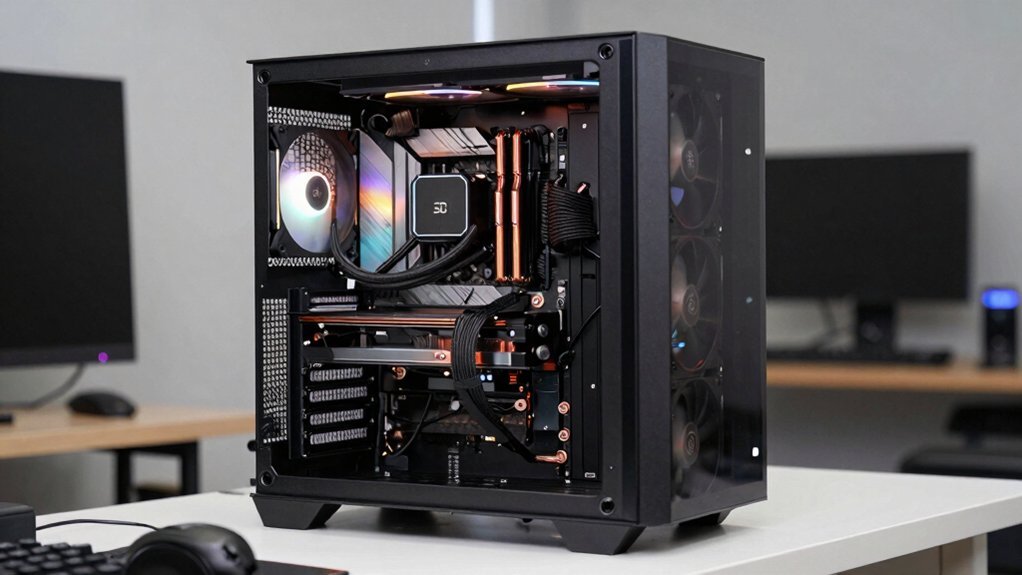
Ever wondered why your GPU still overheats despite extra fans? You need an open‑front case that lets cool outside air rush straight over radiators and components. The open‑front design eliminates the blockage of solid panels, boosting airflow and letting your GPU stay in a cooler thermal zone. You’ll notice lower temperatures on both the GPU and any front‑mounted radiator because the air isn’t forced through tight vents. Expect a bit more dust and louder operation, but the trade‑off is a noticeable performance lift during long sessions. Pair the case with high‑CFM fans and a top exhaust to sweep hot air away, and you’ll keep your system running quietly and efficiently. Open-front design clarifies airflow pathways and can complement models with multiple USB-C PD ports and fire‑resistant materials to maintain safety while maximizing cooling efficiency.
Select the Right Fan Size: 140 mm Front Intake vs. 120 mm Exhaust
Why settle for a 120 mm exhaust when a 140 mm front intake can push more cool air into your case with less noise? A 140 mm front intake moves comparable or greater airflow than a 120 mm fan at similar RPM because its larger blade area lets you spin it slower, cutting noise while still delivering a strong stream of fresh air to the GPU and CPU.
Pair it with a 120 mm exhaust to keep exhaust airflow balanced, maintaining positive or neutral pressure if the case supports the larger fan.
Most mid‑tower cases include at least one 140 mm front slot, so you can mount the fan without sacrificing clearance. This combo boosts overall temperature control and lets you enjoy quieter, more efficient cooling.
Determine Fan Quantity and Speed to Balance Airflow

You’ll want to pick a fan count that gives you enough airflow without flooding the case, so start with at least four 120 mm fans or a mix of 140 mm units for quieter volume.
Balance RPM and noise by running fans at lower speeds when temperatures are modest, then crank them up only when loads spike.
Aim for a slight positive pressure—more intake than exhaust—to push air through radiators while keeping overall airflow high enough for efficient cooling.
PWM control enables smooth, automatic speed adjustments across the fan array, helping maintain steady temps without manual tweaking.
Optimal Fan Count
How many fans should you install, and at what speed, to keep your mid‑tower gaming PC cool without drowning it in noise? Aim for four to six fans, mixing 120 mm and 140 mm sizes to balance static pressure and airflow. Use two front intakes for fresh air, one rear exhaust, and one top exhaust to create positive pressure. If your case has an open front, add an extra front fan; if it’s solid, keep the count low and choose high‑static‑pressure models. For radiators, place intake fans at the front for CPU cooling and top exhaust for GPU cooling, ensuring airflow isn’t throttled. In compact builds, prioritize quality high‑static‑pressure fans and limit total count.
- Front intake (2×)
- Rear exhaust (1×)
- Top exhaust (1×)
- Optional extra front fan for open designs.
Balancing RPM and Noise
When you balance RPM and noise, you’ll find that a modest fan count paired with the right speed settings can keep a mid‑tower gaming PC cool without turning your room into a jet‑engine. Start with 120 mm fans at 600–1,000 RPM for quiet intake; they move enough airflow for case ventilation while staying under your noise threshold.
Add a 140 mm exhaust at 1,200–1,800 RPM if the GPU runs hot—its larger blades deliver comparable airflow at a lower RPM, keeping noise low.
Place fans where they can create a steady intake‑exhaust path, avoiding turbulence. Choose models with good static pressure and low decibel ratings at your target RPM, and you’ll achieve smooth cooling without excess fan count or irritating noise. Also consider choosing kits that emphasize quick setup and stability to ensure reliable performance during long gaming sessions largest coverage and use of a reliable stand for any test benchmarks.
Pressure vs. Volume Flow
Why worry about whether a fan pushes hard enough or simply moves a lot of air? You need the right mix of static pressure and CFM to cool efficiently. Too much pressure without enough airflow stalls heat removal, while high CFM with low pressure leaks through dense radiators. Balance by counting fans, their speed, and where you mount them. When selecting fans, consider anti-static/ESD prerequisites for electronics cleaning gear used nearby to avoid introducing static charges into sensitive components static discharge protection.
Install a Front‑Mounted 120 mm AIO Radiator for CPU Cooling
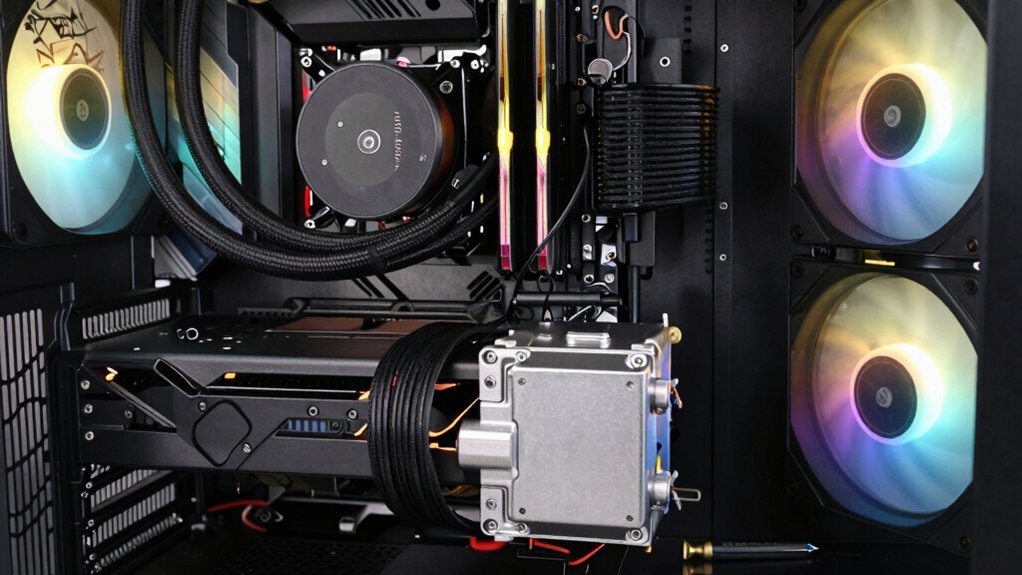
You’ll find a 120 mm AIO fits nicely in most cases and pulls fresh air straight onto the CPU, keeping temps low. Ensure the pump sits above the radiator so air can escape and coolant circulates properly. Follow the simple steps: position the radiator, attach the fans, and verify clearance for RAM and other components. Additionally, choose a model with good durability and a solid warranty to align with budget-conscious upgrades durability features.
Space‑ MMmm AIO
Curious about squeezing the most out of your cooling loop? A front-mounted radiator gives you direct intake air, keeping the CPU chill and preserving interior space. Keep the radiator’s top above the pump to dodge trapped air, and verify your case’s front clearance matches the 120 mm thickness. Choose push or pull fan configs based on static pressure versus airflow to hit optimal temps without screaming noise. Ensuring proper cable management and airflow can help maintain steady temperatures across components, especially in compact builds. front-mounted radiator ensures you leverage direct intake air while conserving space.
Efficient Front Airflow
If you mount a 120 mm AIO radiator at the front of an open-front case, you’ll feed the CPU with the coldest air directly from outside, dramatically improving its temperature. The front intake acts as a high-capacity heat sink, pulling fresh air across the radiator fins before it reaches the processor. Position the pump low enough that any trapped air can escape, preventing bubbles from throttling performance. Pair the radiator with a couple of static-pressure fans to push air through the unit, then add a rear exhaust to complete the airflow loop. Maintaining positive pressure with additional case fans reduces dust buildup while keeping the overall system quiet. This configuration delivers consistent cooling and a clean, cohesive aesthetic for airflow‑focused builds. Airflow balance supports stable temperatures by coordinating intake, radiator, and exhaust paths with minimal turbulence.
Easy Installation Steps
Ever wondered how to get a front‑mounted 120 mm AIO up and running without a hassle? You’ll keep your case tidy and boost airflow by following a few simple steps. First, measure the interior height to confirm the radiator fits between the front panel and the GPU. Next, attach low‑profile, high‑static‑pressure fans in a push‑pull configuration, making sure they face the intake side for optimal airflow. Then, secure the radiator behind the front panel, routing the pump tubing away from RAM and GPU to avoid kinks. Finally, double‑check all connections, power the system, and monitor temperatures.
- Verify clearance and case compatibility.
- Install fans and set push/pull orientation.
- Mount radiator and route tubing cleanly.
- Power up, test, and fine‑tune airflow.
Add a Rear 120 mm Exhaust Fan Dedicated to GPU Heat
Why not add a dedicated 120 mm rear exhaust fan to pull hot GPU air straight out of the case?
A rear exhaust creates a clear path for heat to leave, cutting recirculation and dropping GPU core and VRM temps.
Choose a fan with high static pressure so it pushes hot air through the rear opening efficiently.
Mount it so it spins outward, establishing negative pressure that works with your front or side intakes.
Balance intake and exhaust to keep airflow steady and avoid hotspots.
This simple upgrade pairs well with any air‑cooling or AIO setup, giving your GPU cooling a direct vent to the outside world and improving overall chassis temperature stability.
Fit Dust Filters and Tidy Cables to Preserve Flow Efficiency
A dedicated rear exhaust already clears hot air, but the intake side can quickly become a bottleneck if dust and tangled cables block the flow. Installing dust filters on every intake—front, bottom, and side—keeps particulates from coating fan blades and slows airflow. Choose low‑resistance mesh filters to trap dust without choking the fans. Meanwhile, solid cable management keeps cables away from intake paths and radiator fins, preserving a clean air channel. Periodically clean the filters and re‑tie any loose cables after upgrades to maintain peak efficiency.
- Fit high‑MERV or fine‑mesh dust filters on all intakes.
- Use cable combs or zip ties to route cables behind the motherboard tray.
- Keep cables clear of radiator fins and fan blades.
- Clean filters monthly and audit cable layout after any hardware change.
Adjust Fan Curves and PWM Settings for Low Noise, Cool Temps
How can you keep your rig whisper‑quiet while still crushing temps?
Start by setting gentle PWM curves at low temperatures—30–40 °C should hover around 20–35 % duty cycle. This keeps fan noise low and avoids coil whine.
As the load rises, ramp the curve gradually: 50 % at 50 °C, then jump to 80–100 % once you hit 70 °C.
Use your motherboard’s fan controller to lock a conservative 40–50 % idle duty cycle, and cap gaming at 60–70 % to hold CPU/GPU temps between 65–85 °C.
Prefer linear or stepped ramps over abrupt jumps, which cause audible pulses.
Test with real‑world gaming, tweak points if temps creep toward throttling, and you’ll enjoy cool performance without a noisy fan.
Frequently Asked Questions
How to Make Your Gaming PC Cooler?
You’ll cool your PC by installing a front‑mounted radiator, opening the front panel for direct intake, using larger 140 mm fans at lower RPM, and ensuring bottom intake and rear/top exhaust for smooth airflow.
How Do I Cool Down My PC While Gaming?
You’ll cool your PC by mounting a front intake radiator, using 140 mm fans at low RPM, keeping the top radiator above the pump, and maintaining positive pressure with filtered exhaust to reduce dust.
Is 90 C Hot for CPU While Gaming?
Yes, 90 °C is hot while gaming; it’s near the upper safety limit, can trigger throttling, and reduces performance. You should improve airflow, upgrade the cooler, or lower ambient temperature to keep temps safer.
Is 11 Fans in a PC Overkill?
Yes, eleven fans are usually overkill. You’ll see diminishing temperature returns, more noise, and dust. Focus on balanced intake‑exhaust airflow, good case design, and proper GPU cooling instead of sheer fan count.
In Summary
By picking an open‑front case, matching fan size to airflow needs, and balancing quantity and speed, you’ll keep temps low without blowing your budget. A front‑mounted 120 mm AIO handles the CPU, while a rear 120 mm exhaust tackles GPU heat. Dust filters and tidy cables preserve efficiency, and fine‑tuning fan curves lets you stay quiet. Follow these steps, and your rig will stay cool and perform at its best.


Leave a Reply