You’ll get a truly unique look, showcase your hardware through acrylic or tempered‑glass windows, and keep the case lightweight yet rigid. DIY panels let you match colors, add decals, and place vents exactly where you need airflow, avoiding fan or cable interference. You can fine‑tune the design with cheap tools, clear‑coat for durability, and test everything before committing. Keep reading to discover the step‑by‑step process and avoid common pitfalls.
Is a Custom Side Panel Right for Your Build?
Ever wondered if a custom side panel will truly benefit your build? You’ll notice that a custom side panel lets you showcase internal hardware through acrylic windows or tempered glass, while keeping weight low and rigidity high. Before you start, check component clearance and mounting compatibility; you don’t want a fan or cable interfering with a new cutout. A panel redesign can add strategically placed vents for airflow improvement without sacrificing aesthetics. Choose acrylic for a lighter look or tempered glass for a premium feel, then apply decals, wraps, or paint for color coordination with the rest of your rig. Planning and disassembly ensure everything fits, so you avoid costly rework and enjoy a cleaner, cooler, more personalized case. Wrinkle-resistant, lightweight fabrics from the backdrop options can inspire clean, professional-looking cable management and surface finishes for a cohesive build aesthetic modern backdrop that complements your setup.
Choosing a Cohesive Color Scheme for Your PC Side Panels
Wondering how to make your side panels look like a single, polished statement? Start by picking a color scheme that reflects the vibe you want. A cohesive palette keeps every element—from acrylic side panels to cables—looking intentional. Use the color wheel: primary reds, yellows, blues or well together, while secondary oranges, purples, greens give balanced contrast. Coordinate decals, LEDs, and cable sleeves to reinforce the scheme. Before you commit, try decals testing with removable stickers or color testing panels to see how light and reflections affect the look. This low‑risk step lets you tweak hue, saturation, and brightness until the whole build feels harmonious. When planning, consider a design that includes a fireproof and durable setup as highlighted by fire-resistant materials and sturdy mounting options discussed in the USB/ surge protector context design and mounting features.
Essential Low‑Cost Tools & Materials for Panel Mods
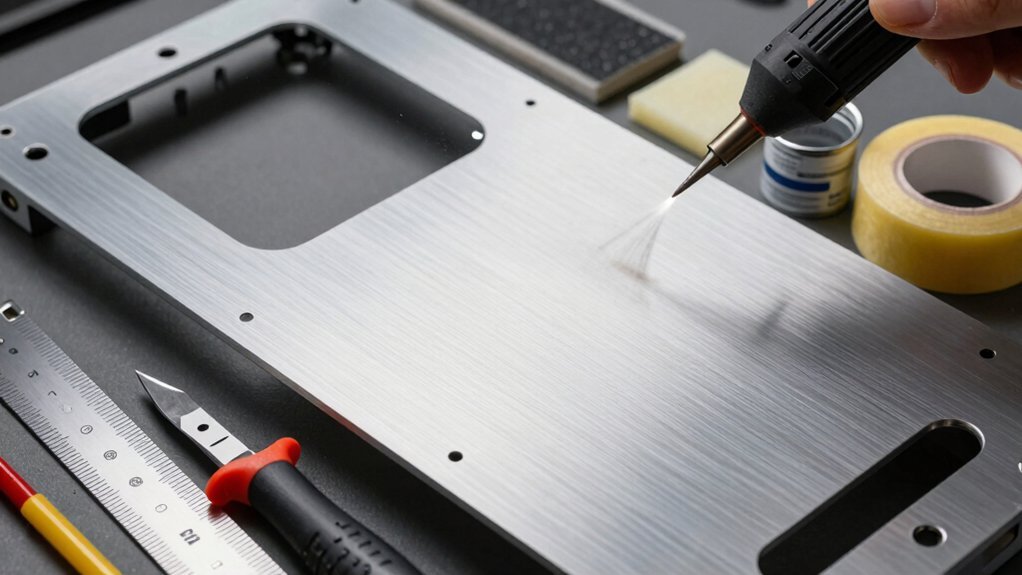
Once you’ve nailed a color scheme, the next step is gathering the tools that let you shape and finish those panels without breaking the bank. A compact rotary tool handles drilling and fine carving, while a modest sanders smooth edges and pre‑paint surfaces. Keep masking tape handy to protect hinges and ports during spray jobs. Degreasing with isopropyl alcohol or a cheap degreaser removes oils, then apply a thin coat of primer to ensure paints designed for metal adhere evenly. Vinyl wraps give instant texture or color without permanent changes, and acrylic sheets serve as lightweight windows or decorative inserts. A basic screwdriver set, a file for tight spots, and a respirator for spray safety round out your budget kit, letting you prep, paint, and wrap panels confidently. High‑density foam or memory foam can inform interior panel comfort considerations in modular builds modular design and improve long‑term usability while you customize borders and contours.
Step‑by‑Step Guide to Installing LED Strips on PC Case Side Panels
Pick an addressable RGB strip that fits your case’s color scheme, then stick it onto the side panels with the adhesive backing.
Route the power and data wires behind the panels or under mounts, securing them with zip ties or heat‑shrink sleeves to keep the look clean.
Finally, connect the strip to a controller or motherboard header, making sure the wiring is firmly attached before you power up.
Additionally, consider using RGBIC technology to achieve multi‑color effects across segments for a more dynamic look RGBIC technology across your PC case panels.
Choose LED Strip Type
Which LED strip will give your case the right glow without overheating or short‑circuits? You’ll want 5V or 12V strips, depending on your controller’s voltage. For smooth illumination, pick 60 LEDs per meter. If you crave a full palette, go with RGB strips; they deliver 16.8 million colors and support static, breathing, cycle, and music‑sync color modes. Want crisp white alongside colors? Choose RGBW strips, which add a dedicated white channel for daylight tones. Look for a 3M adhesive backing to secure the strip cleanly to the panel, and if dust or moisture is a concern, opt for waterproof IP65‑rated strips. These features keep the lighting bright, safe, and easy to integrate into your PC’s aesthetic. IP65-rated strips provide durability against dust and moisture for longer-lasting setups.
Secure Wiring and Power
How do you keep your LED strips powered safely while maintaining a tidy look? First, choose adhesive strips that match your case’s interior and stick them along the front edge or inner side panel. Then, run power wires through existing grommets or drill small channels for routing, ensuring the cables stay out of fan paths for unobstructed airflow. Use a compact RGB controller mounted near the motherboard, connecting it to the strips with short leads. Secure the leads with cable management clips or zip ties, and apply silicone adhesive or electrical tape for wiring concealment. Keep the controller’s power input tidy by bundling any extra cords into a single sheath, and double‑check that no connector touches moving parts before closing the panel. Also, consider mounting a slim power distribution strip inside the case to minimize exposed plugs and simplify future upgrades. Cable management helps maintain airflow and reduces clutter while you customize lighting.
Applying Decals Without Damaging the Case
Ever wondered how to stick a decal on your case without leaving a trace? Start with surface preparation: wipe the panel with a mild degreaser, let it dry, and ensure it’s dust‑free. When you begin the decal application, align it, then use a squeegee or a credit card to press outwards from the center-out, smoothing bubbles as you go. For curved panels, choose flexible vinyl and warm the edges with a heat gun on low; the heat lets the material conform without tearing. After the decal sits flat, perform edge sealing by brushing a thin layer of compatible clear adhesive or a decal setting solution along the perimeter. This prevents lift and protects the finish while keeping the case pristine. Additionally, consider organizing within budget storage principles to maximize space and protect the case contents over time Budget Storage Principles and Planning.
Protecting Your Decals With Clear Coats
You’ll want to pick a clear coat that matches your decal’s material—acrylic, vinyl, or paint—so it adheres without cracking. Apply thin, even layers after cleaning the panel, letting each coat cure fully before the next. Finally, choose a UV‑resistant, non‑yellowing formula to keep the colors vibrant and the finish durable.
Clear Coat Types
What clear coat should you choose for your decals? You need a finish that balances UV protection, adhesion, and curing time while minimizing orange peel. Acrylic clear coat offers quick drying and easy sanding, perfect for hobbyists who want fast results. Polyurethane delivers tougher hardness and excellent moisture resistance, ideal for high‑traffic panels. Epoxy‑based finishes provide the ultimate durability and chemical resistance, though they require longer curing time and careful temperature control. Pick the product that matches your substrate—metal, plastic, or vinyl—to ensure proper adhesion and long‑lasting vibrancy.
- Acrylic clear coat – fast cure, smooth finish, low orange peel
- Polyurethane – tough, UV‑resistant, great for heavy‑use cases
- Epoxy‑based finishes – maximum hardness, chemical resistance
- Hybrid blends – combine ease of application with superior durability
- Specialty UV‑blocking clear coats – extra protection for sun‑exposed builds
Application Techniques
How do you keep your decals looking crisp and protected? First, wipe the panel with isopropyl alcohol to strip oils and dust. Then, apply a clear coat using a spray technique that favors thin passes over heavy coats. Let each layer dry fully—respect the curing time, usually 24 hours—before handling. Finish with a satin finish for subtle shine and extra protection.
| Step | Action | Tip |
|---|---|---|
| 1 | Clean surface | Use isopropyl alcohol |
| 2 | Position decals | Ensure they’re flat |
| 3 | Apply clear coat | Light mist, thin passes |
| 4 | Cure | Wait full curing time before next step |
Durability Tips
A solid clear coat is the key to keeping your decals bright and intact, because it forms a barrier against UV light, moisture, and abrasion. Choose a protective clear coat formulated for plastics or metals, and match its sheen to your paints and finishes for a seamless look.
Spray thin layers, letting each dry fully before sanding between coats with 600‑1000 grit to smooth ridges and boost adhesion optimization. Respect the cure time—usually 24‑48 hours—so the film achieves full UV protection and moisture resistance. Multiple light coats prevent runs, drips, and clouding, delivering lasting durability.
- Feel confident that your case will stay vivid for years.
- Enjoy a flawless, glossy or matte finish that complements your build.
- Trust the coat to guard against scratches and everyday wear.
- Relish the peace of mind that comes with proper adhesion optimization.
- Celebrate a professional look without expensive re‑work.
Cheap Ways to Try Out Your Design Before Painting
A few inexpensive tricks let you test a case‑panel design before committing to paint. You can start with removable decals or vinyl wraps to see colors and patterns instantly, then move to practice painting on scrap panels to fine‑tune technique. Use Photoshop mockups to test designs virtually, and try reversible finishes on spare cover pieces before applying anything permanent.
| Method | Cost | Reusability |
|---|---|---|
| Removable decals | Low | High |
| Vinyl wraps | Low | Medium |
| Scrap panel paint | Very low | Low |
| Digital mockups | Free | Unlimited |
These cheap options let you experiment, compare, and decide without waste, ensuring the final look matches your vision before you spray the real panel.
Upgrading Cable Management With Colored Sleeves
Ever considered turning your tangled wiring into a sleek, color‑coordinated feature? Colored sleeves instantly boost visual cohesion, turning hidden cables into a design statement. Choose 2–3 hues that match your build’s palette, and you’ll reduce visual noise while highlighting key components.
Modern sleeving kits include split loom and heat‑shrink‑compatible connectors, making it easy to route PET sleeving or PTFE sleeving around tight bends. Braided sleeving offers flexibility and heat resistance, preserving airflow and keeping future upgrades accessible.
- Pick complementary colors for a unified look
- Use braided PET or PTFE sleeves for durability
- Apply split‑loom connectors for clean bends
- Verify sleeve length doesn’t block airflow
- Maintain visual cohesion across all panels
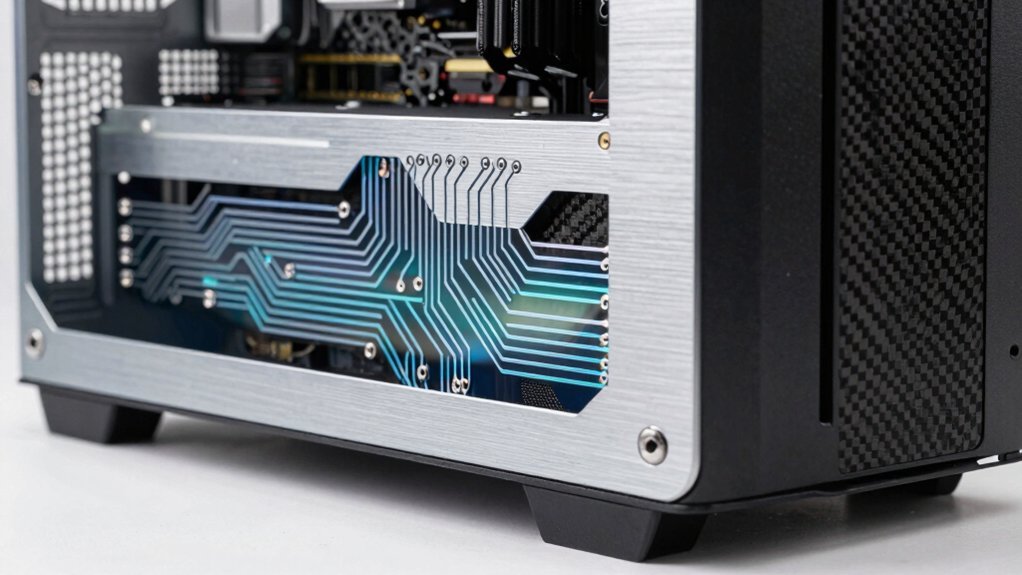
Creating Custom Acrylic Inserts for Transparent PC Case Panels
With your cables neatly sleeved, you can now turn the case’s transparent panels into a showcase by adding custom acrylic inserts. Choose clear acrylic, laser‑cut shapes, and mount them with hardware that snaps into the panel opening. The inserts stay lightweight, protect against dust, and let you paint or frost the backside for soft RGB diffusion. You’ll see your build sparkle while keeping every component visible and safe.
| Feature | Benefit | Feeling |
|---|---|---|
| Laser‑cut shapes | Precise designs | Pride |
| Mounting hardware | Secure fit | Confidence |
| Dust protection | Cleaner interior | Relief |
| RGB diffusion | Glowing ambience | Awe |
These steps elevate PC case customization, turning panel modding into a personal art project.
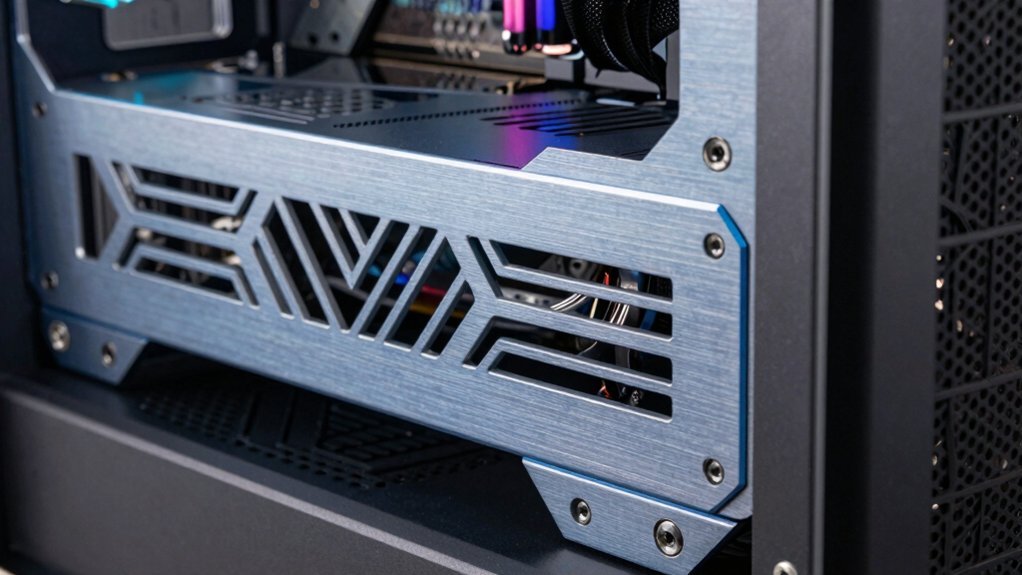
Modifying Component Plates for Visual Consistency
Looking to keep every visual element of your build in sync, you can modify component plates—GPU backplates, motherboard shields, and accent panels—so they complement the case’s color scheme and lighting. Start with acrylic backplates that showcase RGB lighting coherence and match the case’s hue. When swapping motherboard plates, double‑check mounting clearance to avoid interfering with I/O shields or heat dissipation. Paint or apply decals to accent plates for seamless color matching, but keep the design thin enough to preserve airflow. A unified look boosts case aesthetics and makes your rig feel custom‑crafted rather than assembled.
Sync every visual element with matching acrylic backplates, painted motherboard shields, and coordinated accent panels for a unified, custom‑crafted look.
- Acrylic backplates that mirror your RGB palette
- Motherboard plates painted for perfect color matching
- Component plates trimmed to maintain mounting clearance
- Accent panels that echo the case’s primary hue
- Uniform visual consistency that ties the whole build together
How to Balance Aesthetics and Airflow When Cutting Vents?
You’ll want to position vents where hot parts already push air, so the intake and exhaust lines stay efficient. Align the fan direction with those openings and keep the cuts large enough to let air flow freely without creating tiny, noisy gaps.
A quick visual mock‑up lets you check that the design looks sharp while still delivering the cooling you need.
Optimized Vent Placement
Ever wondered how to keep your rig looking sharp while still feeding the components the airflow they need? You’ll master vent placement by mapping intake exhaust positioning to the case’s natural convection path. Start with larger cutout sizing low forward for cool air, and smaller rear‑top openings for hot exhaust. Keep vent symmetry on opposite panels; it pleases the eyes and preserves unobstructed airflow. Test noise vs cooling trade‑offs with a quick thermal testing loop, noting CPU and GPU temps before and after each cut. Adjust perforation patterns until you hit the sweet spot where aesthetics meet performance.
- Mirror vents for visual harmony
- Prioritize low‑front intakes, high‑rear exhausts
- Use few large holes, not many tiny ones
- Balance static pressure against acoustic output
- Validate with before/after thermal testing
Balanced Fan Orientation
When you align vent cuts with the case’s natural airflow—intake low and behind front fans, exhaust high near the CPU cooler or PSU—you’ll preserve both visual harmony and efficient cooling.
Balanced fan orientation hinges on smart airflow management; keep intake/exhaust alignment consistent across the chassis.
In case panel modding, map vent placement so that cool air enters low, travels past components, and exits high without hitting cables or PCIe cards.
Preserve at least 6–8 mm component clearance, then deburr edges to maintain laminar flow.
Add mesh or grille inserts that match your RGB theme, but ensure they don’t choke airflow. By coordinating vent size, fan speed, and clear paths, you achieve a sleek look and optimal thermal performance.
Strategic Cut Size
How big should a vent be to look sleek yet keep the system cool? You’ll want vent sizing that satisfies airflow optimization without sacrificing panel integrity. Aim for 0.5–2 % of the total panel area per prominent vent, then follow vent cut guidelines that keep you within outer margins. Start with simple rectangles, then run fan curve testing to gauge thermal performance.
Avoid stiffening ribs and mounting points; add stiffening reinforcement with lightweight acrylic or hardware. Visualize the design in 3D sketches to confirm strategic vent placement aligns with your fan count.
- Precise cuts boost airflow while preserving aesthetics.
- Balanced vent size prevents pressure loss.
- Reinforced edges stop flex and rattles.
- Real‑world testing validates thermal gains.
- Thoughtful placement maximizes cooling efficiency.
Common Mistakes to Avoid When Modding Side Panels
So, you’re ready to reshape your case’s side panels—don’t let a few common oversights ruin the project. Bad planning leads to mis‑aligned cuts that block airflow or clash with mounting points. Sketch or 3‑D model every change before you grab a rotary tool; otherwise you’ll waste time re‑drilling and risk panel flex.
Skip proper masking and you’ll get burrs, splinters, or paint bleed, compromising safety and finishing. Wear eye protection and gloves, and secure the panel to avoid slippage. Sand and degrease the surface before painting or applying decals to prevent bubbling and chipping. Finally, double‑check that screw threads line up with the chassis standoffs, preserving structural integrity and optimal cooling.
Frequently Asked Questions
Can Panel Modifications Affect Warranty Coverage?
Yes, panel modifications can void your warranty; manufacturers usually require unaltered hardware, so any changes you make might be seen as damage or tampering, leading them to deny coverage.
How Do I Prevent Panel Warping After Painting?
You prevent panel warping by sanding smooth, applying thin primer coats, using even spray layers, letting each coat fully cure, and avoiding excessive heat—store the panel in a stable, dry environment.
Is It Safe to Drill Near Motherboard Standoffs?
You can drill near motherboard standoffs, but only if you double‑check clearance, use a fine‑point bit, and keep the drill steady. Avoid hitting traces or components, and wear safety glasses.
What Thickness of Acrylic Works Best for Side Panels?
You should use 3‑4 mm acrylic for side panels; it’s thick enough to stay rigid, resists warping, and still cuts cleanly with a laser or CNC. Thinner sheets bend, while thicker ones add unnecessary weight.
Do LED Strips Increase Case Temperature?
Yes, LED strips raise case temperature slightly; they add a few watts of heat, so you should manage airflow and consider low‑power strips to keep temperatures under control.
In Summary
You’ve seen how a custom side panel can tie your build together, boost visual appeal, and even improve airflow when done right. By picking a cohesive color scheme, gathering low‑cost tools, and following step‑by‑step guides for LEDs, decals, acrylic inserts, and plate mods, you’ll avoid common pitfalls and end up with a PC that looks as good as it performs. Enjoy the personal touch and the brag‑worthy look you’ve created.


Leave a Reply