Start by picking select pine 1×2×8 boards, then cut two 2‑ft × 28‑in side legs, two 12‑in × 28‑in shelves, and a 24‑in‑wide adjustable center piece with 12‑in extensions. Assemble the legs and shelves with brackets, glue, and pilot‑drilled holes, add a 4‑ft × 12‑in center support and a white‑pine brace for rigidity, and keep the total height under 30 inches. Install a pull‑out keyboard tray, a cable‑management tray, and optional monitor risers, then sand and finish the top. Continue for detailed step‑by‑step instructions.
Start Building Your DIY Gaming Desk – Step‑by‑Step Guide
Where to begin? First, lay out the 8 ft × 2 ft top piece and visualize the two shelf‑leg sections that will keep the Desk under 30 inches. Cut two 2 ft × 28 in panels and two 12 in × 28 in panels, then shape the center adjustable piece—24 in wide with 12‑inch extensions on each side—to match the lengths. Add a 4 ft × 12 in center support and a white‑pine brace for extra stability and storage. Screw all base components together, forming a rigid frame before you attach the top console area. Double‑check your layout against the reference images; symmetrical placement ensures an ergonomic, sturdy desk. Once the frame is solid, secure the 8 ft × 2 ft top, and your DIY gaming desk is ready for use. charging
Pick the Right Size for Your DIY Gaming Desk
How tall should your gaming desk be? Aim for a Desk height under 30 inches so your chair fits comfortably and you keep a relaxed posture. Sketch the footprint before cutting: a 2 ft × 8 ft base section works well for a single desk, or split it into two parallel units for tighter rooms. Use 8-foot stock to maximize material—one sheet yields 26 tops and 26 sides, letting you adjust width with center pieces and fillers. Add a pull-out keyboard tray to free under-desk space without expanding the footprint. The configuration can mirror compact, modular setups like the Furologee and WLIVE configurations, which emphasize open shelves for ventilation and flexible storage TV Stand with integrated outlets, ensuring ample airflow for gaming gear.
Select Wood & Hardware for Strength, Cost, and Style
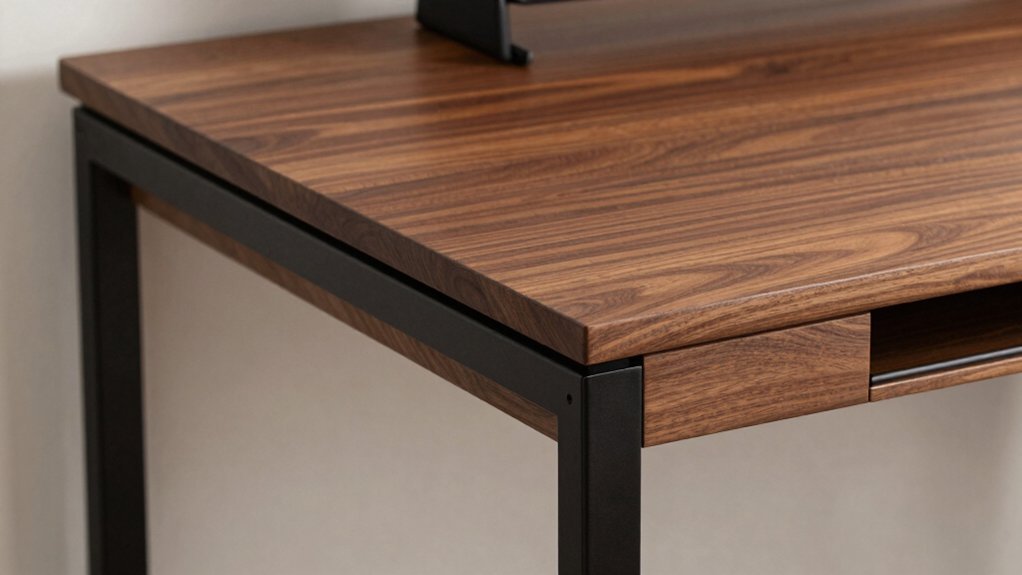
Now that you’ve sized the desk, pick wood and hardware that give you strength without breaking the bank. For gaming desks, choose select pine 1x2x8 boards with minimal knots; they’re easy to machine and keep costs low. Pair the pine with solid brackets and finishing nails for a sturdy, affordable frame. Whitewood pine offers consistent grain and warp resistance, ensuring a flat surface and clean edge joins. Maximize each 8‑foot board by planning cuts for tops and sides, aiming for 26 of each across two desks. Reinforce joints with wood glue, brackets, and nails, giving you rigidity and easy disassembly if you need to move the gaming desks later. Durability indicators
Cut and Prepare Frame Pieces for Maximum Stability
Ready to lock in the desk’s stability? First, measure twice and cut each board to the exact dimensions: two 2 ft × 28 in pieces for the side legs, two 12 in × 28 in shelves, and the adjustable center piece (24 in wide, 12 in each side). Use a fine‑tooth saw to avoid splintering, then sand edges smooth. Lay the pieces on a flat surface, check for warping, and discard any board with knots that could weaken joints. Drill pilot holes before screwing everything together; this prevents wood from splitting and maximizes desk stability. Finally, apply a wood conditioner to seal the surface and keep the frame from twisting over time. In addition, ensure you have a sturdy surge‑protected power solution for your gaming setup with multiple USB ports and safe outlet spacing to prevent interference with adjacent devices USB-C Power Delivery and consider layouts that optimize outlet accessibility for bulky adapters.
Construct Adjustable Legs and Center Support
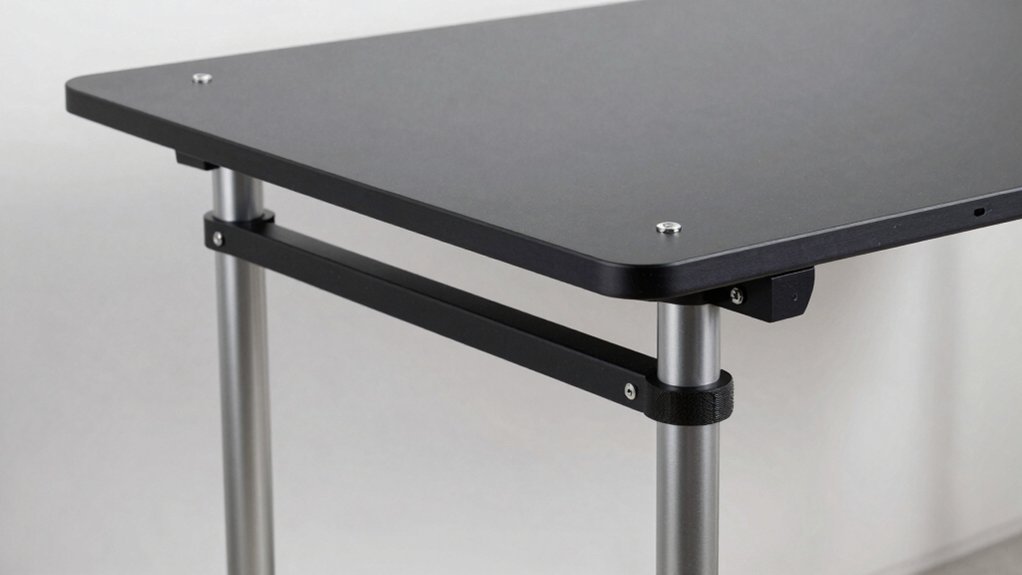
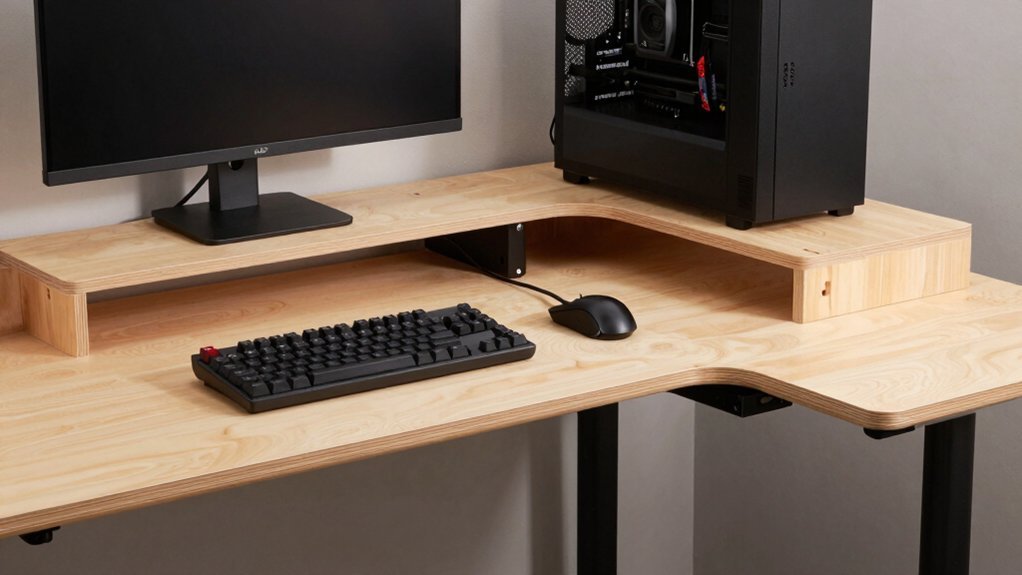
After you’ve cut and sanded the frame pieces, attach the two shelf‑leg boards to the side legs with the adjustable center support, drilling pilot holes and using wood screws to lock everything in place; this creates a sturdy, height‑adjustable base that stays under 30 inches while providing a reinforced, storage‑ready platform beneath the desk surface. You’ll use the 2 ft × 28″ boards as the main legs and the 12 × 28″ pieces as the lower shelves, then slide the 24‑inch wide center support—cut from 4 ft × 12″ and reinforced with a white pine strip—into the middle. Tighten each screw to ensure rigidity, and you’ll have a compact, functional foundation that fits many Desk Ideas. Align pilot holes before driving screws. Use the center support as a hidden shelf for cables or décor. Verify that the overall height stays under 30 inches for chair clearance, and consider integrating a cable‑management tray on the underside for clean organization center support.
Install Shelf or Risers for Monitors and Accessories
A sturdy shelf or risers give you dedicated space for monitors and accessories while keeping the desktop clear. To maximize protection and reuse, consider using modular storage that aligns with the 110+ sleeved card capacity guidance and 2.5–3.3 inch square container sizing for compact expansion growth planning.
Add a Keyboard Tray and Hide Your Cables
Pick a pull‑out tray that fits snugly under your desktop and pre‑drill its mounting holes for a flush, wobble‑free fit.
Plan your wire routes first, then cut channels or install grommets and run a simple cable spine or clips along the leg to hide power and data cords.
Label the cables, separate power from signal, and secure any excess with Velcro ties or a small cable box for a clean look.
Tray Installation Tips
Choosing a pull‑out keyboard tray that’s wide enough and adjustable lets you slide it under the desk while keeping the under‑mounting setup aligned. First, measure the desk depth and ensure the tray’s travel range won’t hit the legs. Next, drill discreet access holes at the back edge, grommet them to protect cables, and route power and data lines through the tray’s underside. Secure Velcro wraps and clips to keep cords tidy, preserving clean desk organization. Finally, test the tray’s glide before tightening all fasteners. Use a sturdy mounting bracket that supports the tray’s weight. Align the tray’s cable channels with existing desk cutouts. Add a removable panel to hide power strips and USB hubs. Cable Size Compatibility Across Clips
Cable Management Solutions
Ever wondered how to keep your gaming desk tidy while still enjoying a full‑size keyboard? Slide a pull‑out keyboard tray under the desk surface; it frees the main workspace and lets you type comfortably.
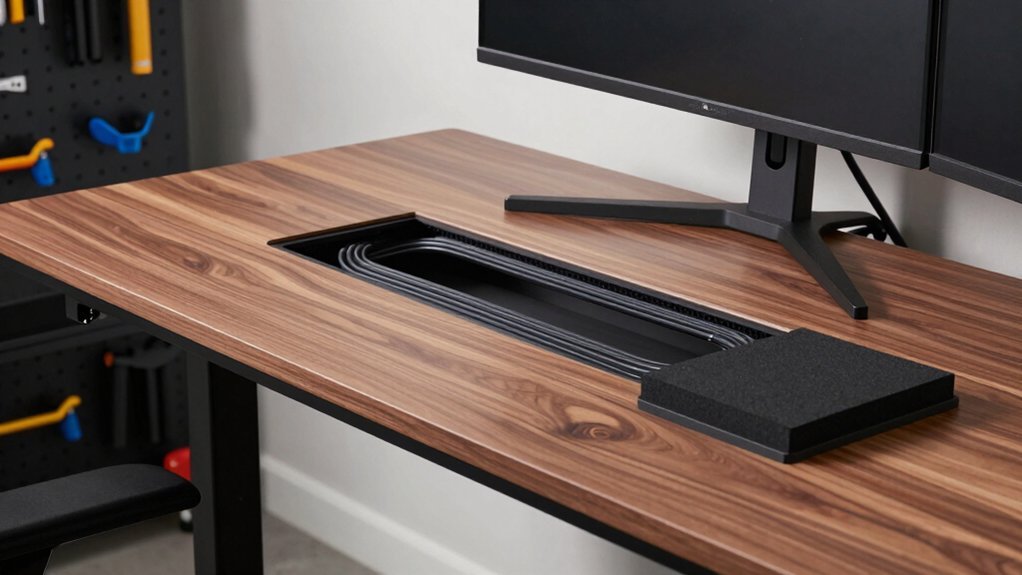
While assembling, plan cable management routes in steps 8‑9, directing power, data, and water‑cooling lines behind dedicated compartments.
Cut a hidden trough along the desk underside and install root‑recessed grommets to guide cables from the motherboard, PSU, and peripherals.
Add a custom power/reset switch for quick access and reduced clutter.
Label high‑power cables (GPU, PSU) separately from low‑power peripherals to avoid interference and simplify future maintenance.
This organized approach keeps airflow clear, looks sleek, and makes upgrades a breeze.
Sand, Paint, or Varnish the Desk Surface
You’ll start by sanding the surface with progressively finer grits to smooth out imperfections and open the wood for better adhesion.
Then decide whether paint, stain, or clear varnish best matches the look and protection you want.
Finally, apply the chosen finish in thin, even coats, sanding lightly between layers to keep the surface flawless.
Choose Surface Preparation Techniques
Which surface prep will give your desk the smooth, lasting finish you want? Start with sandpapering to erase imperfections, then decide whether paint or varnish fits your style and durability needs. A clean, sealed base prevents moisture and ensures even coverage, while proper lighting coordination can enhance the final look.
- Sand: Begin with medium‑grit (120‑150) and finish with fine‑grit (220) for a glass‑smooth top.
- Paint: Apply 2‑3 coats, waiting 2‑4 hours between coats and letting the piece cure 24 hours before use.
- Varnish: Choose polyurethane or polycrylic, spread thin layers with a cloth or brush, and sand lightly between coats for a glossy or satin finish.
Select Finish Type Wisely
Looking to achieve a durable, eye‑catching surface, start by sanding the desk evenly with medium‑grit paper, then finish with fine‑grit for a glass‑smooth base before deciding between paint, varnish, or polyurethane. You’ll want a finish that matches both aesthetics and usage. Paint adds bold color, while varnish preserves the natural grain and offers a subtle sheen. Polyurethane gives the toughest protection but can mask wood texture. Choose based on how much you value visual warmth versus resistance to wear.
| Finish | Best For |
|---|---|
| Paint | Colorful, custom looks |
| Varnish | Showcasing wood grain |
| Polyurethane | Maximum durability |
Apply 2‑3 light coats, let each dry, and sand lightly between layers for a flawless, flush result. Wear a mask, ventilate, and protect your workspace.
Apply Protective Coating Carefully
Ready to protect your new gaming desk? First, sand the surface thoroughly until it feels smooth; this removes imperfections and gives the paint finish a solid grip. Next, decide whether you’ll spray, brush, or roll on a matte polyurethane or clearcoat, and plan for at least two coats with proper drying time between each. Finally, set up a tarp‑covered work area, keep the spray nozzle 8–12 inches away, and move in steady back‑and‑forth strokes for an even coat.
- Sand to create a flawless base for any paint finish.
- Apply two clearcoat layers, allowing full drying per product instructions.
- Use a tarp, maintain spray distance, and move the can steadily for uniform coverage.
Assemble All Parts, Test Ergonomics, and Make Final Tweaks
Once you’ve tightened every screw and aligned the center support, step back and check the desk’s ergonomics: make sure the overall height stays under 30 inches so your chair fits comfortably, verify that the keyboard tray clears the desk surface, and run a quick cable‑management test before making any final adjustments.
Next, attach the two 2 ft × 28 in pieces and the two 12 × 28 in side panels, then slide the adjustable center piece into place, confirming the 24‑inch width and 12‑inch side extensions match.
Add the 4 ft × 12 in center support and the extra white‑pine brace for rigidity, referencing the visual guide for alignment.
Secure the 8 ft × 2 ft top base, double‑check all screws, and finally, fit the repurposed PC frame components, ensuring the keyboard tray and cable routes stay clear. This Desk build finalizes your compact gaming workstation.
Frequently Asked Questions
Can I Use a Reclaimed Pallet for the Desk Surface?
Yes, you can use a reclaimed pallet for the desk surface, but sand it smooth, seal it to prevent splinters and moisture, and reinforce it with brackets or a sturdy frame for durability.
How Many Weight Can the DIY Desk Support?
You can support roughly 150 – 200 pounds if you use sturdy plywood, reinforce the frame with metal brackets, and space the legs evenly; avoid exceeding that limit to keep the desk safe.
Do I Need a Special Drill for Hardwood Legs?
You don’t need a special drill; a standard corded or cordless drill with a sharp, high‑speed steel bit works fine on hardwood legs. Just keep the speed moderate and apply steady pressure.
What’s the Best Way to Attach Cable Management Clips?
You should screw the clips into pre‑drilled pilot holes, using a short wood‑screw that fits the clip’s base. Tighten just enough to hold the cable without cracking the desk surface.
Can the Desk Height Be Made Height-Adjustable?
Yes, you can make the desk height‑adjustable by installing a linear actuator or pneumatic lift, attaching it to the frame with sturdy brackets, and wiring a simple switch for smooth, on‑demand elevation.
In Summary
Now the desk’s assembled, step back and test its height, stability, and cable management. Adjust the legs or support if needed, then enjoy the sleek, personalized workspace you built yourself. With the right size, sturdy materials, and thoughtful accessories, your DIY gaming desk will boost comfort and performance for countless gaming sessions.


Leave a Reply