
Start with two filtered bottom‑intake fans and a rear exhaust fan, then add a side intake if temps rise, keeping the intake‑to‑exhaust ratio around 5 : 2 for positive pressure. Mount intakes at the front‑bottom or side and the exhaust at the rear (or top) to let warm air exit straight. Choose 140 mm fans with 1.0–1.5 mm H₂O static pressure and low‑resistance mesh filters. Set intake fans low (30‑40 % idle) and raise the rear exhaust slightly higher to maintain pressure. Fine‑tune PWM curves in 5‑10 % steps, prioritizing intake speed for cooling while keeping noise low. Follow these basics and you’ll discover deeper tricks for optimal airflow.
What Intake‑Exhaust Ratio Gives the Best Cooling for a Budget Gaming PC?
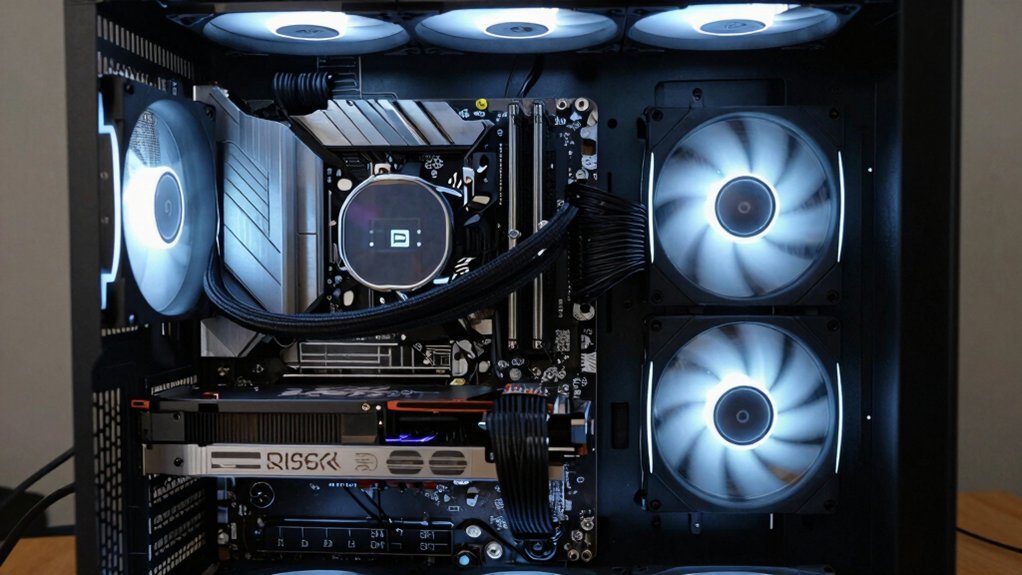
How many intake fans should you pair with your exhausts to keep a budget gaming PC cool without drowning in noise? You’ll find that a 5i/2e (five intake, two exhaust) ratio often hits the sweet spot.
Start with two bottom‑front intakes, then add a side intake if you need more airflow. Keep a rear exhaust modest—one 120 mm fan at a lower RPM usually suffices. This setup creates positive pressure, pushing fresh air through the front and side while dust‑laden air exits the back, reducing dust buildup. By fine‑tuning fan speeds, you maintain strong cooling for the CPU and GPU without cranking noise.
If temperatures still climb, add a second rear exhaust, but keep the intake count higher to preserve that positive‑pressure advantage. Positive pressure helps minimize dust intrusion while maintaining steady cooling performance across components.
Why You Should Aim for Positive Pressure (Even on a Tight Budget)
You’ll keep dust out and boost cooling efficiency by setting up positive pressure, even if you’re watching your budget. With a few extra intake fans you can push air through filters and force dust out of gaps, so you won’t need a mountain of fans to stay clean. This simple setup lets you maintain performance while spending less on hardware. Heat Ventilation Design helps ensure proper airflow and stability in compact, budget-conscious stands.
Dust Keeps Dust Out
Ever wonder why a modest positive pressure setup can keep dust at bay without breaking the bank? When intake airflow exceeds exhaust airflow, you push air out through any case leaks instead of letting dust be drawn in. Adding an extra intake fan or using a higher‑ratio intake‑to‑exhaust configuration supplies cleaner outside air continuously, so dust stays outside. If you pull air from the bottom, floor particles can sneak in, so fit a dust filter on each bottom intake to preserve pressure without adding contamination. Design your case so air exits through designated vents, not random gaps. In dusty rooms, even a slight positive pressure dramatically reduces dust infiltration while still delivering adequate cooling. This approach aligns with the idea of using multiple, strategically positioned airflow paths and robust surge protections to maintain stable power delivery in high-demand gaming setups. outlet layout and careful component placement help sustain positive pressure while supporting cooling and safety.
Improves Cooling Efficiency
Why settle for mediocre temps when a modest positive‑pressure setup can slash component heat without extra spend? By letting intake airflow exceed exhaust, you push fresh air through the case and force hot air out through gaps, keeping temperatures down. This approach also benefits from using simple, durable components like bottom or side intakes paired with a rear exhaust for reliable positive pressure pressure balance. Prioritize bottom or side intakes and pair them with a rear exhaust; this arrangement creates positive pressure and improves overall airflow. Add cheap intake filters to bottom fans to block dust while preserving the pressure advantage.
Start with two bottom intakes, monitor CPU and GPU temps, and tweak fan speeds if needed—no complex curves required. You’ll see cooler components, reduced thermal throttling, and a cleaner interior, all without buying extra fans or expensive cooling kits.
Requires Fewer Fans
Even with a modest budget, you can keep temperatures low by using fewer fans while still maintaining positive pressure. By favoring more intake than exhaust, you steer air out through gaps, limiting dust ingress. Start with two side or bottom intake fans and one rear exhaust fan; if temps climb, add another intake before adding another exhaust. Lower RPMs keep noise down and power cheap, yet the net airflow stays positive, protecting components and reducing filter changes. Surface Compatibility helps ensure easy removal and reuse of clips when adjusting setups.
Where Should Intake Fans Be Mounted for Maximum Cool‑Air Delivery?
You’ll get the most cooling when you mount intake fans at the bottom of the case, letting fresh air rise directly onto the CPU and GPU.
Side fans can help boost airflow, but they work best as a supplement to the bottom intakes rather than a sole source.
Keep the intake placement balanced with rear or top exhausts to maintain positive pressure and keep dust out.
Bottom Intake Placement
Where should you mount intake fans for the coolest airflow? Place them at the bottom of the case, directly drawing fresh air from the floor. This creates positive pressure, pushing dust out through exhausts while delivering cool air straight to GPUs and CPUs. Use a filter on each intake to block floor debris, and pair two bottom intakes with rear or top exhausts for balanced flow. Keep top exhausts unobstructed; otherwise, bottom intake effectiveness drops and recirculation rises. Aim for a slight surplus of intake airflow over exhaust to maintain positive pressure without over‑pressurizing the chassis. Bottom intake efficiency improves when paired with managed airflow, including dust filters and balanced exhaust placement to optimize cooling performance. Bottom intake efficiency relies on clean filters and proper placement to sustain positive pressure and prevent dust buildup.
Side Intake Advantages
Why not mount intake fans on the side panel to deliver cool air straight to the GPU and motherboard? A side intake pulls fresh air directly into the case midsection, creating positive pressure that complements rear and top exhausts. You’ll notice cooler component temps because the airflow reaches the GPU and motherboard without having to travel past other heat sources.
Pair a side intake with bottom or rear exhaust to balance pressure and keep dust out; a filter on the side vent mitigates floor‑borne particles.
The design of your case matters—ensure the side panel has enough clearance and a removable filter.
Exhaust Balance Considerations
Ever wondered how to position intake fans for optimal cool‑air delivery while keeping exhaust balanced? You’ll want to maximize fresh airflow without upsetting exhaust balance, so follow these steps.
- Mount intake fans on the bottom or side of the case. Bottom mounts pull cool air straight up, while side mounts feed it directly to the GPU and CPU. Use filters to keep floor dust out.
- Pair the intake with a rear or top exhaust. Rear exhaust pushes warm air away from the motherboard, and a top exhaust adds a natural rise effect.
- Aim for slightly more intake than exhaust. A positive‑pressure setup reduces dust infiltration and keeps the system cooler overall.
This configuration delivers strong cool‑air flow, maintains exhaust balance, and works well with radiators and AIO coolers. Fresh-air helps maximize cooling efficiency by ensuring more air enters than leaves, supporting high‑performance components.
Where Should Exhaust Fans Be Mounted to Complete Your Intake‑Exhaust Ratio?
Typically, you’ll mount the exhaust fan at the rear of the case to create a front‑to‑back airflow path that efficiently expels warm air. Rear exhaust fans give you a reliable, straight‑line exit for heat, letting intake fans on the bottom or side pull cool air in. If you need extra airflow, consider a top‑rear fan; warm air rises naturally, so a top exhaust works well without disturbing the front‑to‑back flow. Keep front and side fans as intake only—using them for exhaust can upset the pressure balance and draw dust through gaps. By fixing rear exhaust and tweaking bottom or side intakes, you maintain positive pressure, avoid negative‑pressure dust issues, and achieve the intended intake‑exhaust ratio.
Pick Affordable Fans & Filters That Still Perform
Looking for budget‑friendly fans that still move air efficiently? You can keep dust under control and maintain strong airflow without breaking the bank. Choose intake fans that hit 1.0–1.5 mm H₂O static pressure and pair them with low‑resistance mesh filters that clean easily. Position them at the front‑bottom or side‑intake while routing hot air to a rear or top exhaust, preserving a net positive pressure.
- Two mid‑range intake fans – add clean, easy‑to‑wash filters.
- One rear exhaust – removes heat without adding noise.
- Monitor temps – if they climb, add another intake with a filter.
Stick to this setup, regularly clear the filters, and you’ll get solid cooling performance on a tight budget.
How to Set Simple Fan Curves for Quiet Yet Effective Cooling
When you start tweaking fan curves, begin with low RPMs on the intake fans and a slightly higher setting on the exhausts to keep a modest positive pressure without raising noise. Set the intake curve at roughly 30–40 % duty at idle, then move to 60–70 % under load, adjusting in 5–10 % steps to feel the temperature drop versus sound level.
Prioritize raising the intake fan speed before the exhaust when you need more cooling; fresh air cools components more efficiently. For a CPU‑IR radiator, keep front intake at a modest curve (40–60 %) and rear or top exhaust at an equal or slightly higher curve to push air through the radiator.
Monitor CPU, GPU, and motherboard temps, aiming for a stable, quiet point under 70–75 °C while preserving positive pressure to limit dust.
How to Keep Noise Low While Maintaining the Ratio?

Want to keep your PC quiet while preserving a healthy intake‑to‑exhaust balance? Start by choosing a fan setup with more intake than exhaust, using larger 140 mm fans at low RPM to hit the same airflow with less noise. Then apply a staggered fan curve: keep intakes at a modest baseline and only boost the rear exhaust when temps climb. Finally, fine‑tune the PWM profile for smooth ramps and avoid sudden spikes.
Balanced intake‑exhaust with large, low‑RPM fans and staggered PWM curves keeps PC quiet and cool.
- Install quiet‑rated, balanced‑bearing fans on front/top intakes and a single rear exhaust.
- Set BIOS fan curves to 20‑60 % steady, then gradual slope as temps rise.
- Monitor temps, adjusting RPMs to stay within 5‑10 °C of target while minimizing noise.
Troubleshooting Intake‑Exhaust Imbalance on a Budget Gaming PC
Why does your budget PC feel hot despite a few intake fans? Start with two bottom‑side intake fans to create positive pressure, then check temps before adding more exhaust. Keep intake count low; excess intakes raise dust risk if filters are weak. Use the rear fan as the primary exhaust because hot air rises and aligns with rear and top vents. When you add a top fan, make it an exhaust, not an intake, and test a 2 front intake + 1 top exhaust + rear exhaust combo. Swap one component at a time—swap a top intake for a top exhaust—and compare the Celsius delta to see which change cools your system.
| Position | Fan Type | Recommended Action |
|---|---|---|
| Bottom | intake | 2 fans, positive pressure |
| Front | intake | 1‑2 fans, balanced airflow |
| Top | exhaust | 1 fan, avoid front radiator conflict |
| Rear | exhaust | Primary exhaust, always on |
Frequently Asked Questions
How to Setup PC Fans for Intake and Exhaust?
You’ll mount bottom or side fans as intakes, rear or top fans as exhausts, start with two bottom intakes, add a rear exhaust, then test temps and adjust with extra exhaust or intake fans if needed.
How to Know if a Fan Is Set to Intake or Exhaust?
Check the fan’s arrow: if it points into the case, it’s intake; if it points outward, it’s exhaust. Look at blade rotation—toward the interior means intake, toward the exterior means exhaust.
What Is the Best Fan Layout for Airflow?
You should use more intake than exhaust, placing two bottom intakes and a rear exhaust, then add side or top intakes as needed, keeping positive pressure to push dust out through exhaust openings.
Should You Have the Same Amount of Intake and Exhaust Fans?
You don’t need equal numbers; aim for slightly more intake than exhaust to keep positive pressure, improve cooling, and avoid dust, but adjust based on temperature and noise results.
In Summary
By balancing intake and exhaust, you’ll keep your budget gaming PC cool without breaking the bank. Aim for a slight positive pressure, mount intakes where fresh air can flow freely, and place exhausts to pull hot air out efficiently. Choose affordable, quality fans and filters, set gentle curves, and keep noise low. If the temps spike, tweak the ratio or fan speeds, and you’ll stay gaming smoothly.


