You can turn a regular table into a height‑adjustable desk by adding a sturdy frame, cable‑management channels, and a manual or electric lift; repurpose an IKEA ladder with metal brackets and cross‑bracing for a quick stand; build a crank‑lift using 3D‑printed gears and a threaded rod; install a linear actuator with a DPDT switch for motorized motion; use a sawhorse‑based riser with a counter‑weight pulley; create a wall‑mounted fold‑down desk with pivot hinges; add modular L‑shaped extensions for gaming stations; and integrate cable routing with grommets and zip ties. Keep the steps simple and the finish clean, and you’ll discover even more ideas ahead.
Plan Your DIY Standing‑Desk Project
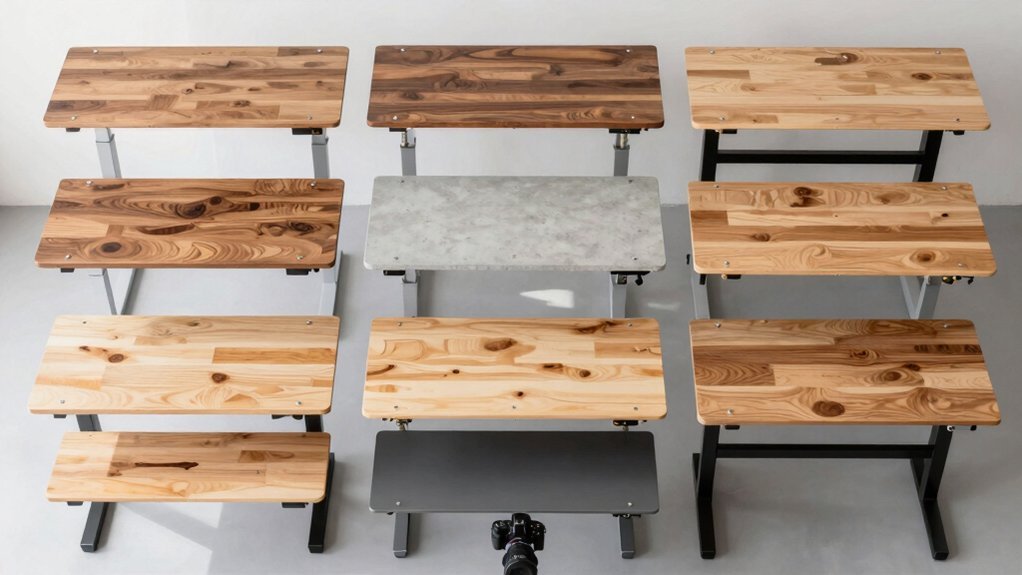
Where do you start? Begin with planning: sketch your workspace, mark the desk’s footprint, and decide how tall you need to go. Choose a tabletop that fits the room’s style—oak, pine, or acacia—consider thickness and edge profile for durability and aesthetics.
Begin with planning: sketch workspace, mark footprint, decide height, choose fitting tabletop material.
Next, pick an adjustable frame that matches the tabletop’s dimensions and load capacity; verify whether you prefer manual or electric lift. Gather tools, fasteners, and any finish you’ll apply.
As you attach the frame to the underside, integrate cable management channels or clips to keep cords tidy and out of the way.
Follow the frame’s instructions step‑by‑step, ensuring each bolt tightens securely so the desk stays stable throughout height changes. cable management
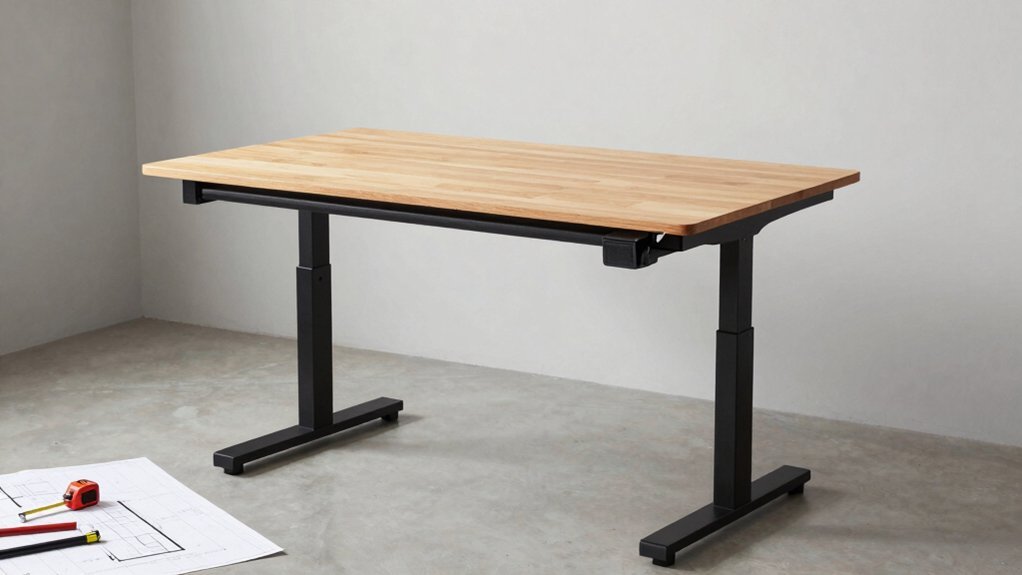
Convert a Simple Table Into a DIY Desk
Ready to turn a regular table into a functional standing desk? First, pick a height‑adjustable frame that matches your tabletop’s dimensions and load rating—most frames handle 18–25 mm thick surfaces. Secure the tabletop to the frame with the supplied screws, tightening until the base feels rock‑solid. Decide between a manual frame, which you raise by hand, or an electric one that shifts with a button press; electric models need a power source and compatible controller. Before tightening everything, run cable‑management clips or channels under the tabletop so cords stay tidy as you move. After mounting, test the full height range, confirming smooth motion and zero wobble. Once satisfied, finish edges or apply a protective coat, then enjoy your DIY height‑adjustable desk. cable management
Build a Crank‑Lift Desk With 3‑D‑Printed Gears
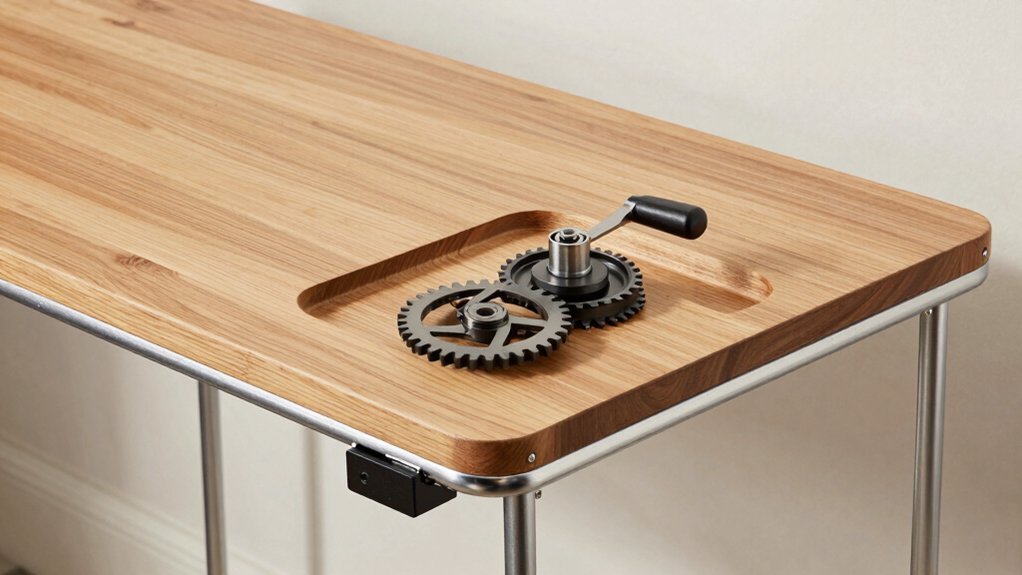
Ever wondered how to add height‑adjustability to your desk without wiring or motors? You can build a crank lift using 3D‑printed gears that turn a simple hand crank into smooth vertical motion. Print a pair of coarse‑tooth gears that mesh with a threaded rod or rack‑and‑pinion, then attach the rod to sturdy under‑desk lifting arms. When you turn the crank, the gear train converts rotation into linear lift, giving you quick height adjustment. Fine‑tooth gears near the bottom let you fine‑tune the position, while tight tolerances keep backlash minimal under loads of 20–40 kg per side. The extendable frame keeps the arms aligned, ensuring stable support as you raise or lower the work surface. This quiet, reliable system offers a fully manual, motor‑free solution for a height‑adjustable desk. Kits can provide complementary cable management solutions to keep wires organized as you reposition the desk.
Install a DIY Linear‑Actuator Frame for Motorized Height
After the crank‑lift gears give you a smooth manual lift, the motorized option swaps the hand crank for two 20‑inch drawer slides that glide on vertical columns mounted to each side of the desk. You’ll first attach the columns to the desk side walls with 1‑inch wood screws, making sure the slides align perfectly to avoid binding. Carve mortises into each column with a chisel, creating a sturdy joinery framework for the lifting arms. Mount the arms under the desk frame, leaving a measured clearance between the actuator bottom and the floor to set the mounting height. Wire the linear actuator in parallel, connect it to a DPDT momentary rocker switch, and power it with a dedicated PSU. Design the control panel in Fusion 360, 3D‑print it, and secure it to the desk frame for a clean, height‑adjustable DIY solution. This approach can pair well with a modular, magnetic cooling-style attachment system to keep electronic components accessible without obstructing motion, similar to flexible mounting options found in compact, clip‑on devices like magnetic attachments.
Repurpose an IKEA Ladder as a Sturdy Adjustable Stand
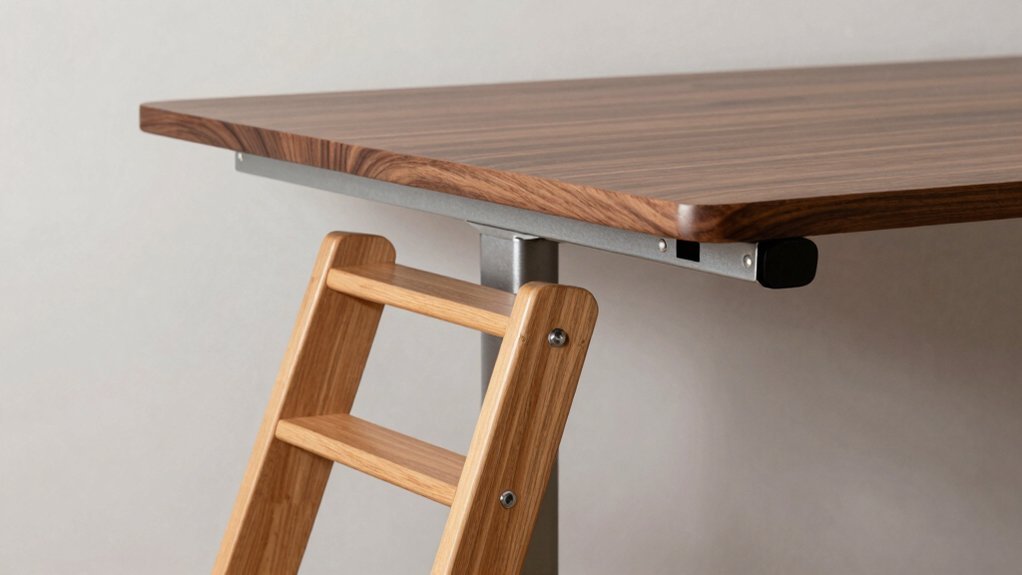
If you have an IKEA ladder lying around, you can turn it into a solid, adjustable stand for a DIY height‑adjustable desk.
First, position the ladder on a sturdy base—attach non‑slip feet or a cork pad to protect the floor and spread the load.
Place the ladder on a sturdy base, adding non‑slip feet or a cork pad to protect the floor and distribute weight.
Secure the ladder’s legs to the base with metal brackets, then reinforce each joint with extra screws or angle braces to stop wobble when you raise or lower the tabletop.
Use the rungs as mounting points for a desktop plate or a simple lifting mechanism; the ladder’s width gives ample space for a large work surface.
Finally, check the load capacity and add cross‑bracing if you’ll be heavy equipment, ensuring your repurposed IKEA ladder stands firm as an adjustable stand. Fire‑resistant materials
Secure a Ladder‑Based Stand With Brackets and Locks
The ladder you’ve already anchored becomes a reliable frame once you add sturdy brackets and lock‑in mechanisms.
First, attach ladder brackets to each side of the top rail, aligning the pre‑drilled holes with the desk surface. Use heavy‑duty bolts and lock nuts to prevent loosening as you raise or lower the height.
Next, install locking mechanisms—quick‑release pins or cam locks—at the joints where the legs meet the brackets; these keep the frame rigid and guarantee height stability during work.
Reinforce the assembly with cross braces that run diagonally between opposite legs; they add torsional stiffness and eliminate wobble.
Finally, tighten all fasteners, check that the desk sits level, and test the locks before daily use. Brackets and lock‑in mechanisms
Use a Sawhorse‑Based Riser With Counter‑Weight System
You’ll start by positioning the sawhorses on a level surface and adding cross‑bracing to keep them steady.
Then, attach the counter‑weight to the underside of the platform, making sure it sits close to the center of mass for smooth lifting.
Finally, snap the removable top onto the frames and test the latch to confirm the desk stays secure at any height.
Additionally, verify device compatibility with any integrated hardware or accessories to ensure stable operation across different setups Device Compatibility.
Sawhorse Stability Tips
Wondering how to keep a sawhorse‑based riser steady while you raise and lower your desk? First, lock the sawhorse stability by attaching sturdy brackets and cross‑bracing to the legs. Use a wide, rigid top—like a plywood panel—to spread the load evenly and prevent wobble as you adjust the height. Screw‑fastened crossbars or L‑brackets under the tabletop improve load distribution and reduce flex. Add non‑slip foot pads to each leg for better floor grip, especially when the desk riser carries monitors or a laptop. Finally, check that the height range aligns with ergonomic sitting‑to‑standing transitions, and tighten all fasteners before each use. This simple setup keeps the riser steady and safe.
Counter‑Weight Placement Guide
Where should you position the counter‑weight for optimal balance on a sawhorse‑based riser? Place it directly opposite the lifting mechanism, aligning its center of mass with the vertical column’s midpoint. This arrangement creates a balanced moment arm, easing motor strain and boosting stability during height changes.
Secure the counter‑weight with sturdy bolts and brackets, then attach matched drawer slides or linear guides to the column for smooth, binding‑free motion.
Test the full extension under typical desk loads; if the platform tilts, shift the weight slightly inward or add mass until you achieve near‑neutral static balance.
A well‑tuned counter‑weight not only steadies the riser but also prolongs the lifting mechanism’s lifespan.
Easy Assembly Steps
How do you get a sturdy, adjustable desk up and running in minutes? First, line up two sawhorses the length of your tabletop and bolt a rigid crossbar across them to lock the legs in place. Next, attach the counter‑weight pulley system to the crossbar, threading a weight that balances the tabletop’s mass. Finally, secure the top with screws and corner brackets, then add a quick‑release latch so you can lock the desk at any height.
- Position sawhorses, install crossbar, align legs.
- Mount pulley, thread counter‑weight, test balance.
- Fasten tabletop, add corner brackets, install lock.
Craft a Fold‑Down Wall‑Mounted Desk With Pivot Hinge
Ever need extra work space without sacrificing floor area? A fold‑down desk with a pivot hinge gives you a wall‑mounted, space‑saving workstation that tucks flat when not in use.
A wall‑mounted fold‑down desk saves floor space while providing a sturdy, adjustable workstation.
First, locate studs and mark a sturdy mounting point. Attach a reinforced pivot hinge to a plywood or MDF top, then secure the hinge to a vertical support arm that locks when the desk is deployed.
Use a small lip on the edge to keep items from sliding, and consider a soft‑close mechanism for quiet folding. Ensure the arm can bear the load by adding a brace or using heavy‑duty hardware.
When you pull the desk down, the hinge swings the surface to a comfortable seated or standing height, then folds flush against the wall, preserving precious floor space.
Add Cable Management to a DIY Standing‑Desk Converter
Why bother with tangled cords when you can keep your DIY standing‑desk converter tidy and safe? Start by mapping cable routes before you bolt the frame. Use Yaasa’s drilling template to cut precise holes, then feed wires through under‑d channels channels or a grommet. Keep slack to a minimum, then zip ties or Velcro straps to bundle excess length. Position power outlets placement under the tabletop or along the frame so cords stay hidden while you adjust height. This simple cable management plan reduces snag hazards, protects devices from tugging, and gives your adjustable-height desk a clean, professional look.
- Plan routes and drill holes with Yaasa template
- Route wires through under‑desk channels or grommets
- Secure bundles with zip ties/Velcro and place power outlets strategically
Design a Modular L‑Shaped Gaming Station
After sorting out cable routes for your converter, you can extend that organization into a full‑scale L‑shaped gaming station. Use a modular, adjustable‑height frame that spans two walls, giving you a standing surface on one leg and a tall seating area on the other. Sync the lift mechanisms so both workspaces rise together, preserving ergonomic posture. Add integrated shelves or drawers along the longer edge to stash controllers and games, keeping the main area clear. Choose laminate or wood‑veneer finishes that match your room’s palette and hold up to heavy use.
| Component | Feature |
|---|---|
| Frame | Modular, adjustable‑height |
| Tabletops | Durable, easy‑clean surface |
| Shelves | Integrated storage on outer leg |
| Cable System | Concealed routing for monitors |
| Finish | Laminate or wood veneer for aesthetics |
Frequently Asked Questions
How to Make Your Own Height Adjustable Desk?
You’ll start by selecting an extendable frame that fits your tabletop, then attach the top with bolts, install a motor or crank mechanism, run cables through a tray, and test height limits for ergonomics.
What Is the 20/8-2 Rule for Standing Desks?
You follow the 20/8‑2 rule by spending 20 % of your workday standing, 80 % sitting, and allowing a two‑minute pause to adjust the desk height and screen angle each time you switch.
Is It Cheaper to Build Your Own Desk?
Yes, you’ll usually spend less building your own desk—especially if you start with a cheap converter or repurpose a refurbished frame—because you avoid the premium markup on pre‑assembled standing desks.
What Can I Use to Raise the Height of My Desk?
You can put a standing‑desk converter on it, attach under‑desk support legs, add a sturdy riser block, or install a motorized frame. All options raise height quickly, and for different budgets.
In Summary
Now you’ve got a toolbox of DIY options, from crank‑lift mechanisms to repurposed ladders, so you can craft a height‑adjustable desk that fits your space and budget. Pick the design that matches your skill level, assemble it with confidence, and enjoy a healthier, more productive work setup—no pricey commercial desk required.


Leave a Reply