Pick two budget‑friendly IPS monitors with the same native resolution (1080p or 1440p) and size, then grab cheap HDMI 2.0 or DisplayPort 1.2 cables that support that spec. Align the screens physically and in Windows so the edges match, set each to native resolution and tweak per‑monitor scaling for uniform UI size, and use PowerToys FancyZones or DisplayFusion for free window snapping. Adjust brightness, color temperature, and refresh rate to look identical, and tidy cables with labels and a single power strip for a clean, energy‑smart desk. The next tips will show you how to lock the cursor in games and fine‑tune visual consistency.
Select Two Inexpensive Monitors With Matching Resolution
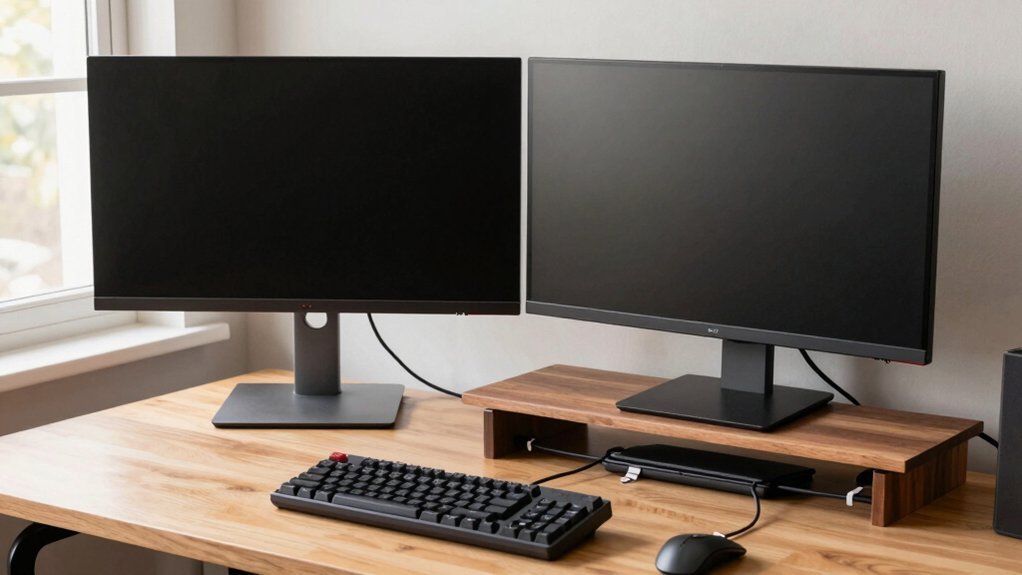
Looking for a budget-friendly dual‑monitor setup? Start by picking two budget monitors that share the same native resolution—1080p or 1440p works best—so windows glide across screens without scaling glitches. Match panel types, preferably IPS, to keep color and brightness consistent. Aim for identical screen sizes, like 24‑27 inches, to preserve pixel density and visual harmony. Scan for models such as the Lenovo D24‑40, often under $100–$200 each on sale, and verify they both offer the same connectivity, HDMI or DisplayPort. This ensures you can use a single cable type for each display, simplifying setup and maintaining stable dual‑monitor performance without extra adapters. Best Monitor Integration
Choose Cheap Cables That Still Deliver Full Speed
Pick affordable HDMI 2.0 or DisplayPort 1.2+ cables that match your monitors’ native resolution and refresh rate, and you’ll keep full bandwidth without breaking the bank. Make sure both ends use the same protocol and that the cable’s rating meets the required data rate to avoid bottlenecks. Certified USB‑C or Thunderbolt cables with video Alt Mode are also cheap, reliable options that prevent flicker and dropouts. HDMI 2.1 cables with 48Gbps bandwidth can also future-proof setups if you plan to upgrade to 4K at high refresh rates.
CQuality Cables, Low Cost
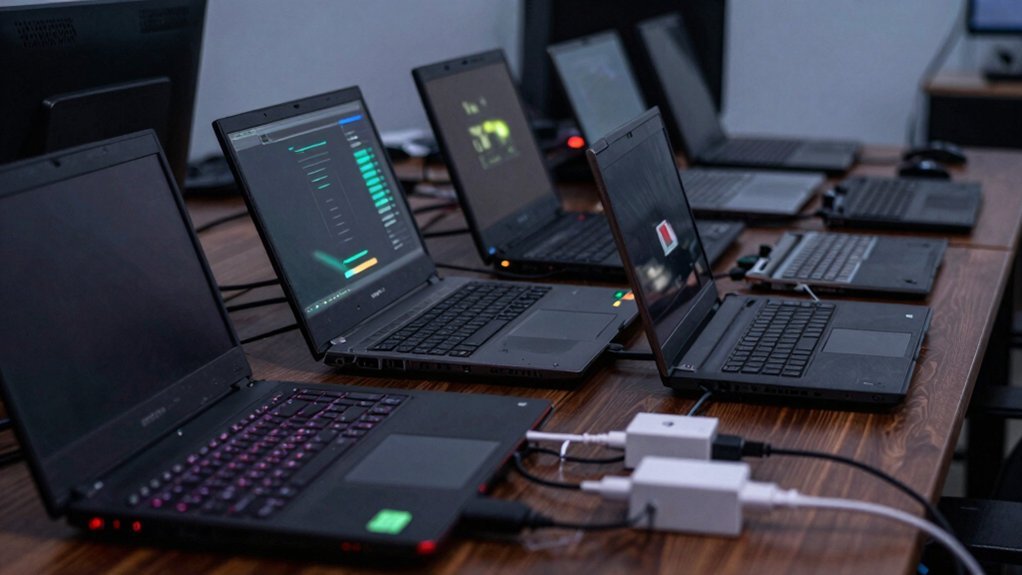
What cable you choose can make a huge difference in performance without breaking the bank. Pick HDMI, DisplayPort, or USB‑C cables that match your monitors and PC ports, and make sure they support your required resolution and refresh rate—4K @ 60 Hz or 1080p @ 60 Hz—without paying for extra features. Stick to reputable, budget‑friendly brands; many cables under $10–$15 reliably handle standard office refresh rates. Choose the shortest length that reaches your ports to cut signal loss and cost. Check each cable’s connectors, shielding, and fit before you buy. If you need to mix devices, use inexpensive adapters only when necessary, and prioritize direct cable matches to keep compatibility smooth and performance high. For pet‑proof setups, consider cables and sleeves that offer durable, split‑sleeve protection to minimize exposure and keep cords tidy Cable Protection.
Verify Bandwidth Compatibility
Even if you opt for budget‑friendly cables, you still need to confirm they can handle the bandwidth your monitors demand; check the cable’s rating—HDMI 2.0, DisplayPort 1.4, or USB‑C with DisplayPort Alt Mode—to ensure it supports the highest resolution and refresh rate in your setup.
Test each display at its native resolution before you connect them together, and verify that color, latency, and flicker‑free performance stay consistent. Ensure your budget PC case supports robust airflow and space for dual monitors by permitting ample GPU clearance and top‑mounted radiator options for cooler performance. GPU clearance
Mount Screens Ergonomically for a Cheap Dual Monitor Setup
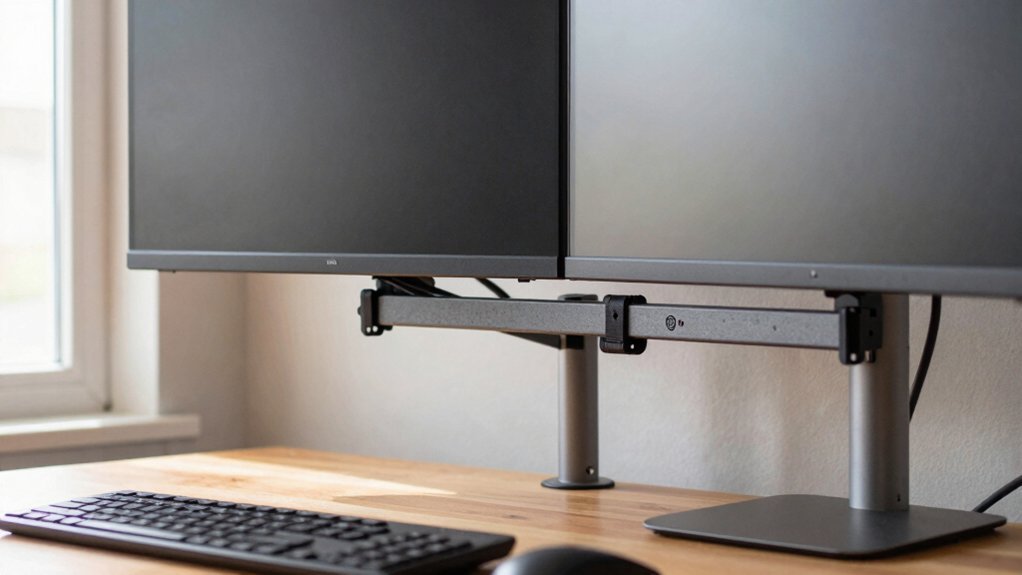
Ever wondered how to keep your workspace comfortable without splurging? Good ergonomics start with proper monitor mounting. Align the top edges of both screens so your desktop feels uniform and neck strain drops. Use adjustable arms or cheap stands to set each monitor at eye level; place the primary directly in front and the secondary slightly to the side, minimizing head turning. Keep cables neat with inexpensive mounts or sleeves, preventing clutter and accidental unplugging. Budget-friendly gear like budget gaming mice and affordable peripherals can complement a cost-efficient dual-monitor setup by boosting overall control and responsiveness onboard memory and easy customization for quick in-game and work transitions. When budgeting, pick two identical or very similar monitors to maintain consistent brightness, color, and scaling across your dual‑monitor setup. This cost‑effective approach gives you a professional, comfortable layout without breaking the bank.
Configure Windows Display Settings for Seamless Cursor Flow
You’ll first line up the monitor edges in Display Settings so the cursor slides naturally from one screen to the next. Then set each display to its native resolution and adjust scaling to keep text size consistent. Finally, enable the Extend desktop mode and lock the cursor to the combined workspace for seamless movement. Also, consider enabling RGB lighting and temperature displays on compatible devices to help monitor cooling and performance during extended gaming sessions power sources and connectivity.
Align Monitor Edges
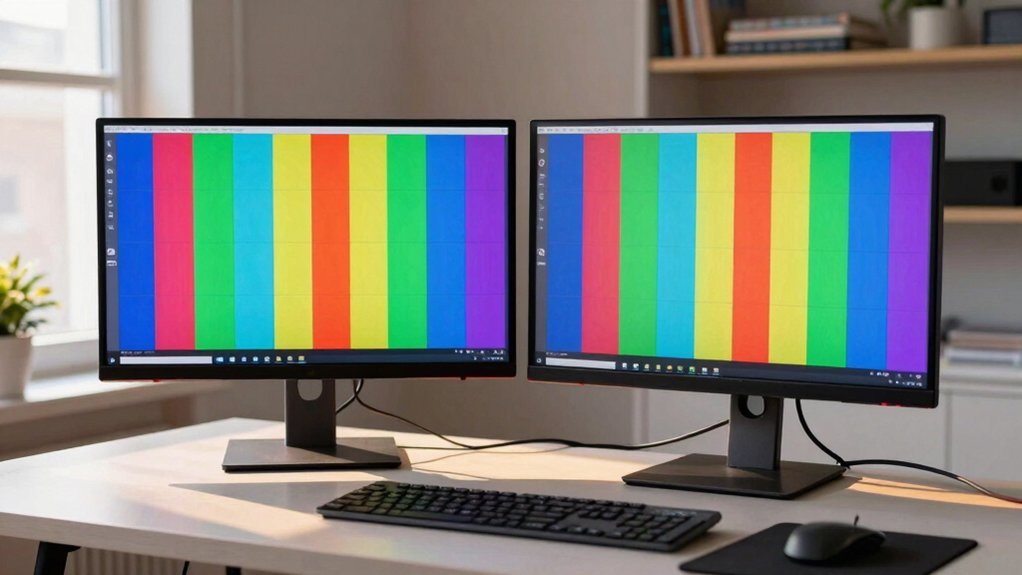
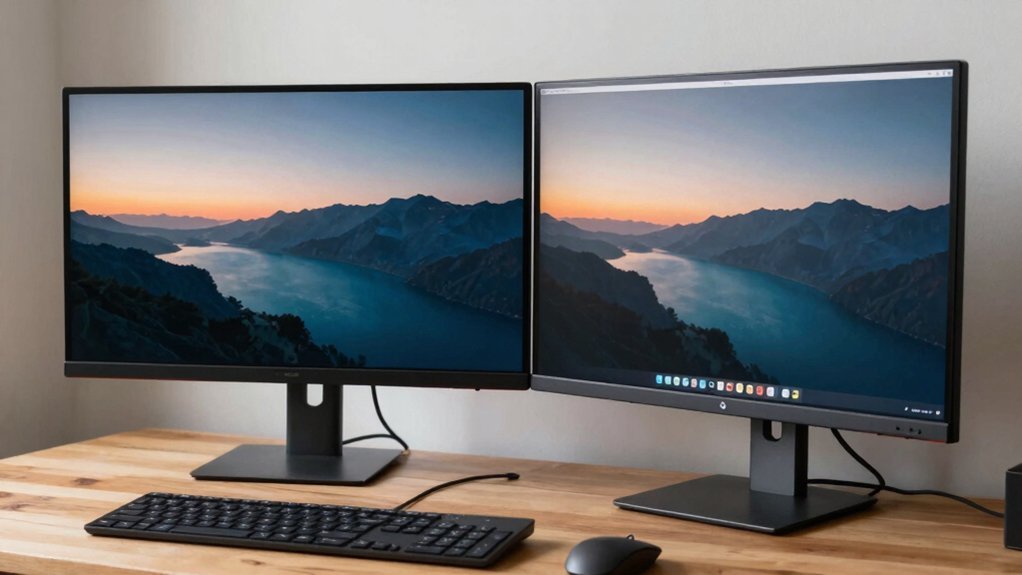
How can you make the cursor glide effortlessly from one screen to the next? In a dual monitor setup, open Display Settings and drag the monitor rectangles until their top edges line up perfectly. This monitor alignment eliminates dead zones that would otherwise snag cursor movement. Keep the on‑screen order matching the physical layout—left monitor on the left, right on the right—so the pointer travels straight across. Adjust per‑monitor scaling if needed, but focus first on the geometric alignment; a smooth seam means windows won’t jump when you drag them.
| Step | Action |
|---|---|
| 1 | Open Display Settings |
| 2 | Drag rectangles to match top edges |
| 3 | Verify left‑to‑right order matches reality |
Set Native Resolutions
After aligning the monitor edges, set each screen to its native resolution in Windows Display Settings. Doing this gives you pixel clarity and eliminates scaling jumps that make the cursor feel “stuck.” Open Settings → System → Display, click each monitor, and choose its native resolution from the drop‑down. Then use the Detect and Arrange tools to match physical layouts, ensuring the top edges line up perfectly. Finally, tweak per‑monitor scaling (125%–150% on 4K screens) so UI elements stay consistent across your monitors, which smooths cursor flow. Ensure you enable per‑monitor scaling for optimal clarity on high‑DPI displays and maintain accurate cursor alignment across screens.
- Choose native resolutions for both monitors.
- Apply matching scaling percentages per display.
- Verify alignment with the Detect tool before testing cursor movement.
Enable Cursor Lock
Ever found the cursor slipping onto a second screen mid‑game? You can stop that with Cursor Lock. First, download the utility and launch it. Click “Open Program,” browse to your game’s EXE, and let Cursor Lock create a shortcut that launches the game with the cursor confined to the game window. Place the shortcut on your desktop or start menu for quick access. When you Alt+Tab out, the lock releases, so you’ll need to relaunch or re‑activate the shortcut when you return.
Some titles need extra tweaks—follow the Cursor Lock tutorial to adjust compatibility settings. This simple step keeps the mouse where you want it, making your dual monitor or multi‑monitor setup far less distracting during intense play.
Align Resolutions and Scaling for Consistent Windows
Ever wondered why windows jump in size when you drag them between a 1080p monitor and a 4K display? The trick is to align resolution and scaling on each screen so UI elements stay the same size. In a dual monitor setup, set each monitor to its native resolution, then adjust per‑monitor scaling until the text and icons match. Position the screens in Display settings to mirror their physical layout, which smooths cursor travel and window movement.
Align resolution and scaling per monitor to keep windows consistent across different displays.
- Windows: open Settings → Display, set 1080p at 100% scaling, 4K at 125‑150% scaling.
- macOS: System Settings → Displays, pick “More Space” or “Larger Text” to sync UI size.
- Verify alignment by moving a window across screens; it should retain its dimensions without jumping.
Customize the Taskbar and Apply a Multi‑Monitor Wallpaper
You can pick which screen gets the primary taskbar or show icons on all monitors via the “Multiple displays” setting, then choose a span or cover wallpaper to make a single image stretch across both screens.
Tools like DisplayFusion let you switch wallpapers instantly with keyboard shortcuts and even dim the inactive monitor.
Just make sure your displays are correctly arranged in Windows so the taskbar anchors where you want and the image aligns perfectly across the bezel.
Taskbar Placement Options
Wonder how to keep your workflow smooth across two screens? In Windows 10/11 you can decide whether the taskbar stretches across multiple displays or stays on the primary monitor. Right‑click the taskbar, open Taskbar settings, and toggle Show taskbar on all displays. You can then pick “When using multiple displays” to show taskbar buttons only on the active screen or on every screen, letting you keep shortcuts where you need them most.
- Keep the taskbar on the primary monitor for a clean, single‑line look.
- Extend the taskbar to all displays for quick access on each screen.
- Choose per‑app placement so specific programs appear only on the monitor you use most.
Adjusting these options tailors your desktop to your workflow, eliminating clutter and boosting productivity.
Multi‑Monitor Wallpaper Setup
When you choose a single image that spans both monitors, the desktop instantly feels unified, and the taskbar can stay on the primary screen or appear on every display without breaking the visual flow. To set a multi‑monitor wallpaper, open Windows Personalize → Background and select “Span,” or on macOS go to Desktop & Screen Saver → Desktop and pick “Span.” Pick an ultrawide or dual‑monitor setup‑ that matches your resolution, avoiding seams at the edge. Sites like Dual Monitor Backgrounds and WallpaperFusion specialize in such images. If you prefer per‑monitor control, use DisplayFusion to assign each screen its own picture while keeping synchronized transitions. Finally, adjust Settings → Personalization → Taskbar to show the bar only on the active monitor or on all screens, reducing clutter and preserving the seamless look.
Quick Wallpaper Switching Shortcuts
Looking to swap your dual‑monitor backdrop in a flash? You can bind a key combo to a preset wallpaper set, then hit it and watch the scene change across both screens. First, grab a free tool like DisplayFusion; it lets you assign shortcuts for any image you’ve saved. Next, set Windows 11’s taskbar to “Show taskbar on all displays” so the shortcut bar stays visible on the correct monitor while you switch. Finally, source multi‑monitor‑ready images from WallpaperFusion or Dual Monitor Backgrounds to keep the visual flow seamless.
- Use DisplayFusion’s hotkey manager to map Ctrl + Alt + 1, 2, 3 to your favorite dual monitor wallpaper sets.
- Enable “Span” in Windows Personalize > Background so each image stretches across both screens.
- Choose images labeled “multi‑monitor WallpaperFusion” for perfect alignment without manual cropping.
Use Free Window‑Management Tools (PowerToys, DisplayFusion)
Ever tried juggling windows across two screens only to waste time dragging and resizing? PowerToys’ FancyZones lets you draw custom grids and snap apps with a single keystroke, so you instantly fill each monitor with the right layout. Use the built‑in shortcuts to switch zones without moving the mouse, cutting cross‑monitor drag time in half. DisplayFusion adds wallpaper control, per‑monitor taskbars, and automatic dimming of idle screens, keeping your workspace tidy and focused. Its free version already aligns windows, synchronizes taskbars, and lets you set different taskbar options per display. Together, these free or low‑cost tools turn a cheap dual‑monitor rig into a smooth, organized workstation without extra hardware.
Game‑Specific Cursor Lock to Stop Drifting Between Screens
A drifting cursor can ruin a gaming session on a dual‑monitor rig, but a simple lock utility keeps the pointer confined to the game window. You’ll create a shortcut that points to the game’s EXE inside the Cursor Lock interface, then launch the game through that shortcut. When the cursor tries to wander onto the second display, the tool snaps it back to the game window, letting you stay immersed. Remember that Alt+Tab exits the lock, so you may need to re‑enter it or use in‑game menus to regain control without minimizing.
- Set up a dedicated shortcut for each title.
- Assign a hotkey to toggle lock on/off quickly.
- Test compatibility; some games need extra tweaks due to anti‑cheat or fullscreen settings.
Fine‑Tune Brightness, Color, and Refresh Rate for Visual Unity
After locking the cursor to your game window, the next step is making the two screens look alike. Adjust each monitor’s built‑in brightness and color controls until the luminance feels even; if one is brighter, turn it down or disable HDR. Match color temperature (around 6500 K) and contrast so hues stay consistent across the pair. Set both displays to the same native resolution and similar scaling, and pick monitors with the same panel type—IPS works best—to keep color and brightness discrepancies minimal. Finally, lock the refresh rate to a common value (e.g., 60 Hz) to avoid jitter when windows glide between the two monitors.
| Setting | Monitor 1 | Monitor 2 |
|---|---|---|
| Brightness | 70 % | 68 % |
| Color Temp | 6500 K | 6500 K |
| Contrast | 80 % | 78 % |
| Resolution | 1920×1080 | 1920×1080 |
| Refresh Rate | 60 Hz | 60 Hz |
Organize Cables and Power Settings for a Tidy, Energy‑Efficient Desk
How can you keep your desk looking clean while cutting power waste? Start by using a single power strip and label each monitor’s cables. Route all cables along the back edge of the desk or under a monitor arm, and choose inexpensive, same‑length HDMI or DisplayPort cables to avoid slack. Enable power‑saving modes on both screens and set the power settings to auto‑sleep after 5–10 minutes of inactivity. This simple cable management and energy‑efficient setup reduces clutter and lowers your electricity bill.
Use one power strip, label cables, route them neatly, and enable auto‑sleep for a tidy, energy‑saving desk.
- Label cables and use one power strip for easy unplugging.
- Run cables behind the desk or under a monitor arm for a tidy look.
- Enable auto‑sleep power settings for optimal energy efficiency.
Frequently Asked Questions
Can I Use a TV as a Cheap Second Monitor?
Yes, you can hook a TV up as a budget second monitor; just connect it via HDMI or DisplayPort, set the resolution to match your desktop, and adjust scaling so windows fit comfortably.
Do I Need a Graphics Card Upgrade for Dual Monitors?
You probably don’t need a full upgrade if your existing GPU has two video outputs and can handle the combined resolution. Check its specs; if it’s older or low‑end, a modest new card will improve performance.
How to Prevent Screen Tearing Without a High‑Refresh Monitor?
You can stop screen tearing by enabling V‑Sync or Adaptive Sync in your driver settings, capping the frame rate, and using a modest GPU with double‑buffering; these tweaks work without needing a high‑refresh display.
What’s the Best Way to Sync Color Profiles Across Both Screens?
You’ll want to create a single ICC profile that matches both displays, then assign it to each monitor via your OS’s color management settings, ensuring identical gamma, white‑point, and saturation.
Are There Any Free Tools to Manage Window Snapping on Two Monitors?
You can use PowerToys FancyZones for free, which lets you create custom snap zones on both screens. It runs on Windows, works instantly, and you can tweak layouts without paying for any software.
In Summary
You’ve got a functional, budget‑friendly dual‑monitor rig that looks sharp and works smoothly. By matching inexpensive screens, using affordable cables, and fine‑tuning settings, you keep costs low without sacrificing performance. Free tools and ergonomic mounts keep everything tidy, while proper power and cable management boost efficiency. Enjoy the extra screen real‑estate and the productivity boost—no pricey accessories required.
Leave a Reply